↑

Simplifying DIY Design

Simple Graphic Design To Grow Your Blog

  • blog
    • Design Tutorials
    • Growth Strategy
    • List Building
    • Product Creation
    • Social Media
    • Page Design
  • Products
    • Monthly Templates Membership
    • Confidently Canva
    • Product Creators Ultimate Toolbox
    • The Complete Blogger’s Template Toolkit
    • The 5 Minute Brand
    • Holiday Gift Guide Bundle
  • Design Library
    • Sign Up for Access
    • Enter Library (Password required)
  • Tools + Resources

Canva Tutorial | YouTube Thumbnail Designs to Get More Views

January 3, 2023 by Simplifying DIY Design Leave a Comment

Last updated on January 5th, 2023

Do you struggle to make your YouTube thumbnails pop? We’re recreating YouTube’s most popular thumbnail designs using Canva to show you the best layering and font effect techniques to help boost your YouTube clicks and views!

Most of us are suckers for a good dupe, especially when it comes to sticker shock stores like Pottery Barn and Restoration Hardware.

We know that grey modular sectional is absolutely stunning but does it really need to cost $17k? Yeah, no. Que the start to our hunt for product dupes and copycats that’ll give us the same look (and most times the same quality) for a LOT less.

Now, let’s pivot for just a sec because, for some reason, our mindset totally changes when it comes to business.

Why is it that we absolutely positively KNOW (or so we think) that there are no compromises when it comes to products we use in our business?

Ready to launch your digital product? Get our FREE Product Creators QuickStart Kit today! You’ll get a checklist, cheatsheet, and Canva design template to help you nail your launch!

GET THE FREE PRODUCT QUICKSTART KIT NOW!

Just because something’s at a lower price point, we automatically think lower quality, minimal features, and a whole lotta headaches. We know; we get the emails saying just as much!

That’s why we decided to show just how powerful Canva really is by recreating the most popular YouTube thumbnail styles using JUST Canva!

It’s so easy to create those eye-catching, almost envious YouTube thumbnails that most bloggers think were designed using a fancy, expensive program like Photoshop or have a team of designers on their payroll.

But with Canva, we can create just about anything, including those jump-off-the-screen YouTube thumbnail designs that draw fast attention from their viewers!

By the end, we know you’ll be saying, “I had no idea Canva could do that!” and maybe even a few wow’s along the way.

REMEMBER THIS POST LATER! PIN IT TO YOUR FAVORITE PINTEREST BOARD! ⬇

Now, before we get started, we need to put out a little disclaimer.

We are NOT recreating these YouTube thumbnail designs for you to create the same exact look. We never have or will condone copycat designs.

We’re simply showing the possibilities of using Canva and how you can use layering and font effect techniques (that used to only be available in programs like Photoshop) to create your own brand’s unique style on YouTube.

DESIGN ELEMENTS TO CONSIDER

We know we’ve said it before, but we’re going to say it again. Just because you like it doesn’t mean your audience will, and vice versa.

Your designs need to be centered around what your audience finds appealing regardless of how you feel about it. With that, we need to consider a few key elements when designing our YouTube thumbnail.

1. AVOID BLACK AND WHITE BACKGROUNDS

You may feel a certain way about YouTube’s Dark Mode, but that doesn’t necessarily mean your audience feels the same.

YouTube recently announced new updates to the layout based on user feedback to make it “even darker so the colors truly pop on your screen.”

If you’re still not convinced that Dark Mode is as popular as you think it is, here’s a November 2022 article from EarthWeb stating, “81.9% of smartphone users use dark mode.”

So, what does that mean for you?

If you’re using dark colors, your YouTube thumbnails may get lost in Dark Mode’s deep, moody background.

But, if your audience falls in the 19% who still prefer Light Mode, you may want to keep away from the crisp, clean white backgrounds we’ve all come to know and love.

2. KEEP FONTS SIMPLE

Are you really a blogger if you don’t have a dedicated font folder filled with script-style fonts you’ll most likely never use but were too cute to pass up? Thanks, Creative Market’s free goods!

All jokes aside, we know how tempting it is to want to add a playful or unique font to your YouTube thumbnail, but you must resist the urge!

Related Post: 5 Typography Tips | How to Design with Canva Fonts

You want your message to be as clear as possible on ALL platforms, whether they’re viewing on mobile, tablet, or computer.

It would be a shame to miss out on views because your audience couldn’t figure out what your video was all about!

3. MINIMIZE DISTRACTIONS

Getting caught up in fun design elements, layers, arrows, and the like is easy. Unfortunately, this causes your YouTube thumbnail to become cluttered, difficult to understand, and very easy to judge (and not in a good way).

Here’s the perfect quote from Coco Chanel we reference often.

“Before you leave the house, look in the mirror and take at least one thing off.”

But in our case, before we download a design, we look it over to see if there’s one thing we can remove.

When a design is cluttered, it looks messy. When it looks messy, it appears unorganized, making it harder for people to trust you as an expert in your niche.

You don’t need to reinvent the wheel to be successful or draw attention to your graphic. Just because everyone else is doing it on YouTube doesn’t mean your thumbnail will fall into the sea of sameness.

They’re doing these things because it WORKS!

This will make much more sense as we dive into the tutorial because you’ll see a LOT of commonalities even though they look vastly different.

Now that we have the key design elements out of the way, let’s jump into designing a YouTube thumbnail!

YOUTUBE THUMBNAIL DESIGN

For this tutorial, we’ll be recreating the most popular (and most requested) YouTube thumbnail styles, which has raised many questions about how and if you can design it in Canva.

And we’re here to tell you that’s a big ol’ YES.

Please note that this tutorial uses a design feature only available for Canva Pro users. You can try out Canva Pro FREE for 30 days here!

If you’re on a budget, you can easily remove backgrounds using the Magic tool inside Preview. For PC users, pixlr.com is a great alternative.

We're recreating the most POPULAR YouTube thumbnail designs using only Canva! See just how easy it is to design YouTube thumbnails that pop!

These are by far the most popular YouTube thumbnail styles because they cover all the bases.

  1. High-quality photo (studies show you’re more trustworthy when viewers can see your face)
  2. Clear and concise text that summarizes your video
  3. Layers that make the thumbnail jump off the screen
  4. Easy to read on ALL platforms

See what we mean by incorporating all the key design elements (no white/black background, easy-to-read fonts, and minimal distractions) yet looking completely different from one another?

DESIGN #1

Let’s start with the first example from AmandaOutside.

In Canva, select the pre-sized ‘YouTube Thumbnail’ (1280px X 720px) to start. Then, upload your main photo twice and move it right on top of each other. Don’t worry about the final placement just yet.

We’ll remove the background from the top photo and blur the bottom photo. To start, highlight (click) the top photo and click ‘Edit Image’ from the top left and again on ‘Background Remover.’

Please note that the ‘Background Remover’ tool is only available for Canva Pro users. You can try out Canva Pro FREE for 30 days here!

Next, hold down the Cmd key (or Ctrl if using a PC) and click on the top photo twice. This will select the bottom photo.

Then go to ‘Edit Image’ –> ‘Adjust’ –> ‘Blur.’ Generally, levels 4-6 look best depending on how clear the original photo is.

Now we can click and drag our mouse over both photos to move them simultaneously into the right spot.

Next up, ‘Glow.’

There’s a faint dark glow around Amanda which can be easily created in Canva. Select the top image once more and click ‘Edit Image’ –> ‘Shadow’ –> ‘Glow.’

To customize the glow, click on ‘Glow’ again.

Here we can change the ‘Size’ (how far out the glow expands), ‘Transparency’ (thickness of the glow), and ‘Blur’ (harsh line or fades out).

For this design, we’ll set the ‘Size’ to 4, ‘Transparency’ to 80, and ‘Blur’ to 4.

It’s now time to add some text!

This YouTube thumbnail design uses two different text effects – ‘Shadow’ and ‘Splice. As of right now (January 2023), you can only add one text effect per text block.

No worries, though; we’ve got a workaround!

We’ll first use the ‘Splice’ text effect.

To create the ‘Shadow,’ copy that same text box, and center it over the previously designed text.

While that text box is still highlighted, click ‘Effects’ –> ‘Shadow.’ We’ll go with an Offset of 42, Direction of 0, Blur of 46, and Transparency of 100.

We changed the ‘Shadow’ to red so you can see what it looks like since the outdoor image we chose is a bit darker in that area.

Now it’s time to move it behind by selecting ‘Position’ from the top right, followed by ‘Backward.’

KEYBOARD SHORTCUT: You can also use Cmd + [ (to move back one) or Option + Cmd + [ (to move all the way back)

For the ‘GIFT IDEAS’, ‘for’, and ‘campers & hikers’ text blocks, we’ll follow the same process as that of our number 18 but with a wider border.

Instead, we’ll go with a ‘Thickness’ of 80 whilst keeping the same ‘Offset’ of 0 and ‘Direction’ of -45.

In total, we have four main individual text blocks and an additional four (set behind) to create the ‘Shadow.’

Lastly, add and position two ‘Square’ elements behind the bottom text block to make it ‘campers’ and ‘hikers’ pop.

Then, we’ll swap out the color for a festive red and finish it with a ‘red gift ribbon and bow’ element in the top left corner to complete the look!

DESIGN #2

The second YouTube thumbnail we’ll recreate is from SarahBethYoga.

We LOVE her thumbnail style with her big b-o-l-d text and an image that clearly depicts a yoga pose without giving it a second thought.

First, we need to find a geometric image for the background. The ‘Abstract blue geometrical background’ from Natrot has the perfect amount of dimension. We’ll adjust the color by clicking ‘Edit Image’ –> ‘Photogenic’ –> ‘Noir.’

Now it’s time to place our teal-colored ‘Square’ element with a transparency of 85 right over our background. Lookin’ great so far!

We’re now ready to add our two textboxes so we can size the smaller word (in this case, ‘yoga’) in line with the larger word, ‘morning.’

Once that’s lined up, we need to add a subtle ‘Shadow’ effect to both lines of text. We’ll use the same levels as our first example, except we’ll reduce the Transparency to 20 for a lot less depth.

The next thing we’ll tackle is the yoga pose. Once that’s lined up, we’ll remove the background using the ‘Background Remover’ tool under ‘Edit Image.’

Please note that the ‘Background Remover’ tool is only available for Canva Pro users. You can try out Canva Pro FREE for 30 days here!

SarahBeth has a slight glow to her transparent image, which can easily be added by selecting the image and clicking ‘Edit Image’ –> ‘Shadows’ –> ‘Glow.’

Click ‘Glow’ once more to change the Size to 6, Transparency to 90, Blur to 7, and swap the black with white. Perfect.

To create the time block at the top left, we’ll start with the ‘Square’ element by Canva. First, click on the color block at the top left and then again on the transparent block with the red diagonal line.

Next, we need to add a border. Click on the ‘Border Style’ box (3 horizontal lines) to the right of the color block and adjust the ‘Border width’ to 4 and ‘Corner rounding’ to 25.

Lastly, we’ll reduce the transparency to 50 (checkered box at the top right), so it’s not so pronounced.

Now that our bordered box is complete, all that’s left is to add a small text box (with a Transparency of 80) and a ‘Clock’ element by Google Design Icons, and we’re ready to go!

Related Post: How to Create Textured Font in Canva

Fonts used within the design are Montserrat Classic (bold text) and Neue Einstellung (time text).

We're recreating the most POPULAR YouTube thumbnail designs using only Canva! See just how easy it is to design YouTube thumbnails that pop!

That looks so good. SarahBeth has such a great YouTube thumbnail style, don’t you think?

DESIGN #3

Our third and final example is from Danielle Kirsty.

This is our favorite style of the three because it checks off all the boxes; high-quality photos, clear and minimal text, and layers make it more two-dimensional.

It tells a story, thee story using only imagery. It’s brilliant!

Regardless of the true crime story, Danielle is the star of the show, so our replica photo needs to be front and center.

Next, we’ll remove the background using the ‘Background Remover’ tool under ‘Edit Image.’

Please note that the ‘Background Remover’ tool is only available for Canva Pro users. You can try out Canva Pro FREE for 30 days here!

Now let’s add a glow by clicking ‘Edit Image’ –> ‘Shadow’ –> ‘Glow.’

We’re going to crank up the levels, so click on ‘Glow’ again and set the size to 12, transparency to 100, and blur to 20. Lastly, we’ll swap the standard black with a beautiful robin’s egg blue.

Now for the layers!

We need four additional photos to replicate this YouTube thumbnail – a news article, stock image, and two people.

Instead of all doom and gloom, we’re going to tell our own story with two people getting together and creating an equine sanctuary!

We’ll upload our news article (that we found by Googling “good news article”) and angle it to fit the space at the top left.

Next, we find a super cheery girl who will play an important role in our fictional animal rescue story. We’re going to follow the same routine as our makeup artist; remove the background (‘Background Remover’ tool) and add a Glow (using ‘Shadow’), but this time, we’ll keep the glow minimal.

Don’t forget to move all images behind our makeup artist by highlighting (clicking and dragging over the images/elements) and then selecting ‘Position’ from the top right and ‘Backward’ or ‘To back.’

Now we’re on the right side of our YouTube thumbnail.

We’ll add the other counterpart of our story by again, removing the background and adding a ‘Glow.’ In Danielle’s YouTube thumbnail, the glow on the right is much more pronounced than on the left.

We think a ‘Size’ 8, ‘Transparency’ of 95, and a ‘Blur’ of 4 should do the trick.

Lastly, we’ll take a stock photo of some horses to tie our fictional story together.

To finish, we need to add Danielle’s signature black and yellow text at the bottom.

First, we’ll add a basic ‘Square’ element and change the set color to yellow. Next, we’ll include a textbox using the Horizon font and a letter spacing of about 50.

Now here’s the tricky part.

We need to get a bit creative when it comes to the dark shadow around the yellow box to help make it pop. We had to use the ‘black blur’ element from Olhar de Alice in a row of four to get the length we needed.

We're recreating the most POPULAR YouTube thumbnail designs using only Canva! See just how easy it is to design YouTube thumbnails that pop!

Group them together by highlighting all four design elements and clicking ‘Group’ at the top right. This makes moving and adjusting much easier to get the angle just right.

And there you have it. The perfect recreation of one of the most popular YouTube thumbnail styles using Canva!

Hopefully, this tutorial gave you the creative boost you needed by seeing just how easy it is to create YouTube thumbnails that pop!

Use these layering and font effect techniques to create your own brand’s unique YouTube thumbnail style, and watch your clicks and views soar.

What designs would you love to see us recreate using ONLY Canva? Drop them below or send us an email at hello[at]simplifyingdiydesign[dot]com.

We’d love to show you just how powerful (and easy) designing in Canva truly is!

RESOURCES MENTIONED IN THIS POST:

  • FREE Product Creators QuickStart Kit
  • Canva
  • How to Design with Canva Fonts
  • Pixlr
  • How to Create Textured Font in Canva

Don’t forget our FREE Product Creators Quickstart Kit! You’ll get a checklist, cheatsheet, and Canva design template to help you nail your launch!

GET THE FREE QUICKSTART KIT NOW!

TRY CANVA PRO FREE FOR 30 DAYS

Start your FREE Canva Pro trial today and unlock ALL of their incredible time-saving features that cut your design time to just minutes.

To be honest? It’s the best $12.99/mo OR $119/yr we spend on our business because that time we save with every design is put back into making MORE money in our business!

WANT TO SAVE THIS FOR LATER? PIN IT TO YOUR FAVORITE PINTEREST BOARD!⬇

Filed Under: Design Tutorials

Pinterest Sales Funnel | 5 Reasons You’re Not Making Money on Pinterest

December 13, 2022 by Simplifying DIY Design Leave a Comment

Last updated on December 14th, 2022

Pinterest marketing can be a revenue generator and a huge asset to an overall marketing strategy, but not everyone sees success.  If that’s you, read on because you’re about to get the tools you need to fix that by using a Pinterest sales funnel.

This is a guest post by Sue of With Sue Crites. See the end of the article for more information about her, her company, and how you can build the perfect Pinterest sales funnel!

You may have spent countless hours, and possibly dollars, on getting your Pinterest account set up with “all of the things” a Pinterest account needs.

You’ve possibly spent way too long in Canva and most likely tackled Tailwind to get your content out onto Pinterest consistently.

You’ve nurtured your account like a gardener growing seeds, and you’ve been patient, knowing anything SEO takes time to take root.

WANT TO SAVE THIS POST FOR LATER? BE SURE TO PIN IT!
Does your blog make money with Pinterest? Here are 5 must-haves to get your Pinterest sales funnel in order to make money blogging and generate passive income!

The excitement builds as your analytics graph moves upward like the little green sprouts that turn into a healthy plant.  Your account is growing, and it feels like the heavens have parted as your traffic continues to increase. 

Let the dollars pour in, baby!

But they don’t, and you might think Pinterest doesn’t work for you.  Think again, my friend.

You may be missing some key elements which are definite causes for the gravy train derailing. Let’s dive into 5 must-haves to get your Pinterest marketing on track so you can see a return on your time, effort, and money.

There’s a lot to cover, so saddle up ‘cause we’re heading out.

1. Know what to expect from Pinterest marketing

The purpose of marketing is to build awareness of what you offer and generate website traffic, with Pinterest being an ideal approach for many businesses.

But does Pinterest increase sales or get you clients?

No.

Can someone sign up for your email list on Pinterest?

No. Your offer and sign-up form are on your website, so your website must sell your offer and capture that address.

Can someone buy a product on Pinterest? 

No. People learn about your product and go through the checkout process on your website, so your website must sell the product.

Can someone book a call with you on Pinterest? 

No. Your contact page is on your website, and why would they contact you if they don’t know anything about you beyond the pin and pin description?  Your website must give people a reason to contact you and is where they actually can.

What’s the common thread in this picture?  

Your website is where people learn about you, what you offer, and where people actually take action, making your website a key element for Pinterest marketing success.

The purpose of Pinterest is to increase brand awareness and traffic.  Pinterest is where people discover you, your offer is introduced, and is the vehicle that brings people to your website when they click on your pin, like a taxi delivering people to your doorstep.

2. Understand the Pinterest User

To understand your Pinterest user, you need to understand their intent on the platform.

User Intent

People are on Pinterest looking for inspiration and solutions.  They’re planning, dreaming, and doing; you need to meet them where they are.

Since they’re planners, they usually don’t take action right away.  

Because they’re searching and discovering, they’re most likely new to what you’re offering, so they need to be warmed up before they’re ready to take action.

People buy when they know, like, and trust you, so when you help people do that, you’ll turn more of your traffic into customers.

Think of it this way.  Do you act with your first engagement with a business?  Not always, so don’t expect Pinterest users to be any different.

Customer Journey

Everyone is in different phases of their buying journey, which is the thought process your customer is going through when making a buying decision.  A very basic roadmap is:

  • Awareness – They’re learning about what’s out there, including you.
  • Consideration – They’ve learned about their options and are making their decision. They’re engaging with you, your content, or website in some way.
  • Action – Decision made and action taken.

To help people get to the finish line and take the desired action (email sign-up, podcast download, purchase, book a call, etc.), you need to provide the answers they need and stay front of mind. 

Pinterest users take longer to spend, but when they do, they spend more.  Your actions today can pay off down the road. 

3. Determine Your Pinterest Marketing Strategy 

These next two steps are huge topics unto themselves, so we’re doing the Cliffs Notes version…

There are multiple ways to reach your audience and different routes they can take to becoming a customer or client.  

What does that mean for you?

You need to think of the different ways to share what you offer and create a path for people to take your desired action, which typically isn’t a straight line, especially when coming from Pinterest.

For example, if you sell gardening products, some people only know the problem they have (a brown thumb), and some people know their solution (they need plant fertilizer).  Both are your ideal client, but you’re going to reach them in two different ways.  

Your brown thumb folks will benefit from something that informs them of how to grow plants successfully, so a how-to blog post would be great for them.

In the post that’s full of value, you wrap things up with how and why your product is their solution with a direct link to that product page.  Your action on Pinterest would be having pins leading to your blog post.

For the folks who are looking for fertilizer, they’re in the buying phase, and you can focus on the product with your pin design.  

So how do you get them from your pin to your end goal?

4. Create Your Pinterest Sales Funnel

A Pinterest sales funnel is the series of steps you have in place for people to go from your pin to the desired action of email sign-ups, checkouts, etc.  They meet you, you show them what you offer, and guide them to each next step until they get to your chosen finish line (they convert).

Does your blog make money with Pinterest? Here are 5 must-haves to get your Pinterest sales funnel in order to make money blogging and generate passive income!

Your sales funnel needs to be a clear, simple, and easy path that removes as many opportunities as possible for people to leave.  We all have a sales funnel, whether we realize it or not, and to convert Pinterest traffic, your sales funnel needs to be a good one.

Let’s break it down:

Determine the types of Pinterest sales funnels you need

If you want someone to sign up for your email list, you’re going to take them down a different path than when you sell a product or want them to book a call with you.  That means you want to have a sales funnel for each goal you have.

Some examples are:

  • Product sales
  • Email sign up
  • Affiliate sales
  • Podcast download
  • Client lead

Use your Pinterest strategy to help build your funnel

Remember the gardening product and the two avenues to reach customers?  One way is with content such as a blog post.  It can also be an email, video, etc.  The other way is sending people straight to the product page.  You can see those Pinterest sales funnel examples below.  There are other options, too, of course.  We’re keeping it simple. 

Does your blog make money with Pinterest? Here are 5 must-haves to get your Pinterest sales funnel in order to make money blogging and generate passive income!

Here’s where you need to pay attention, though.

The first funnel example of pin > product page > checkout seems straightforward.  Just one step between Pinterest and a sale.  Easy peasy, lemon squeezy, right?  Wrong. 

Once someone is on your product page, they have to learn about what you offer, determine if it’s the solution they’re looking for, determine that the price is worth the value they’re getting, add to cart, and checkout successfully. 

If you’re using the second sales funnel example of pin > content > product page > checkout, you have an extra step which means an additional opportunity for people to leave.

Your content (such as a blog post) needs to keep people engaged and help them quickly and easily understand that their solution lies with you and your product, with a clear path to the product page that sells and an easy checkout process.  

Everything on your website either invites people to continue down the path to your goal or gives them a reason to leave.  

To keep them down the path to your goal, you need to plug up any leaks in your funnel.  Here are some examples:

  • Great product descriptions that are easy to read, and all questions answered
  • Easy, safe checkout process with links that work and different payment options, including one pay methods
  • An abandoned cart email sequence to capture the escapees

More to come on plugging the leaks.

Now let’s look at another Pinterest sales funnel example using email marketing.

This is a great option if you have a course.  Sure, you have a landing page where people could buy right away, but what are some things that would cause them not to?  Price. Commitment. Do they know, like, and trust you?

Especially if you’re dealing with a more personal issue or higher price tag, the know, like, and trust is a big factor. So how can you sell your course?  

Here are two paths for people to take:

Does your blog make money with Pinterest? Here are 5 must-haves to get your Pinterest sales funnel in order to make money blogging and generate passive income!

The same basics we covered with the product sales Pinterest sales funnel apply here.  You need to:

  • Help the user understand what you offer
  • Clearly communicate the transformation your offer provides
  • Give people a clear next step to continue down the path
  • Make taking each step very easy 

For some great help with this one and how to even monetize the email sign-up process, check out our post on designing a funnel that converts.

Related Post: The Ultimate Guide to Designing a Sales Funnel That Converts

Let’s tackle one more especially for you bloggers who make money using affiliate marketing.  You’ll see two possible paths below.

Does your blog make money with Pinterest? Here are 5 must-haves to get your Pinterest sales funnel in order to make money blogging and generate passive income!

Your Achilles heel for success can be the quality of the affiliate page and their checkout process.  That’s something you have no control over, but a good thing to have on your radar because it can help you decide if you want to be an affiliate and help you manage your expectations of the return you’ll get.

Get people in your funnel with a great pin design

Now that you have the types of sales funnels you need and used your strategy to create them, it’s time to get people in the top of your funnel.

Your keywords get your pin in front of the right people but those people need to notice the pin and click through.  

These are the best Pinterest pin practices such as pin size, easy to read fonts, etc.  I want to point out a few key things that help people stay on the journey with you down the funnel.

Related Post: Anatomy of the Perfect Pinterest Pin Design

Make it clear what’s on the other side of the pin.  What will they learn or get?  What solution will they find?  In short, what’s in it for them?

Include a call to action on the pin.  Tell people what to do next.  Buy now, download yours, learn more, etc.

Provide continuity between the pin and landing page.  If you have a bold pin with bright colors and large fonts, but your landing page is muted colors and has a calm aesthetic, people will wonder if they landed in the right place.

Plus, is your pin design reflecting your brand?  Someone attracted to the bold pin may not be the person you’re actually targeting.

And if pin design isn’t your strong suit, the DiyDesign Creators Vault is just what you need!

You’ll get exclusive design templates for Pinterest, lead magnets, social media, and more every month that help you stay ahead of content trends so you can leverage your blog posts, lead magnets, and products for faster growth.

5. Prep Your Website for Pinterest traffic

While we tend to get attached to our websites as we spend time, energy and money on them, it’s important to remember that your website isn’t for you.  

Your website is for the user.  

Your website is your vehicle for communicating everything you have to offer in a clear and compelling way.  It needs to be easy to use and navigate.

In a brick-and-mortar store, you have the luxury of a salesperson answering questions, guiding people to the right area, and promoting the products or services.  If something goes wrong, there’s someone to help.

Online, your site has to do it all and do it right all of the time.  Sure, someone can email or call you, but will they be at 11:00 pm or when something is time sensitive?  Don’t let the lead go cold.

Here are some things that are like flashing exit signs for website visitors:

  • Slow site speed
  • Site isn’t optimized for mobile
  • Links and buttons that don’t work or lead to error pages
  • Cluttered website pages 
  • Relentless pop-ups or ads  

A great user experience encourages people to continue down your sales funnel and makes them want to come back.  They may even just sing your praises with a great review or tell others about you.  

WRAP UP

Can you make money with Pinterest marketing?  Yes, but it’s not as simple as getting Pinterest traffic.

Key things to remember:

  • The role of organic Pinterest marketing and Pinterest ads is to build awareness and drive traffic, not convert traffic.  
  • Your website is where the conversions happen.
  • Pinterest users are planners and new to what you offer.  Meet them where they are in their customer journey – awareness, consideration, decision.
  • Your Pinterest marketing strategy needs to include different ways you can reach your audience.
  • Create your Pinterest sales funnels with clear, simple, and easy paths to convert your traffic from site visitor to the desired action.  
  • Use great pin design to get people to the top of your funnel.
  • Your website is for the user.  Provide clear messaging of what your offer is, how people benefit from it, and the next steps to take.
  • Remove all obstacles for website visitors to continue to your goal and provide a great user experience. 

The time and energy you spend getting your strategy created, sales funnels in place and website adjustments made will provide better results for your Pinterest marketing and it will also benefit your business as a whole.

Regardless of where your traffic comes from, you’ll be ready to capture email addresses, secure leads, and make more sales.

Turn your Pinterest traffic into more clients and customers

Get your FREE 7-page checklist of 30 things you want in place on your site for more sign ups, leads, and sales.  Grab it now!

No sharing of your email.  No flooding of your inbox.  Pinky promise.

Hot diggity and thanks!

Check your inbox to confirm your email address and your checklist will be on its way!

.

ABOUT THE AUTHOR

Sue is a dog lover, proud auntie of 20, and founder of With Sue Crites.  She helps clients reach their ideal audience, whether existing or brand new, accelerate email list growth, and increase leads and product sales using traffic-generating and conversion-focused Pinterest strategies and Pinterest ads. 

Get access to my FREE 30-point website checklist to help plug leaks in your sales funnel for better conversions and make the most of your Pinterest marketing!

WANT TO REMEMBER THIS LATER? SAVE IT TO YOUR FAVORITE PINTEREST BOARD! ⬇

Does your blog make money with Pinterest? Here are 5 must-haves to get your Pinterest sales funnel in order to make money blogging and generate passive income!

Filed Under: Growth Strategy, List Building, Social Media

Holiday Product Mockups | Simple Seasonal Mockup Graphics

October 25, 2022 by Simplifying DIY Design 1 Comment

Last updated on December 19th, 2022

Studies show that product mockups build trust with consumers and increase conversion rates. Learn to design beautiful holiday product mockups that help you stand out from all the noise this holiday season so you can have your most profitable quarter yet!

Isn’t it funny how, at a restaurant, you can order something completely on a whim and hope for the best without batting an eye at the cost?

But when it comes to online purchases, you need to go through every single picture available so you can see exactly what you’re getting, even if there’s a return policy.

Now let’s throw the holiday season into the mix.

You’ve got a budget you NEED to stick with and a timeline that does NOT include messing with returns.

Leverage your holiday traffic with our FREE holiday content planning sheet! It’s the perfect tool to maximize your holiday content to boost traffic, email sign-ups, and affiliate income!

GET THE FREE HOLIDAY CONTENT PLANNING SHEET!

To protect your personal headspace, you forego any purchases that have your gut telling you to run… all because of a lack of images.

Here at Simplifying DIY Design, we love to talk about the importance of establishing trust with your readers through design. And now that’s more important than ever.

Analysts expect online spending will hit a whopping $910 billion this holiday season. That’s an 11% jump year-on-year!

We cannot stress it enough. Design matters!

Stop leaving money on the table by creating high-converting holiday product mockups that promote your seasonal freebies and paid products.

REMEMBER THIS POST LATER! PIN IT TO YOUR FAVORITE PINTEREST BOARD!⬇

But before we jump right in, we wanted to let you know that we’re breaking down the very game plan we use to prepare our blog for the holidays AND take some time off without compromising our sales!

WHAT IS A MOCKUP?

In order to design your holiday product mockup, you need to know what a mockup actually is.

A mockup is a rendering or design of your completed product.

The intention is to showcase your product in action, whether it’s a tangible product like a t-shirt or mug to a digital product such as a printable or eCourse.

One of the things we love about designing mockups is our ability to get creative. There isn’t one set design or layout for creating a mockup.

Each product is different. Our eCourse mockup will look vastly different from your home organization binder mockup or prayer journal mockup.

Despite the differences in design, all mockups have one major thing in common; how they’re used.

SALES PAGE MOCKUPS

No matter the industry, a mockup is used to promote said product. Go to ANY sales page, and they’ll all have the same style image – a mockup.

Here’s the mockup we use for our Ultimate Holiday Canva Template Bundle sales page.

The Ultimate Holiday Canva Template Bundle is ideal for the blogger whose blog either has seasonal content they want to maximize for quarter four or wants to start by having the right tools!

We have a binder and individual pages to represent a printable holiday planner. Our Holiday Template Toolkit is shown on a computer monitor because it’s digital, along with our Holiday Gift Guide Bundle, shown on a laptop.

If done right, a sales page mockup will speak for your sales page by showing your audience exactly what they’re getting. Be honest; when on a sales page, what do you look at first? The image or text?

That’s how important your holiday product mockups truly are!

The Ultimate Holiday Canva Template Bundle is ideal for the blogger whose blog either has seasonal content they want to maximize for quarter four or wants to start by having the right tools!

Here are examples of other sales page mockups you can create using Canva Smartmockups.

Remember, product mockups build trust, which leads to more sales. It’s as easy as that!

SQUARE MOCKUPS

Square mockups are our go-to because they work for almost every area of your blog; Facebook, Instagram, blog posts, emails, and more.

We like to change up our square mockups using devices, spreads, fun borders, and backgrounds to nothing.

Again, this provides us with a ton of variety to use throughout our blog.

The Ultimate Holiday Canva Template Bundle is ideal for the blogger whose blog either has seasonal content they want to maximize for quarter four or wants to start by having the right tools!

To save even more time and still maintain brand consistency, ‘Copy and resize’ your designs in Canva for Pinterest, Stories, Reels, etc.

This is so much easier than starting from scratch. Trust us!

PINTEREST MOCKUPS

We generally create around 10 Pinterest pins per blog post, at least half of which is for landing and sales pages.

Pinterest is a visual search engine, not a social media platform. Instead of fighting the clock for relevancy, which is usually only a few hours, one pin can bring you traffic for years to come.

With that, it does take a bit of time for your pins to gain traction, so the sooner you get them added, the better!

Holiday content performs exceptionally well on Pinterest, especially direct sales, because people are actively searching for something to buy… even as early as April!

The Ultimate Holiday Canva Template Bundle is ideal for the blogger whose blog either has seasonal content they want to maximize for quarter four or wants to start by having the right tools!

Be sure to use large text, so it’s easy to read, especially from mobile devices. As shown above, don’t be afraid to showcase your product, even if it’s just a page or two.

People need to see what your seasonal product is all about. Now is NOT the time to leave it up to their imagination.

VIDEO MOCKUPS

Video mockups are all the rage, especially on social media and sales pages. With all the distractions the holiday season brings, you need something that’s going to grab attention and fast.

We’ve created flip graphics (also known as GIFs) using just a laptop element in Canva. Each page of our project showcases a different template, so the final product cycles through all the different templates.

You can also record your screen as you scroll or click through your product. Then, upload the video to a computer or laptop element in Canva to make it more realistic for your buyers like we did below.

Other ideas are before and afters or using the product in real time. For example, we take a few templates from one of our products and record our screen as we customize it to fit our brand.

Add in a few holiday elements and seasonal brand colors to finish your holiday product mockup!

SWAP OUT COLORS

Over the years, we’ve made hundreds (if not close to thousands!) of product mockup templates. While some are specific to the holidays, the majority are evergreen.

Instead of spending even more time creating holiday product mockups with perfectly good evergreen mockups sitting by the wayside, we decided to experiment with some color.

We took a few templates from our DiyDesign Creators Vault (yes, we use our own templates) and swapped out our regular color palette with our seasonal brand colors.

Related Post: How to Choose Colors for Your Holiday Content

To say we were impressed would be an understatement. Look at the difference a simple color swap can make.

It's a fact that product mockups build trust and increase conversion rates. Stand out from the noise this holiday season with beautiful holiday product mockups!

Pretty incredible, huh?

Instead of taking time away from other projects to brainstorm new holiday product mockups, we used what we already had. All in all, this took us about 5 minutes from start to finish.

Related Post: Seasonal Lead Magnets to Boost Your Email List

So if you’re short on time or have a limited design budget, this is a great way to create holiday product mockups that showcase your seasonal lead magnets without costing you a dime!

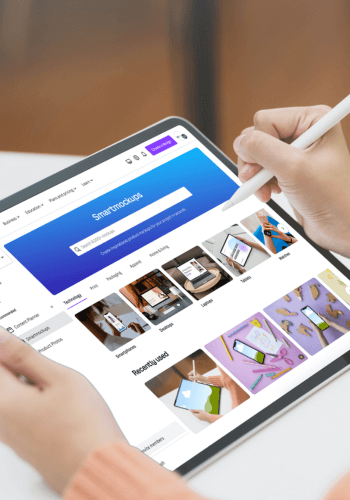
CANVA SMARTMOCKUPS

If you’re a Canva user, you now have access to OVER 8000 Smartmockup images across various industries.

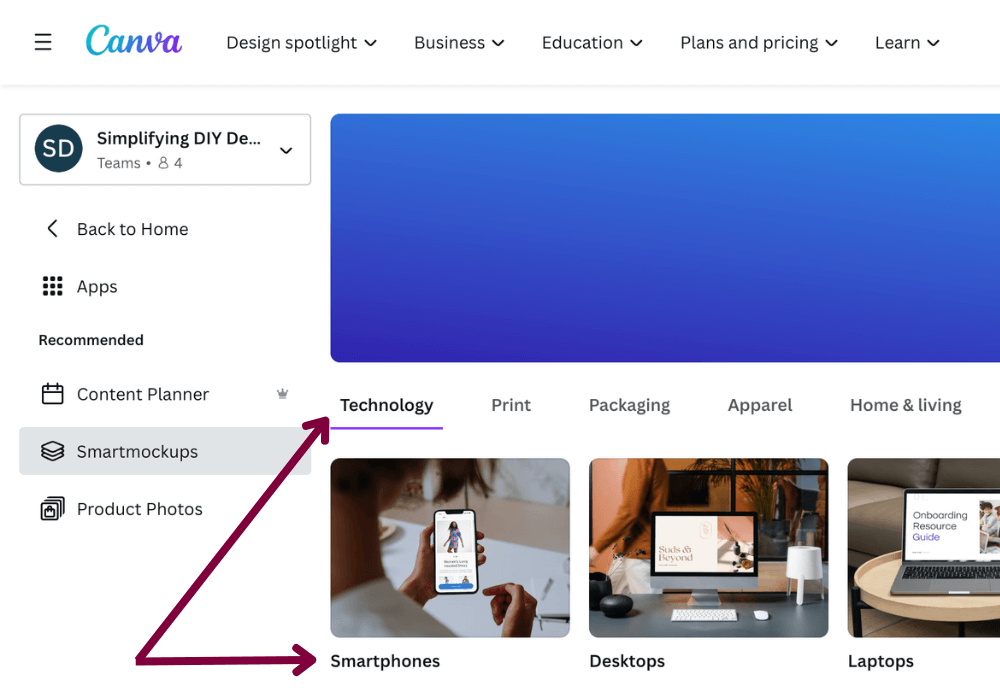
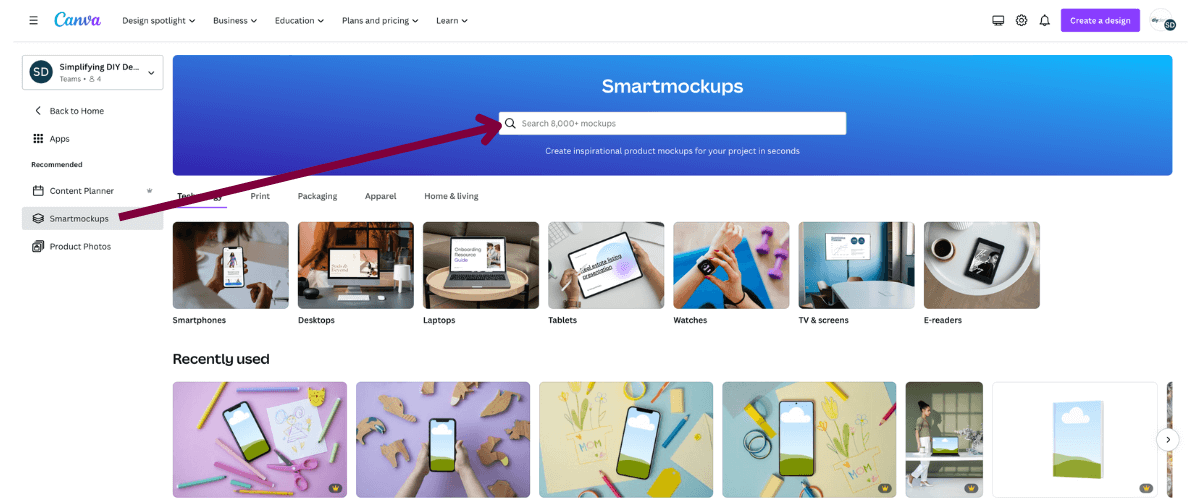
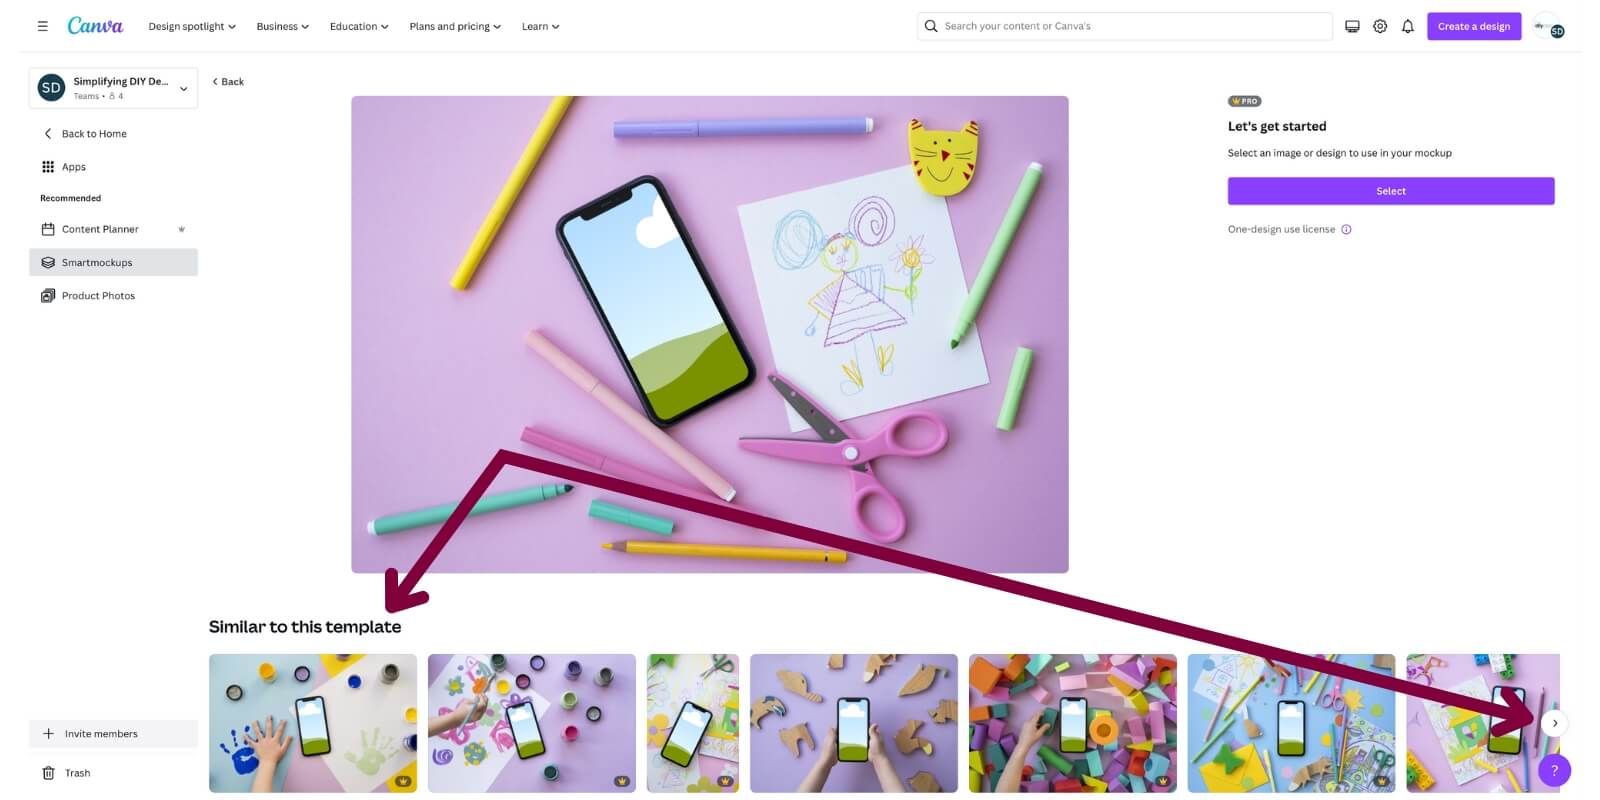
From your Canva homepage, navigate to the left menu and click ‘Smartmockups’ under ‘Tools.’

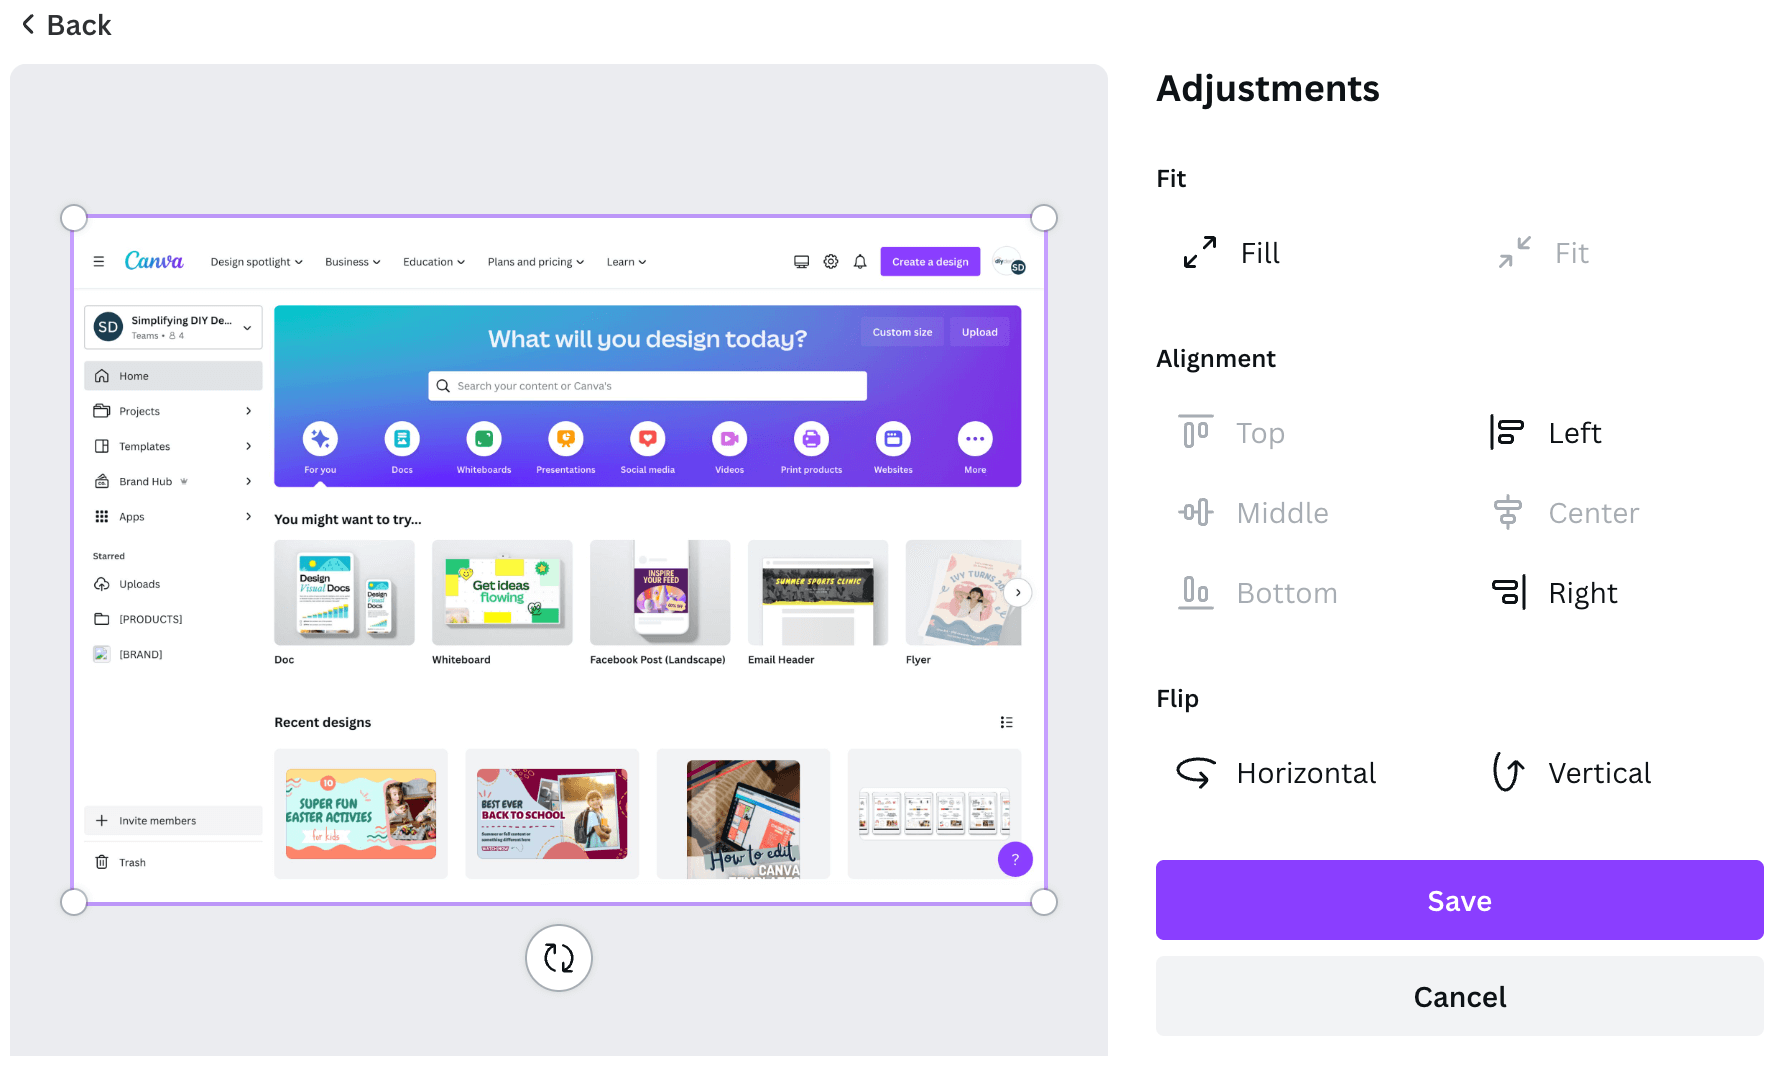
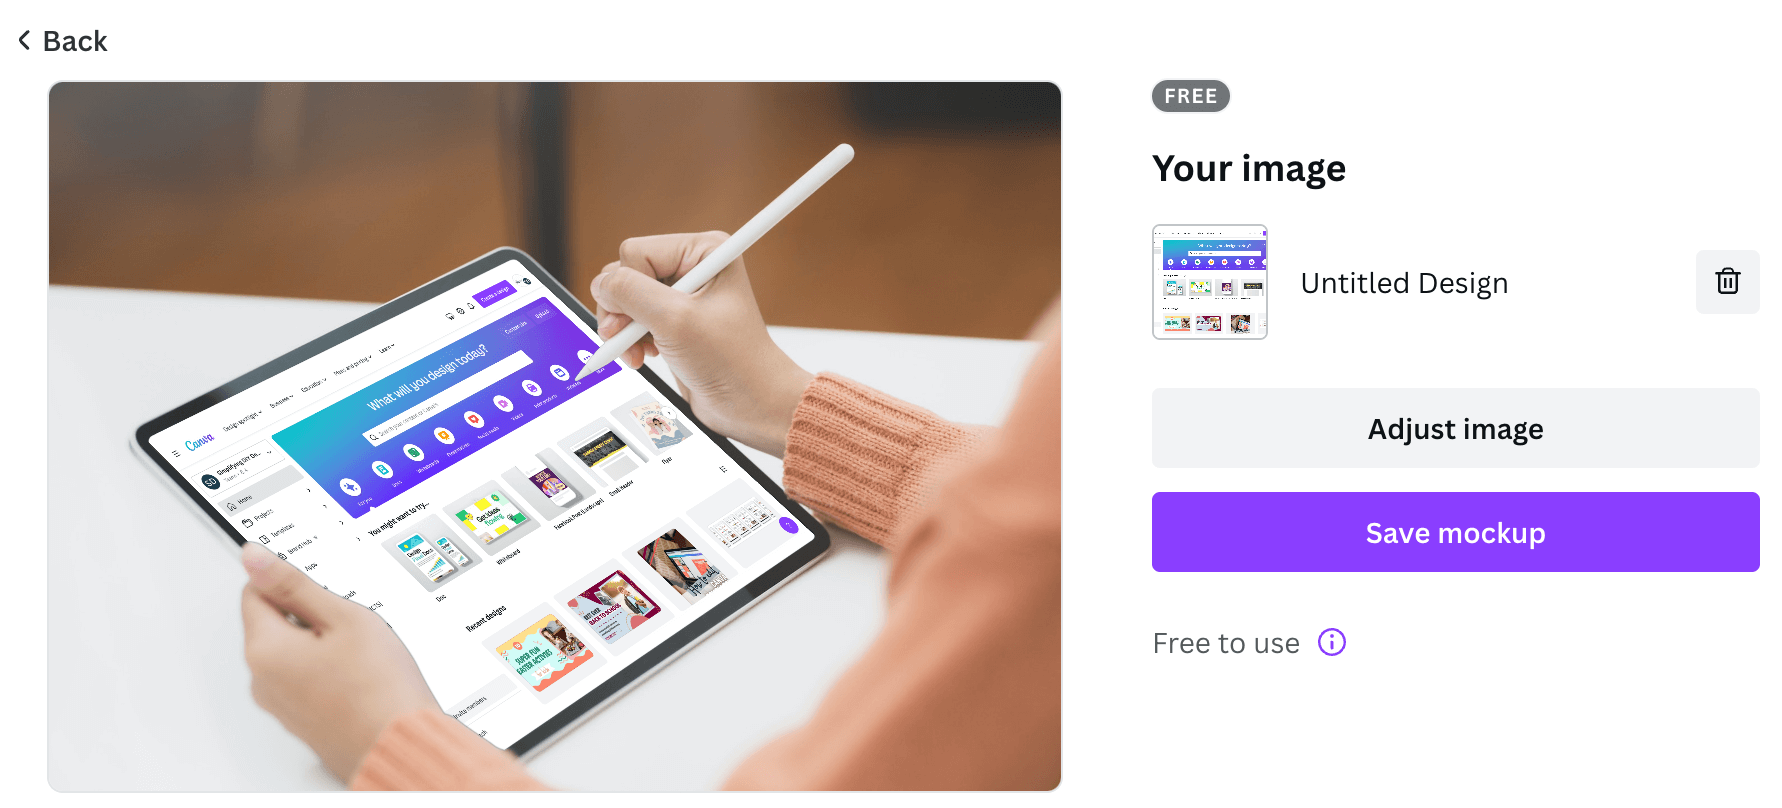
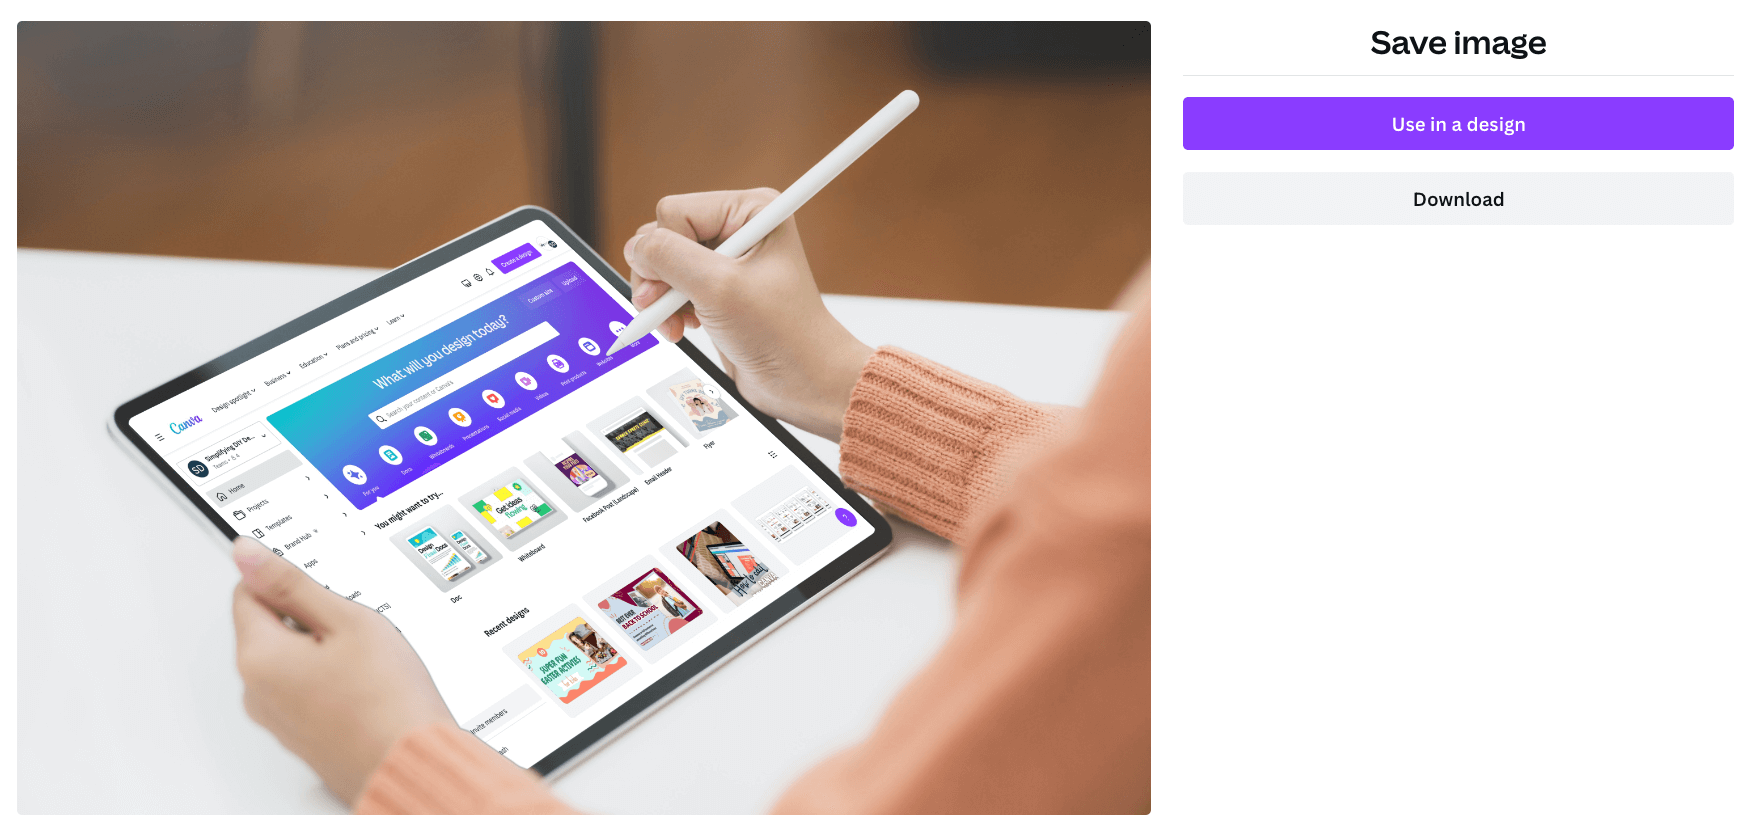
Follow the prompts on your screen to get started, all the way to choosing a design or an upload of your product. You can then view your final mockup, adjust as needed, or choose a similarly styled template – all on the same page!

The Ultimate Holiday Canva Template Bundle is ideal for the blogger whose blog either has seasonal content they want to maximize for quarter four or wants to start by having the right tools!

Just look at these holiday product mockups we made in under 10 minutes. Honestly, we spent more time picking out our favorite Smartmockup images than we did actually making them!

Now, there is one thing you need to know. The full library (all 8000+ Smartmockup images) is only available for Canva Pro users.

If you’re on the free plan, you can access about 25% of the library, which doesn’t include any of the holiday-specific mockups shown above.

You can try Canva Pro free for 30 days! Seriously, what do you have to lose?

HOLIDAY PHOTO MOCKUPS

If you’ve invested in a stock photo membership, chances are you have various mockup photos to choose from.

This can range from the basic ‘iPad on a desk’ with maybe a few trinkets to having delicately placed hands resting atop a keyboard in a beautiful office setting that perfectly matches your feminine brand.

It’s quite the spectrum!

If you don’t have the budget for a stock photo membership, we just want to advise a word of caution.

Try to avoid free stock image sites such as Pexels, Pixabay, Unsplash, etc. Sometimes, these images aren’t meant to be free (AKA stolen), and we’d hate for you to be slapped with a copyright violation.

But don’t worry. Reputable stock photo memberships like Haute Stock and DepositPhotos have crystal-clear Image License Terms for their protection and yours.

Once you find the mockup photos you like, you can easily upload them to Canva and place a ‘grid’ over the screen or product (like a binder or book) to fit your workbook cover, printable, or anything digital!

It's a fact that product mockups build trust and increase conversion rates. Stand out from the noise this holiday season with beautiful holiday product mockups!

Here are three different ways we used photo mockups. We added an iPad and stylus directly over a blank piece of paper within the stock photo for the first graphic.

The second and third graphics have a simple grid over the book and binder to emphasize that the product is printable.

EDIT IN PHOTOPEA

However, there’s one major flaw to using mockup photos if you’re not skilled in the art of Photoshop.

Have you ever noticed that some of the mockups are a bit crooked? Or, even worse, the screen is angled!

Talk about a waste of perfectly good mockup photos, right?

Well, that’s where Photopea steps in. First, Photopea is free. Second, it’s SO easy to use, and the images look just as good as Photoshop. Seriously!

It's a fact that product mockups build trust and increase conversion rates. Stand out from the noise this holiday season with beautiful holiday product mockups!

To manipulate your product mockup, just hold ‘CMD’ (or ‘Ctrl’ if on a PC) as you click and drag on the corner you want to move. Hold ‘Shift’ as you click and drag to change the height and width.

We highly recommend zooming in as close as you can to get the edges of your product mockup just right!

Related Post: Your Ultimate Black Friday Promo Guide

We knocked out all of our Black Friday promo graphics (that needed manipulation) in just a few minutes.

While you can add text inside Photopea, we prefer to download our images as .png and upload them to Canva so we can control the overall look of our holiday product mockups.

The text shown below is added in Canva, along with the ‘square’ elements, to provide a bit of dimension to the text.

It's a fact that product mockups build trust and increase conversion rates. Stand out from the noise this holiday season with beautiful holiday product mockups!

There’s so much more you can do with Photopea that’s very similar to Photoshop (and will take some time to learn, as you can see on the left menu in the photo above).

However, it sure makes manipulating your holiday product mockups to fit those awkwardly angled laptops, tablets, and phones a breeze!

HOLIDAY PRODUCT MOCKUP TEMPLATES

If you’re short on time or would rather have plug-n-play holiday product mockups, you can always purchase a pack of templates.

In fact, we created our Ultimate Holiday Canva Template Bundle for those two very reasons.

The Ultimate Holiday Canva Template Bundle is ideal for the blogger whose blog either has seasonal content they want to maximize for quarter four or wants to start by having the right tools!

All you have to do with templates is add your text, swap out the colors, and upload your product mockup. That’s it!

We LOVE using templates because they give us more time to spend on high-ROI tasks, which help pay for our blog’s investments and then some.

As a blogger, the great thing about the holiday season is that people are actively looking to spend money. But that doesn’t mean they’ll do it without intention.

Give your seasonal products and freebies a major boost by creating holiday product mockups that show your buyers exactly what they’re getting.

A well-design holiday product mockup should grab attention and build trust with your audience.

The more holiday mockups you use, the more information your buyer has to make an informed purchase decision. More mockups mean more trust. And with more trust, higher conversions will follow.

RESOURCES MENTIONED IN THIS POST:

  • FREE Holiday Content Planner
  • Easy Holiday Printables for Blog Traffic
  • Ultimate Holiday Canva Template Bundle
  • How to Choose Colors for Your Holiday Content
  • Seasonal Lead Magnets to Boost Your Email List
  • Your Ultimate Black Friday Promo Guide

Don’t forget to grab our FREE holiday content planning sheet! It’s the perfect tool to maximize your holiday content to boost holiday traffic, email sign-ups, and affiliate income!

GET THE FREE HOLIDAY CONTENT PLANNING SHEET!

TRY CANVA PRO FREE FOR 30 DAYS

Start your FREE Canva Pro trial today and unlock ALL of their incredible time-saving features that cut your design time to just minutes.

To be honest? It’s the best $12.99/mo OR $119/yr we spend on our business because that time we save with every design is put back into making MORE money in your business!

WANT TO SAVE THIS FOR LATER? PIN IT TO YOUR FAVORITE PINTEREST BOARD!⬇

Filed Under: Design Tutorials, Growth Strategy, Product Creation

7 Easy Ways to Prepare Your Blog for the Holidays

October 17, 2022 by Simplifying DIY Design Leave a Comment

Last updated on March 10th, 2023

Whether it’s your goal to take some time off for the holidays or just get ahead of the content curve, it’s still great practice to prepare your blog for the holidays. These simple steps will help you create a solid plan that keeps you focused on what matters most, saving you time!

There are so many things to love about blogging, especially how we can have so much in common, yet almost nothing at all.

Our audiences aren’t the same. The ways we make money blogging are vastly different. Our content couldn’t be farther apart.

But despite our vast differences, ask ANY blogger what their Q4 goals are, and they’ll all tell you the same thing.

Can you guess what those goals might be?

Leverage your holiday traffic with our FREE holiday content planning sheet! It’s the perfect tool to help you prepare your blog for the holidays so you can have your best Q4 yet!

GET THE FREE HOLIDAY CONTENT PLANNING SHEET!

First, to have their most profitable quarter-to-date. Second, to take the entire month of December off – if not the WHOLE season!

Sounds dreamy, doesn’t it? Well, it’s quite easy to turn that dream into reality… if done right.

All you need is a rock-solid game plan to prepare your blog for the holidays.

WANT TO SAVE THIS POST FOR LATER? BE SURE TO PIN IT!

Knowing how to prepare your blog for the holidays will give you an extra boost in traffic and email subscribers just in time for the new year!

We really wanted to hit home the act of preparation because it’s not a quick and easy task to take an entire month off, let alone the busiest month for most bloggers.

We know you’re already giving your blog everything you’ve got, but we’re going to ask for a little bit more just this one time.

The extra time you put in now will pay off, especially when you’re enjoying every special moment with your family this holiday season instead of downing your fifth cup of coffee hunched over in front of the computer and telling your kids, “just a few more minutes!”.

Now that we know how to plan right and put in the extra work beforehand, that’s something our families no longer have to endure.

If you’re ready to enjoy some much-needed time away from your blog, here’s how you can prepare your blog for the holidays!

1. CREATE A PROMOTIONAL CALENDAR

To prepare, we have to plan. And to plan, we have to make a schedule.

Whenever you get a new planner, what’s the first thing you do? Write in holidays, birthdays, etc. I.e., anything you don’t have control over.

The same goes for your promotional calendar, except we’re starting with affiliate promotions while adding in our own sales.

For example, we added a summit we’re participating in that’s running the first week of November. Then, we added our week-long Black Friday/Cyber Monday sale and any other affiliate promotions for the remainder of the year.

Now we have something to work around!

Having a solid baseline helps you get ahead of the curve and prepare your blog for the holidays.

Creating a plan will allow you to:

  • breakdown your goals into manageable, bite-sized tasks
  • keep your focus on only exactly what needs to be done, saving you time
  • analyze your content showing any weak or promotionally-heavy spots
  • take some much-needed time off because you deserve it!

We are firm believers in doing things today that your future self will thank you for.

2. EVALUATE YOUR CONTENT

Now that we have our schedule out of the way, we want to look at all of our blog posts to include both evergreen and seasonal.

Our goal for this step is to see if we can throw a holiday spin on any published content and create seasonal content to fill any gaps.

This gives us a ton of content to use on Pinterest and in our weekly emails, which we’ll get to later in this post.

For now, let’s chat about the latter for a moment.

Fill in content gaps

When we were evaluating our seasonal content, we realized we were missing a few key topics based on questions from our readers:

  • How to prepare your blog for the holidays
  • Ultimate Black Friday promo guide
  • Holiday product mockups

Adding more seasonal content to our blog helps in many ways, but the main focus for holiday prep is that we can take MORE time off because of it.

By adding new additional pieces of seasonal content, we can schedule further out, which means less time at the computer overall.

Add a holiday spin on evergreen content

Any time you can repurpose content, you’re saving yourself a ton of time.

But when you repurpose content with a holiday spin, you’re giving yourself more opportunities to grow your list during the busiest time of the year.

However, not everyone is good at brainstorming holiday content. Or, have reached the point of exhaustion by this time of year to even think of new post ideas.

To help combat this, we have an entire blog post covering holiday content ideas in three of the most popular niches!

Related Post: Printables You Need to Create for Holiday Traffic

Now, it doesn’t have to be a direct 1:1 swap from evergreen to seasonal.

For example, we have a post titled ‘Digital Product Launch Graphics You Need to Create,’ which is the base for our holiday post, ‘Black Friday 2022: Ultimate Promo Guide‘.

It’s not directly related, but it gives us a great jumping-off point due to the ‘launch’ similarities for outlining and writing our holiday post in record time.

Refresh outdated content

You’re already ahead of the game if you update your seasonal content annually! But if not, we’ve got you covered.

This is always good practice with any piece of blog content because things are always changing that, if you let slip, will be difficult to recover from. Ask us how we know…

We comb through every holiday post to check for a few key things:

  • Are the content and images still relevant?
  • Can any links, both inbound and outbound, be added?
  • Does this content match any affiliate products?
  • Are there any keywords Google Search Console recommends?
  • Can we promote any of our own products?

It may look like a lot, but if it’s something you’re consistent with, you’ll knock it out in no time. Plus, Google loves regularly updated content.

As you can see, having great seasonal blog content is key to helping you prepare your blog for the holidays!

2. REVIEW AFFILIATE PROGRAMS

Everything we know about affiliate sales is from the Lazy Guide to Affiliate Marketing by Elizabeth Goddard. She is truly a marketing genius, and her strategies are perfect for those of us that love the set-it-and-forget-it approach!

Aside from adding any relevant affiliate links throughout your holiday content, there’s something else you can do to really boost that income while you’re taking some time off – heavily monetized posts!

We skim through our affiliate spreadsheet each year and see if there are any products we can write a whole blog post about.

Is it a sponsored post? No. Instead, we’ll write a review-style post about a particular product and add our affiliate link throughout.

An added bonus is if this product goes on sale for Black Friday, you can push your audience to the post AND repurpose your content for promotional emails and social media posts!

Side note: This is why we review our promotional calendar before starting our content!

Related Post: Leverage the Holidays to Grow Your List and Income

Other ways to accelerate your affiliate income over the holidays while taking some time off are with round-up posts and gift guides.

3. DESIGN HOLIDAY LEAD MAGNETS

You can have the greatest content in the world but will be meaningless if you’re not capturing email subscribers in the process.

Holiday-themed lead magnets are the perfect way to grow your email list throughout all of Q4 because it provides the ‘how’ to your content’s ‘why.’

Related Post: Seasonal Lead Magnets to Boost Your Email List

Does that mean every holiday blog post needs to have a dedicated lead magnet? Not at all.

We only have two holiday lead magnets, but they tie in perfectly with our seasonal content and provide a quick win for our audience as they prepare their blog for the holidays.

If you want done-for-you holiday page templates to help you design beautiful lead magnets and printables, you need our Ultimate Holiday Canva Template Bundle NOW.

The Ultimate Holiday Canva Template Bundle is ideal for the blogger whose blog either has seasonal content they want to maximize for quarter four or wants to start by having the right tools!

We specifically created this bundle to help you leverage Q4 traffic for maximum growth by designing all of your seasonal content in a fraction of the time.

The Ultimate Holiday Canva Template Bundle provides you with social media and Pinterest templates, promotional mockup templates, page layout templates (for lead magnets, gift guides, and digital products), and a 24-page content planner to help you plan your most profitable Q4 yet.

4. WRITE EMAIL + SOCIAL MEDIA CONTENT

Once your main piece of content is done, you can easily repurpose it in emails and social media posts.

We repurpose as much blog content as possible to keep our message consistent. But in terms of helping you prepare your blog for the holidays, it’s essential for saving even more time.

WRITE EMAILS

Our weekly emails are broken up into three parts:

  • Weekly blog post promotion
  • Canva design tip related to our weekly blog post
  • Tools and resources related to our weekly blog post

Because our blog posts are already planned out, we can easily add relatable Canva design tips and resources to our emails. They’re now written and ready to be scheduled.

To get ahead of the clock, we write our weekly emails in Google Docs and then do a quick run-through with Grammarly before we add them to ConvertKit.

WRITE SOCIAL MEDIA

We categorized our social media posts into four content styles:

  • Quick tip
  • Tweet-style
  • Carousel
  • Engagement

This not only makes batch-designing our visuals quick and painless but dramatically cuts down our time spent on brainstorming content.

For social media, we write our posts directly in Asana and then add our visuals. It’s so easy to move cards around and make any edits to posts before we add them to our scheduler.

This is a personal preference, as we found it takes quite a bit to edit and reschedule posts in Business Suite.

5. SCHEDULE YOUR CONTENT

Every part of your blog can be scheduled, which is where the holiday magic happens!

It would be pointless to write all this content ahead of time and then manually post everything. So much for taking some time off, right!?

Instead, thanks to automation, blog posts, social media, email, and even Pinterest can all be automatically published at peak times.

BLOG POST

We schedule our blog posts right in WordPress. We love that we can have these written weeks, if not months, in advance and will only publish to our site on the date and time of our choosing.

This is handy when we schedule our Pinterest content so that our pins don’t go out before the blog post is published, which we’ll get to in just a moment.

SOCIAL MEDIA

Believe it or not, we actually schedule our Facebook and Instagram content directly in Business Suite.

As we said earlier, editing and rescheduling posts in Business Suite was just too time-consuming. Not to mention we were tired of dealing with connection issues from third-party schedulers.

Plus, everything we read said the algorithm favors native posting anyway.

EMAIL

We’ve been using ConvertKit since we started Simplifying DIY Design and are still in love, 5+ years later.

It’s so easy to create intuitive sequences and automations so your content goes to the right readers at the right time.

It’s also incredibly easy to establish rules where the true magic of segmentation takes place, we think!

PINTEREST + TAILWIND

If you’re going to prepare your blog for the holidays, you NEED to utilize Pinterest to ensure a revolving door of traffic to your posts.

We have the entire fourth quarter scheduled in Tailwind, so as our audience searches for seasonal solutions, Pinterest continuously delivers without us lifting a finger.

Every single blogger should be using Tailwind regardless if you want to prepare your blog for the holidays or not.

It’s a vital tool in our business that lets us offload a huge, time-consuming task of manual pinning and brings us thousands of visitors a month!

Related Post: A Guide to Creating and Uploading Pinterest Content for Traffic

We especially love the ability to schedule pins for posts that have yet to hit the blog. This is key!

Get started with Tailwind today to help you prepare your blog for the holidays and schedule your Pinterest content (and more) through smart automations!

7. TEST-RUN YOUR PROCESSES

Nothing’s worse than putting in the work to prepare your blog for the holidays and having a hiccup in your customer journey go unnoticed.

Even if you think everything’s good to go, run through every step anyway.

True story.

We were less than 24 hours out from a huge collaboration that was estimated to bring in hundreds of email subscribers. We’re no rookies with collabs, yet something told us to go through our customer journey regardless just to make sure…

  • Email tags were added
  • Automations started, and emails sent
  • Accounts created and logins activated

Turns out the wrong tags were added (totally our fault), AND our automation had a glitch that wouldn’t move our subscribers forward.

In sheer panic, we got in touch with ConvertKit’s support and resolved the issue in a matter of minutes.

If we had never test-run our processes beforehand, we would’ve found out about these errors AFTER taking a few weeks off.

In other words, we would’ve walked into a complete disaster, and we definitely don’t want you to make the same mistake we did!

With the right game plan, you can easily prepare your blog for the holidays, whether you’re taking some time off or not.

It’s always good practice to get ahead of things. So, even if time off isn’t your goal, you’ll still be able to create a winning game plan that keeps your focus on something we can all agree with – spending your time on what matters most!

RESOURCES MENTIONED IN THIS POST:

  • FREE Holiday Content Planning Sheet
  • Ultimate Holiday Canva Template Bundle
  • Ultimate Black Friday Promo Guide
  • Leverage the Holidays to Grow Your List and Income
  • Printables You Need to Create for Holiday Traffic
  • Seasonal Lead Magnets to Boost Your Email List

Don’t forget to grab our FREE holiday content planning sheet! It’s the perfect tool to help you prepare your blog for the holidays to maximize your traffic for insane growth!

GET THE FREE HOLIDAY CONTENT PLANNING SHEET!

TRY CANVA PRO FREE FOR 30 DAYS

Start your FREE Canva Pro trial today and unlock ALL of their incredible time-saving features that’ll cut your design time down to just minutes.

To be honest? It’s the best $12.99/mo OR $119/yr we spend on our business because that time we save with every single design is put back into making MORE money in our business!

WANT TO REMEMBER THIS LATER? SAVE IT TO YOUR FAVORITE PINTEREST BOARD! ⬇

Filed Under: Growth Strategy, List Building

Black Friday 2022: The Ultimate Promo Guide

October 11, 2022 by Simplifying DIY Design Leave a Comment

Last updated on March 9th, 2023

As a blogger, do you have a Black Friday marketing strategy? Learn to plan out your most epic Black Friday promotion yet to dramatically boost your blog’s income, whether you have your own products, use affiliate marketing, or both!

Remember when Black Friday meant getting up at the crack of dawn to navigate the mall’s Texas-sized parking lot to then speed walk through, weaving in and out of roped lines just to get the best deals on your kid’s toys?

Or maybe it was the only time to get your kid’s toys because they were sold out for over half the year.

That darn Tickle-Me-Elmo crisis will go down in history, you mark our words!

Leverage your holiday traffic with our FREE holiday content planning sheet! It’s the perfect tool to maximize your holiday content to boost traffic, email sign-ups, and affiliate income!

GET THE FREE HOLIDAY CONTENT PLANNING SHEET!

Thanks to technology, we replaced cardio with furiously inconsistent clicks and keyboard swipes just to make our way to a checkout before whatever we’re stressing about is pulled from the site.

So much anxiety!

The thing is, it can be even more chaotic now that we’re on the receiving end of it all. Who knew planning out your OWN Black Friday promo would be so stressful?

And, if we’re being honest, a void of information on how bloggers can and should leverage Black Friday’s traffic to generate some serious income.

REMEMBER THIS POST LATER! PIN IT TO YOUR FAVORITE PINTEREST BOARD!⬇

Bloggers need to have a Black Friday marketing strategy. Plan your Black Friday promotion NOW to boost your blog's income with product and affiliate sales!

We decided to take our Black Friday marketing strategy, created from our own trial and error over the years, into one simple-to-follow yet jam-packed Black Friday promo guide.

Even if you don’t have a big shop or none at all and rely solely on affiliate sales, it’s time you finally leveraged Black Friday’s traffic to end this crazy year with a celebratory bang!

1. PLAN OUT YOUR PROMOTION

If you fail to plan, you’re planning to fail. It’s as simple as that!

The nice thing about planning your first Black Friday promotion is that you’ll have a template for years to follow. And as you know, templates are our jam!

Related Post: How to Prepare Your Blog for the Holidays

We advise you to prepare your blog for the holidays while simultaneously planning your Black Friday promo. Because you’ll be in the preparation mindset, your productivity will skyrocket.

Plus, you’ll save even more time, AND your messaging will be more consistent!

SCHEDULE

First, you want to plan out your schedule. Will it be a one-day event, a week-long sale, or something different? We prefer a week-long sale to catch buyers throughout the week since most completely step away from their computers over the holiday.

PRODUCTS

Next up is planning the actual sale – what products will be a part of your Black Friday promotion? Are you focusing on a specific audience group? Will you provide any product bundles for steeper discounts?

We generally discount our whole shop except for entry-level products, priced at $27. We found that bundling based on audience group (beginner, intermediate, and advanced) has really bumped up our sales.

As a new blogger, for example, a bundle will include what we recommend is best for you, which is generally what our inbox fills with this time of year.

They’re more confident in their purchase by providing that reassurance (products to grow their blog AND what we recommend working on).

Be sure to visit your affiliate tracker to see which products you can promote, too. Many people forget about affiliate marketing when it comes to their Black Friday promo, focusing solely on their own products.

This a huge missed opportunity because your audience is actively looking for something to buy! You’ll still make a sale with your affiliates, even if it’s not one of your own products.

If you want to learn more about affiliate marketing, we can NOT recommend the Lazy Guide to Affiliate Marketing by Elizabeth Goddard enough. She has completely revolutionized our thought process on affiliate sales, and we absolutely love the set-it-and-forget-it approach!

DISCOUNTS

Lastly, it’s time to plan out your Black Friday promotion rates. Will you run a range or flat XX% off across your shop? BOGOs? The more you buy, the larger the discount.

This will depend on your shop’s host (Etsy or Shopify) and check-out programs such as ThriveCart.

Side note: We swear by ThriveCart, and if you can swing the one-time LIFETIME cost, get it! It’s so easy to customize your checkout pages, manage your affiliates, add bumps and upsells, and so much more.

For our Black Friday promo specifically, we’ll have a variety of discounts for individual products and bundles instead of one flat rate. We really push our bundles this time of year to boost our AVO.

Yes, we even measure those!

If you need a new Shopify theme template, definitely check out Easy Website Themes. Their Shopify themes are built by an official Shopify developer, so you’ll have super fast load times AND a beautiful storefront! Use code SIMPLIFY20 for 20% off your order!

2. BUILD OUT YOUR FUNNEL

Any time we can put our design skills to use, we’re happy campers, and a sales funnel is definitely no exception.

There’s actually a lot of design involved when it comes to creating a profitable funnel. In fact, we’ve created an entire blog post because there’s so much to cover!

Related Post: Ultimate Guide to Creating a Funnel that Converts

If this is your first Black Friday promotion, this is hands down where you’ll spend most of your time.

But it’ll all be worth it because you’re simultaneously creating a full-blown funnel template for you to use over and over again.

We can easily knock out our entire Black Friday promotion funnel in one day, thanks to the insane time and effort we put in years past. And you will, too!

LANDING PAGE

To start, we recommend creating a dedicated Black Friday promo page that’ll update every year.

This will dramatically help with SEO because it’ll have more time to gain traffic and rank in the search. Plus, it’ll help you save time since all you have to do is update the text instead of starting from scratch.

We use LeadPages for ALL of our landing pages. It’s so simple to design, add in timers, re-direct, and more.

Don’t forget to include an email opt-in (ConvertKit makes this incredibly easy!) to be notified when your Black Friday promotion starts.

EMAILS

Emails are essential for making money with your Black Friday promo, so whatever you do, don’t skip this step!

First, we just want to clarify that you’ll have an increasing number of unsubscribers. It is what it is, there’s no changing that.

But the way you use your emails will have an impact which brings us to SEGMENTS. Always segment your list!

When you segment, you can send out targeted emails to prevent promoting a product that a subscriber has already purchased.

If your products are categorized such as beginner, intermediate, etc., you can use their purchase history to your advantage by recommending products they’re more likely to buy.

Bloggers need to have a Black Friday marketing strategy. Plan your Black Friday promotion NOW to boost your blog's income with product and affiliate sales!

For example, if a subscriber purchased our Five-Minute Brand, we won’t send them an email about our Ultimate Product Creators Toolbox. Instead, we’ll focus more on entry-level products such as Confidently Canva or our Complete Blogger Template Toolkit.

Targeted emails make your subscribers feel appreciated and that you care about them. So again, segment that list!

Also, countdown timers are great at getting those on-the-fence buyers to make a move because it promotes scarcity. Hurry before the time runs out! We use and love MotionMail. Plus, it’s free!

CHATBOT

Here’s the thing. People WILL have questions whether the answer is in your sales copy or not.

Especially when it comes to customers wanting to buy the next-step product in your funnel.

Related Post: How to Use QR Codes for Easy Money

If you’re ignoring those questions, you’re missing out on sales. While we’re not saying you need to be glued to your computer for your entire Black Friday promotion, having an easy line of communication will help.

We have a ManyChat chatbot set up on all of our sales pages that’s available 24/7. If someone sends us a message that it doesn’t recognize (based on triggered keywords), the chatbot will send us a notification.

The user then receives a confirmation message and a link to our FAQ page, which usually answers their question anyway.

People are more apt to send us a message than an email because it’s literally right there on the sales page. And if you’re available, chatting live with multiple people (including voice notes if that’s your thing) is a breeze.

DISCOUNT CODES

Discounting products for a Black Friday promotion can be done in two ways. Either discounting straight in the shop or creating a coupon code to be used at checkout.

The latter is generally preferred for various reasons, some of which revolve around buyer psychology.

ThriveCart is perfect for this. Just add your code, discount, dates, applicable products – it’s really that easy.

Bloggers need to have a Black Friday marketing strategy. Plan your Black Friday promotion NOW to boost your blog's income with product and affiliate sales!

Don’t forget to keep your coupon codes simple. Nothing translates to an abandoned cart more than ‘bot-proof’ coupon codes or even acronyms.

CHECK OUT

We don’t care what anyone says – your checkout pages NEED to be customizable! We love changing the text, imagery, order bumps, and even layout with just a few clicks of our mouse using ThriveCart.

And to make our Black Friday promotion even easier for our customers, we add the coupon code to our page’s top banner resulting in fewer abandoned carts!

3. DESIGN YOUR VISUALS

We’ve made it to the best part of a Black Friday promotion – designing our visuals!

While we have an evergreen guide to creating product launch graphics, your Black Friday visuals must take it up a notch.

Related Post: Digital Product Launch Graphics You Need to Create

There’s a LOT of noise in Q4, especially during Black Friday. You need visuals that make your products pop. Your customers need to see what your product is all about to help them determine if it’s right for them.

MOCKUP

If you can only make one graphic for your Black Friday promotion out of everything we’re about to recommend, this is it.

Your buyer isn’t going to care about the title or description if they can’t see what they’re buying, regardless of cost. Just put yourself in their shoes. Would you buy something without seeing it? Probably not, right?

A mockup is what your product looks like. Really, what your product IS. If it’s a course, it’ll be on a computer or laptop. If it’s an eBook, you’ll have it on a tablet. It’s all about visual representation!

The Ultimate Holiday Canva Template Bundle is ideal for the blogger whose blog either has seasonal content they want to maximize for quarter four or wants to start by having the right tools!

This is what a mockup looks like. We have a binder and individual pages to represent a printable holiday planner. Our Holiday Template Toolkit is shown on a computer monitor because it’s digital, along with our Holiday Gift Guide Bundle, shown on a laptop.

You know what this product is all about without scrolling through the sales page.

The Ultimate Holiday Canva Template Bundle is ideal for the blogger whose blog either has seasonal content they want to maximize for quarter four or wants to start by having the right tools!

Here are other examples of more high-end mockups you can easily make using Canva Smartmockups. These mockups are perfect for sales pages and ‘background’ images with text overlay (image #3).

SQUARE

While primarily used for Facebook and Instagram, square graphics are still great for blog posts, sales pages, and emails.

However, there really isn’t a set design process to follow. You can make these in various styles, including just text, photos and text, a continuation of mockups, etc.

The Ultimate Holiday Canva Template Bundle is ideal for the blogger whose blog either has seasonal content they want to maximize for quarter four or wants to start by having the right tools!

Here are three completely different square promotional graphics.

Image one is similar to a mockup in that it showcases just some of the templates available in our Ultimate Holiday Canva Template Bundle with a bit of text describing what the product is about.

Image two, again, highlights the product with a few templates and a small text summary.

Image three is a template from our Ultimate Holiday Canva Template Bundle with some text for you to describe your product and a place for a stock photo or image of your product.

Three vastly different looks but are all still promotional in nature.

PINTEREST

Because Pinterest is a visual search engine, you want as much content circulating through the feed as possible. We have at least 4+ years old pins that still bring regular traffic to our blog.

Remember when we talked about having a dedicated Black Friday promo page?

Even if someone clicks on your Pin in the middle of March, they’ll go to an active page where they can sign up for a discount that may not be as good as the Black Friday promo you offered but is still better than full price.

Talk about SEO and money-making perfection, friend!

VIDEO

Video marketing is HUGE so take advantage of it! To really showcase your product, create a sneak peek or demo of your product in use. We love taking a template from one of our products and customizing it to match our brand.

Our audience responds well to seeing our templates in action because it not only helps visualize them using it, but they can see firsthand just how easy designing with templates truly is.

You can also do a before and after or film yourself going through the product. This may be turning the pages of your book or binder or clicking through on your computer.

We combined our favorite ways to promote a product into one video for our 5-Minute Brand. This is a really popular and easy option, too!

You can easily make this as a GIF or flip graphic to use on social media so it constantly plays through instead of a video that must start manually.

Related Post: Animated Flip Graphics | How to Make a Flipbook in Canva

Bonus, it’s so simple to make right inside Canva. As if anything isn’t, right?!

No matter where you are on your blogging journey, there’s always money to be made on Black Friday.

As you plan out your Black Friday promo and even after, keep documenting what’s working and what isn’t so you can fine-tune your plan for next year.

Remember, progress is still progress. While some might see a ‘bust’ as a failure, it’s still an experience you can walk away from knowing more than you did before you started!

RESOURCES MENTIONED IN THIS POST:

  • FREE Holiday Content Planner
  • Ultimate Guide to Creating a Funnel that Converts
  • ThriveCart
  • How to Make a Flipbook in Canva
  • Ultimate Holiday Canva Template Bundle

Don’t forget to grab our FREE holiday content planning sheet! It’s the perfect tool to maximize your holiday content to boost holiday traffic, email sign-ups, and affiliate income!

GET THE FREE HOLIDAY CONTENT PLANNING SHEET!

TRY CANVA PRO FREE FOR 30 DAYS

Start your FREE Canva Pro trial today and unlock ALL of their incredible time-saving features that cut your design time to just minutes.

To be honest? It’s the best $12.99/mo OR $119/yr we spend on our business because that time we save with every design is put back into making MORE money in your business!
WANT TO SAVE THIS FOR LATER? PIN IT TO YOUR FAVORITE PINTEREST BOARD!⬇

Filed Under: Growth Strategy, List Building

Pinterest Pin Design: Anatomy of the Perfect Pinterest Pin

April 28, 2022 by Simplifying DIY Design Leave a Comment

Last updated on June 24th, 2022

Are you struggling with establishing a Pinterest pin design? Between the updates with Idea pins and the push for fresh pins, creating the perfect pin design isn’t as easy as it once was. Fortunately, designing pins can be quick, easy, and fun with the right Pinterest design tips!

This is a guest post by Domitille of Mademoiselle Social. See the end of the article for more information about her, her company, and how you can create the perfect Pinterest pin design!

Let’s see how you can create a click-worthy Pinterest pin design and get more people to click on them by breaking down the anatomy of the perfect Pinterest pin.

HOW DO YOU CREATE A PIN FOR PINTEREST?

Before we dive in, let’s take a look at the different methods you can use to create a Pinterest pin.

As of May 2022, there are three ways you can create a pin for Pinterest.

  • Pinterest’s native pin design maker
  • Design software like Canva
  • Tailwind Create

WANT TO SAVE THIS POST FOR LATER? BE SURE TO PIN IT!

Creating high-converting Pinterest pins is possible once you know what Pinterest wants. Here's the anatomy of the perfect Pinterest pin design for 2022!

HOW DO YOU MAKE A PIN DESIGN ON PINTEREST?

To design a Pinterest pin with the native pin maker, you’ll click on ‘Create’ from the top menu bar then ‘Create Pin’. Once you’re in the native pin maker, you can add an image and then start adding text. 

Creating high-converting Pinterest pins is possible once you know what Pinterest wants. Here's the anatomy of the perfect Pinterest pin design for 2022!

It’s fair to say that the graphic design options for the native pin maker are limited and not super easy to use.

Once you’ve designed your Pinterest pin and added your title and description, choose a board, click ‘Save’, and voilà you published your Pinterest pin design!

HOW DO YOU MAKE A PINTEREST PIN ON CANVA?

The second option to create a click-worthy Pinterest pin design is to use a design program like Canva. You can also use PicMonkey, Snappa, or any other graphic design software that you like, it works the same.

Canva provides templates for Pinterest pins that you can use and customize for your brand or you can start from scratch.

  • Create a new design
  • Upload an image
  • Add your text
  • Download to your computer

In order to upload it on Pinterest, you can either use the native pin maker that we talked about above or upload it to a scheduler like Tailwind. 

With the native pin maker, you would upload the created images in the pin maker, add the title, description, and URL. Choose your board and click on ‘Save.’ 

Creating high-converting Pinterest pins is possible once you know what Pinterest wants. Here's the anatomy of the perfect Pinterest pin design for 2022!

It’s also where you upload your pins in “bulk” by clicking the ‘+’ in the top left corner. This is a HUGE time-saver for content creators that design multiple pins at a time.

Related Post: A Guide to Creating and Uploading Multiple Pins for Traffic

With Tailwind*, you can upload the Pinterest pin design to Tailwind, add the title and description, choose your board and schedule it in your queue!

Creating high-converting Pinterest pins is possible once you know what Pinterest wants. Here's the anatomy of the perfect Pinterest pin design for 2022!

*If you’re new to the term Tailwind, it’s an automatic scheduler used by a lot of Pinterest users to schedule their pins ahead of time and have them automatically published on Pinterest.

HOW DO YOU MAKE A PINTEREST PIN USING TAILWIND?

The last option I want to talk about with you when it comes to making pins for Pinterest is to use Tailwind’s native pin maker: Tailwind Create! It’s like your very own Pinterest pin generator software.

With Tailwind Create, you can design plenty of pins straight in Tailwind.

Click on create, choose your designs, add your branding, and your text and choose a picture. Tailwind does the rest by creating multiple Pin designs for you.

Creating high-converting Pinterest pins is possible once you know what Pinterest wants. Here's the anatomy of the perfect Pinterest pin design for 2022!

You can choose your favorites and add them to your queue to be published or adjust them to your liking.

Canva and Tailwind are great options if you need some Pinterest pin design ideas since you can use templates and find inspiration right in the software.

Now that we saw three ways you could be making your pins for Pinterest, let’s review the different types of pins you can encounter on the platform before we go into how to design your Pinterest pins for clicks and traffic.

THE TWO TYPES OF PINTEREST PINS YOU CAN USE

Currently, you can create two different formats of Pinterest pins.

  • Standard pins: Been around since Pinterest first started
  • Idea pins: Rolled out last year (2021)

The difference between these two types of pins is that the standard Pinterest pin links outside of Pinterest (traffic to your website) and the Idea pins do NOT.

Both of these types of pins can be either static images or videos. And to add more confusion to the matter, you can also create Carousel pins which are still considered standard pins.

For Idea pins, they can be designed with multiple images but we call them “pages” and therefore, they’re not considered a Carousel pin.

Creating high-converting Pinterest pins is possible once you know what Pinterest wants. Here's the anatomy of the perfect Pinterest pin design for 2022!

SIDE NOTE: If you need help making sense of all these formats and learning how to use them in your Pinterest strategy, you can get my Pin Cheatsheet!

Luckily for us though, all the different Pinterest pins that I listed require somewhat of the same design tips to make sure we’re creating click-worthy and scroll-stopping Pinterest pin designs! 

Let’s take a look at what makes a good pin on Pinterest!

WHAT MAKES A GOOD PIN ON PINTEREST?

If you’re wondering how to make an attractive Pinterest pin, this is where you want to pay attention! A Pinterest pin design that converts usually follows three main elements! 

  • The right format and size for your images
  • Beautiful imagery and design
  • Keyworded text

Let’s look at the anatomy of a perfect Pinterest pin design!

WHAT PINTEREST PIN SIZE SHOULD YOU USE?

Yes, the size of your pins does matter. Your Pinterest pin should always be a vertical design. 

Pinterest recommends a ⅔ ratio when it comes to creating your Pinterest pins. It means that it could be 600px x 900px or 1000px x 1500px for example.

If we’re talking about creating Idea pins, then Pinterest recommends the following ratio: 1080px x 1920px (they’re very similar to the size of Instagram Stories)

Creating high-converting Pinterest pins is possible once you know what Pinterest wants. Here's the anatomy of the perfect Pinterest pin design for 2022!

Keep in mind that even if Pinterest recommends using the vertical format, you could also experiment with the square ratio of 600px x 600px to see if your audience answers better to that format.

I would keep it to a minimum, though, because a vertical Pinterest pin design is easier to read for users on the mobile app.

CHOOSE BEAUTIFUL IMAGERY FOR YOUR BACKGROUND AND TASTEFUL DESIGN

Pinterest is a visual search engine so the images you choose to illustrate your pin do matter as much as the overall design of the Pinterest pins!

The pictures you choose should always be of high quality and related to the content of the Pinterest pins.

Pinterest can “find objects” on your image and associate it with keywords. If you choose a picture of a dog when your Pinterest pin is about a chocolate cake recipe, Pinterest won’t have much trust in your pin and won’t distribute it very much.

When it comes to the choice of your font, we want to make sure that you’re using fonts that are easy to read. Keep in mind that 80% of Pinterest users are on mobile devices!

Creating high-converting Pinterest pins is possible once you know what Pinterest wants. Here's the anatomy of the perfect Pinterest pin design for 2022!

If they can’t read your text, they won’t click on your pins. It’s that simple! 

Handwritten fonts are beautiful but they should be used in moderation. Readability over cuteness, that’s what you’re shooting for!

The design of your pins in itself should highlight the most important part of your title, the piece of information that will make your audience think “yes, that’s exactly what I want to know, let me click on THAT pin!”

You want to make sure that your text pops up on your image so it’s easy to read and users know instantly what your pin is about. You can play around with different sizes of text and different fonts, underlining some part of the text that is important or using a different color like we did above.

The sky is the limit when it comes to creating your Pinterest pin design as long as you keep it easy to read!

The last design element we want to add is your branding!

BRANDING YOUR PINTEREST PIN DESIGN

It can be a simple logo or your website address as well as your branding colors. We simply want to make sure that we’re letting the users know where this pin is coming from. It’ll help with brand recognition and authority on the platform.

When it comes to your brand color, some businesses are very particular about their colors and won’t create Pinterest pins using other colors. But, it’s important to try things out.

Aim to create some Pinterest templates with your brand colors and some others using different colors. 

The light blue/green (image 7) as well as the light orange (image 8) aren’t part of our brand.

Creating high-converting Pinterest pins is possible once you know what Pinterest wants. Here's the anatomy of the perfect Pinterest pin design for 2022!

You never know what will work best with your audience and that would be too bad to miss on a click because someone is not attracted to the colors you chose for your brand. (Yes, this happens!)

OPTIMIZE YOUR PINTEREST PIN DESIGN FOR SEO

We’re finishing our anatomy of the perfect Pinterest pin design with a key part: your keywords!

As we said earlier, Pinterest can read your image so they can extract keywords that help them categorize your content.

We want to make sure that these keywords are also appearing on the text of our pins! That’s where you can play with the size or the color of your text and make sure you’re highlighting those keywords for the users and for Pinterest!

And last but not least, make sure you’re using “calls to action” on your Pinterest pin design as well.

A call to action (or CTA) will help people take that next step! Tell them to “visit your website”, “read more on the blog”, or “download the free resource.”

The other part of your SEO will happen not on the design of your pins but in the title and the description that you will need to fill in before you publish it.

Creating high-converting Pinterest pins is possible once you know what Pinterest wants. Here's the anatomy of the perfect Pinterest pin design for 2022!

This is another important place where keywords should appear. Don’t keyword stuff, try to write two to three coherent sentences using keywords and describing what users can expect to find when they click on the pins.

WRAP UP

To summarize the perfect anatomy of a Pinterest pin design, you’ll need:

  • To create a vertical ⅔ ratio Pinterest pin
  • Use high-quality and relevant images for your background
  • Make sure your text is easy to read
  • Use a hierarchy to highlight the important information
  • Add your branding
  • Close with a strong call to action

Follow these Pinterest pin design tips and you’re on your way to creating some Pinterest magic!

ABOUT THE AUTHOR

Domitille is the founder of Mademoiselle Social. She helps service providers, online course creators and digital product owners create a sustainable and automatized marketing strategy to increase traffic to their offers and website using Pinterest as a top-of-funnel.

Get access to the Pin Cheatsheet & 50+ calls to action to create high-converting Pins on Pinterest & get clicks with my FREE Pinterest Pin Cheatsheet!

WANT TO REMEMBER THIS LATER? SAVE IT TO YOUR FAVORITE PINTEREST BOARD! ⬇

Creating high-converting Pinterest pins is possible once you know what Pinterest wants. Here's the anatomy of the perfect Pinterest pin design for 2022!

Filed Under: Design Tutorials, Growth Strategy, Social Media

  • 1
  • 2
  • 3
  • …
  • 10
  • Next Page »

Welcome!

We specialize in template designs that jump-off-the-screen! Here you will find templates, design tools and systems that you can use to implement your way to success in your digital business!Read More!

Get instant access to our design library!

Full of free design templates, tutorials, and other tools for online marketing through simplified design

    Popular Posts

    More Freebies!

    More Freebies!

    categories

    some of our
    favorite recommendations

    Photo Editing & More
    Emails That Convert
    Fonts, Images & More
    Stock Photos & Vectors
    Fonts At a Discount

    Navigate

    • Shop Products + Courses
    • Affiliate Sign-Up
    • Contact

    Search

    simplifying diy design canva templates
    Copyright ©2023, Simplifying DIY Design. All Rights Reserved.
    Privacy | Disclosure | Terms