There are so many Canva Pro features that bloggers don’t use properly or even know to exist. Taking a few minutes to get your Canva Pro account set up the right way can cut down on design time, helping you design faster and maximize productivity!
Here at Simplifying DIY Design, we’re all about efficiency.
Even though it may seem like an extra second saved by using bookmarked links or keyboard shortcuts, it really adds up when you spend your day in front of a computer.
Any and all designs, sales page links, copy, etc., are tucked neatly away in Asana so they can be quickly referenced.
Nothing is more of a time-suck than scouring a program looking for that one thing you created but cannot remember what you titled it for the life of you. Hey, it happens!
Want a FREE, no-fluff crash course on how to use Canva as a blogger? Enroll in our self-paced Canva 2.0 Quick Start NOW to dive in!
This is just ONE of the many reasons we upgraded to Canva Pro. And still, to this day, we cannot believe how long we waited to make the switch.
Actually, that’s a lie. We do know why.
What we didn’t realize was how much extra time was spent finding workarounds to what was available for Canva Pro users until we gave it a spin using their FREE 30-day trial of Canva Pro.
Ignorance is bliss, right?
Well, to our disbelief, we saved oodles of time by having all of our frequently used tools in one easy-to-use design platform.
We’re going to dive into all the amazing Canva Pro features and how they’ll benefit you as a blogger, so grab your favorite drink, get comfy, and let’s do this!
REMEMBER THIS POST LATER! PIN IT TO YOUR FAVORITE PINTEREST BOARD! ⬇
Table of Contents
BRAND COLOR PALETTES
Gone are the days of saved hex codes in Notes or digital sticky posts!
Use this section of your Canva Pro account to organize all of your brand colors. Just click ‘+ Add new’ and type in your individual hex codes for each color.
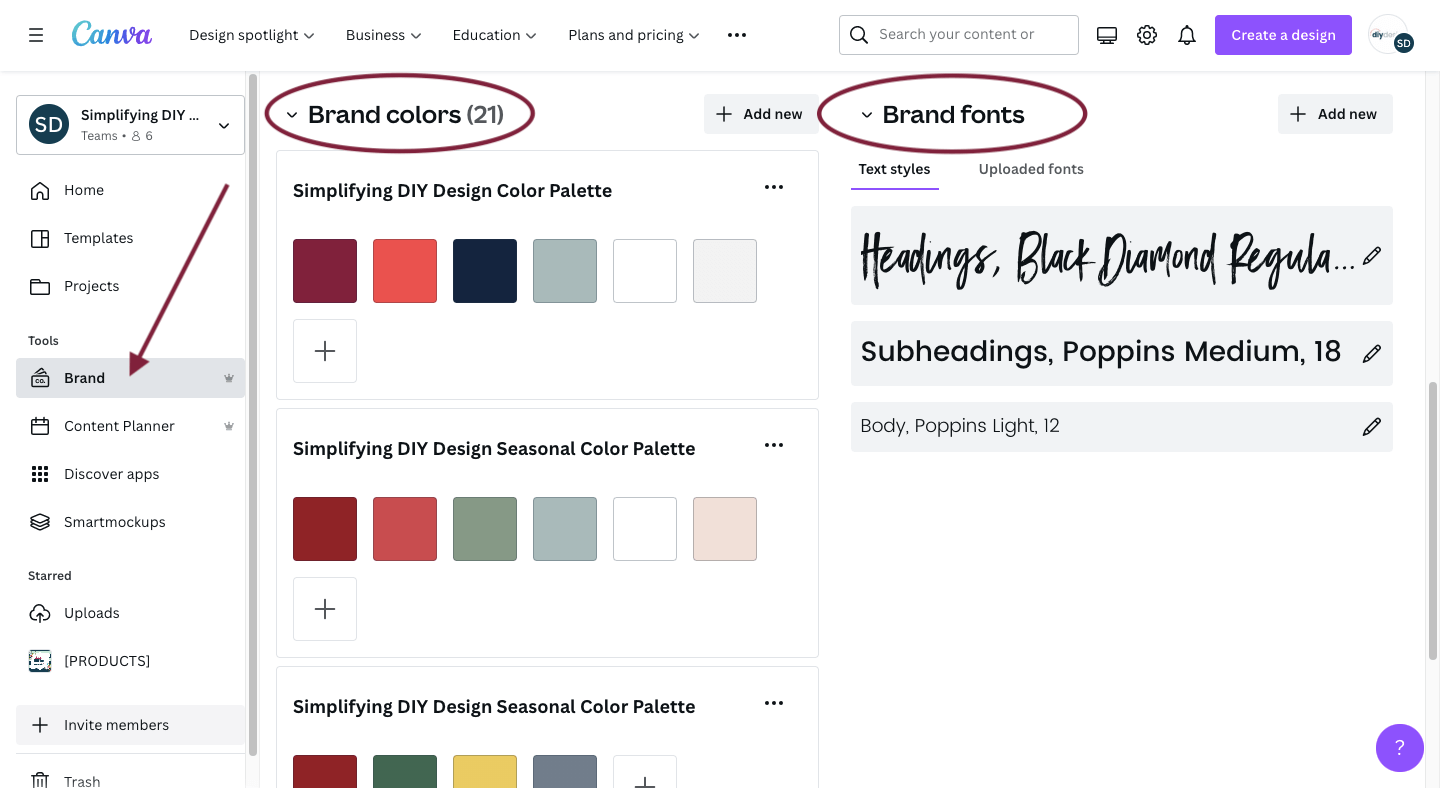
What we really like about this Canva Pro feature is that we can keep our holiday color palette separate from our main brand’s colors.
Related Post: How to Choose Brand Colors For Your Blog
You can even segment your complimentary colors and frequently used colors for clients or alternative products.
That’ll come into use here in just a minute.
Lastly, click on the three horizontal dots to the right of your palette title to reorder, copy, or delete.
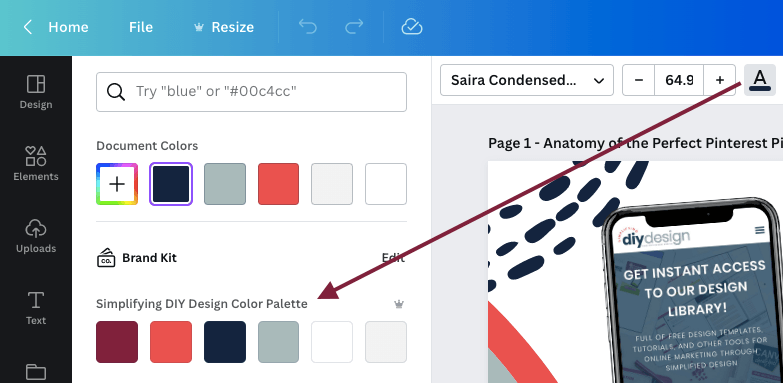
And here’s what it’ll look like in a design project once you add your color palettes to your Brand Kit.
BRAND FONTS
This Cana Pro feature allows you to select which fonts you want for specific sizes.
Having a baseline does help with quick placement, but we wouldn’t stress about it too much since it varies based on your design.
We only have two brand fonts for Simplifying DIY Design – Black Diamond and Poppins. We generally recommend no more than three brand fonts, anyway.
Related Post: How to Rock Your Fonts with These Typography Tips
Since Poppins can look vastly different based on the size of a design, we uploaded different varieties, including Light and Medium.
Canva has since added Thin, Regular, and ExtraBold. Bonus points: we now have the complete Poppins set!
If you’re in the blog branding stage, we highly recommend these design generators to help you create the perfect brand.
We even use them for certain design projects, too!
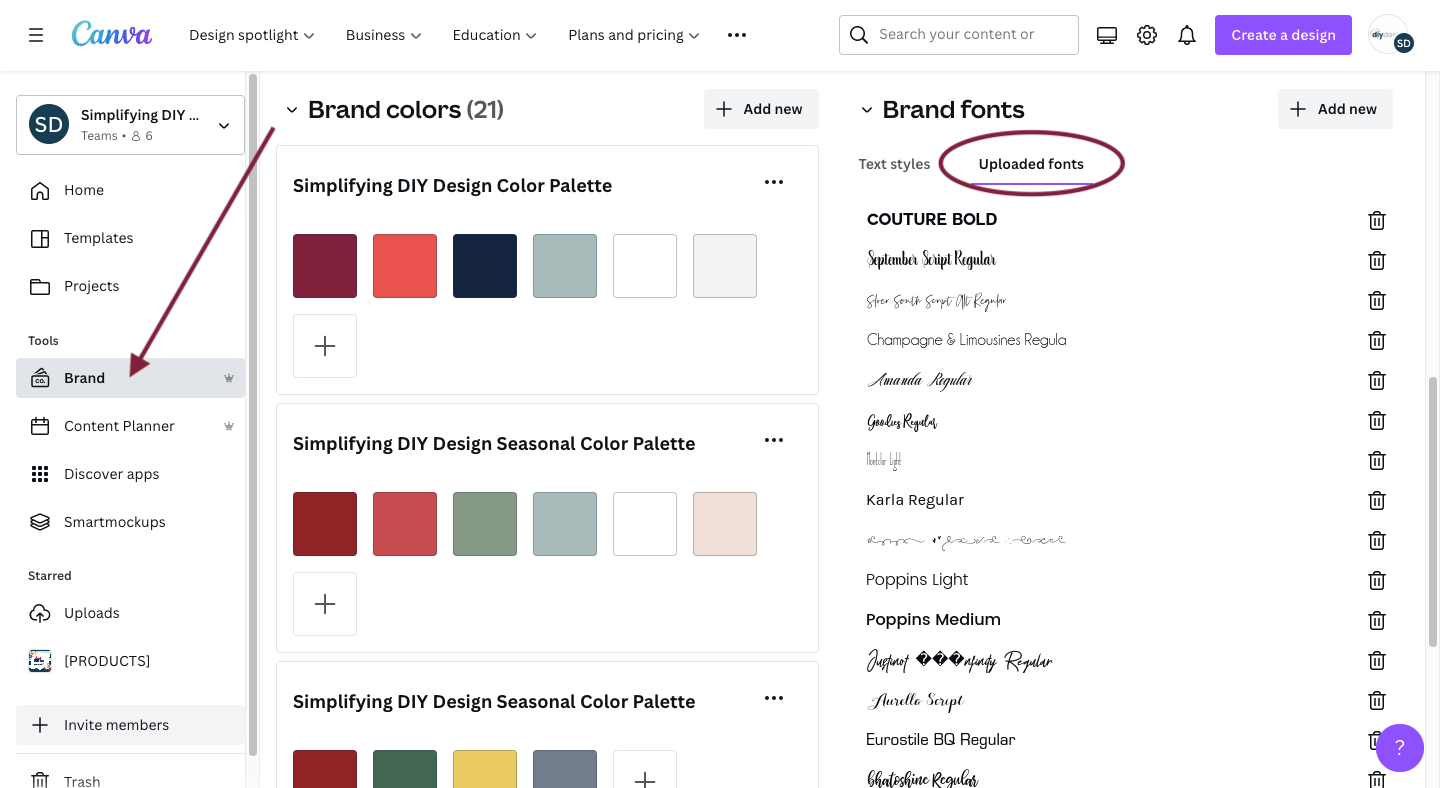
To edit your uploaded fonts (regardless if they’re your brand fonts), click ‘Uploaded fonts’ to the right of ‘Text styles.’ Here, you can add/delete without interfering with your ‘Text styles.’
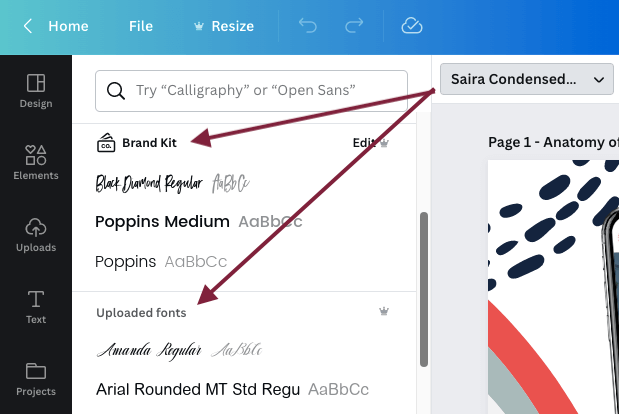
Here’s what it’ll look like in your design project once you add your fonts to your Brand Kit and any additional uploaded fonts.
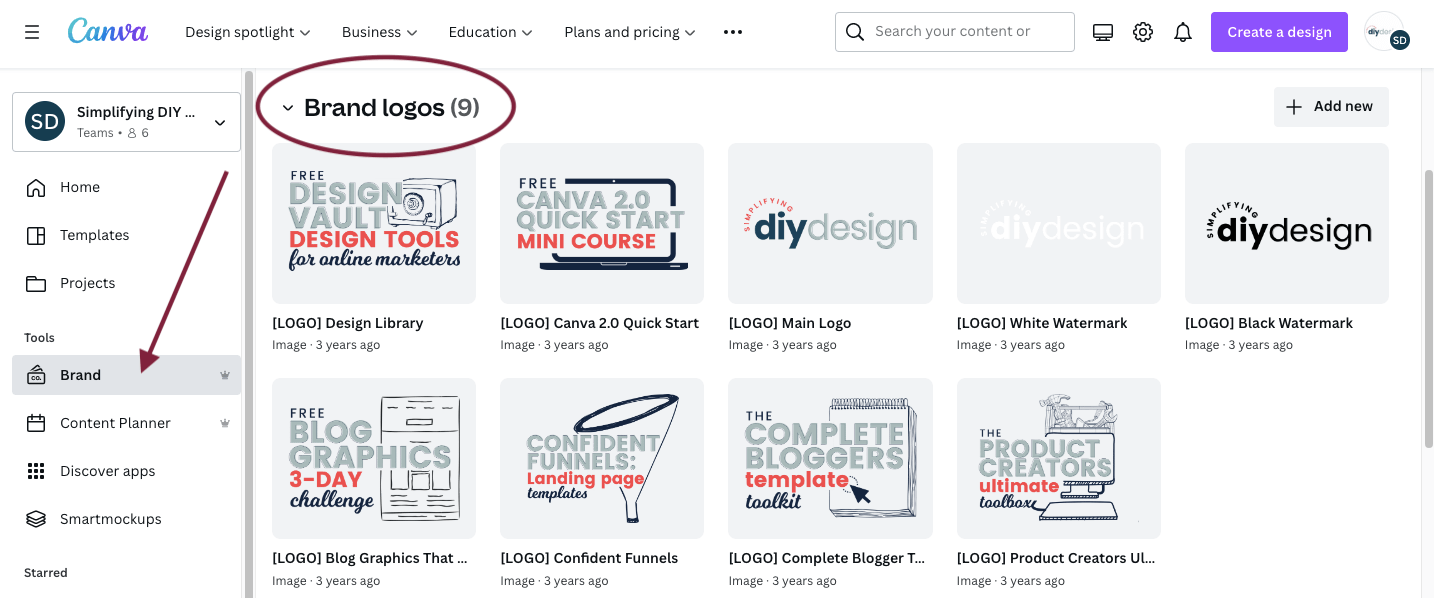
BRAND LOGOS
Use this Canva Pro feature to add any and all logos. We’re talking main, alternate, watermark, products, the works!
If you don’t have watermarks yet, no worries! We used to use them pretty regularly on our Pinterest pins. But now they’re used on certain graphics for copyright protection/prevent theft.
Product logos aren’t necessary, either. But if you have them, add ’em! We use ours in promotional material and email signatures, so having them readily available has come in handy.
To add Brand logos, click ‘+ Add new’ on the right and upload away.
If you still haven’t found the perfect logo, be sure to check out our Five-Minute Brand!

You’ll get instant access to 40 complete (editable!) brand kits PLUS matching Canva templates to brand your blog. It’s truly lived up to its name if we do say so ourselves!
BRAND TEMPLATES
This spot holds all of your brand templates, so you’ll never accidentally design over your original!
We’ve done that a few times with our course mockups before using this Canva Pro feature. It was a hard lesson learned. But hey, now we know!
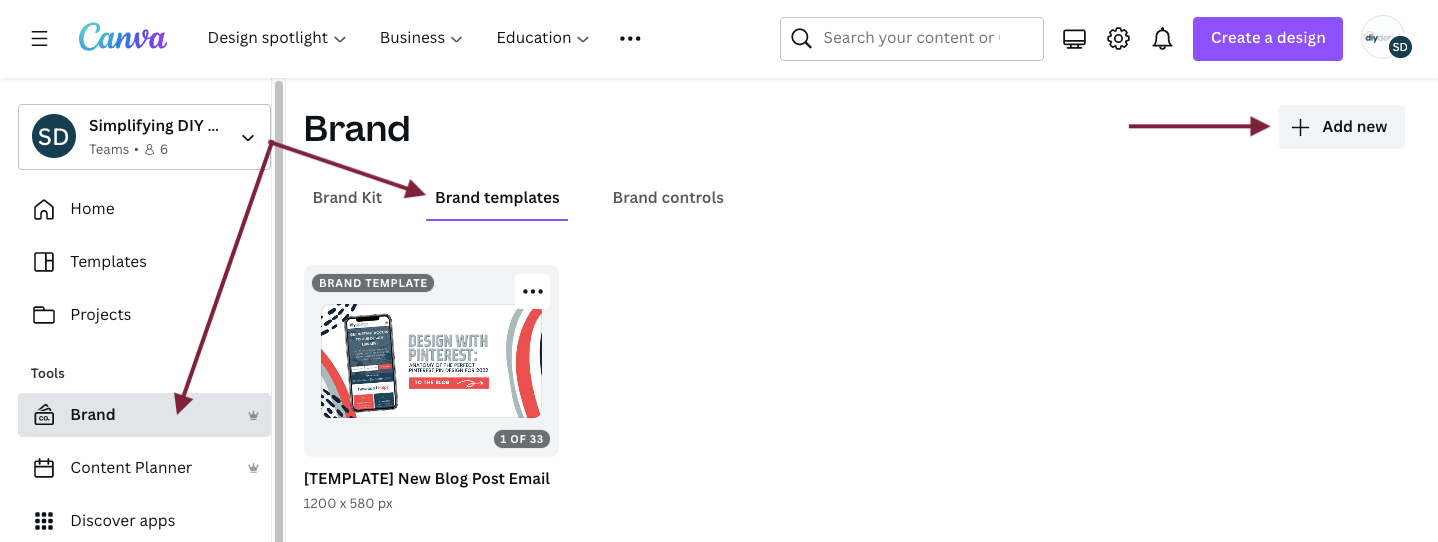
To add a design to your Brand templates, you can either click ‘+ Add new’ from the top right or click ‘Share’ –> ‘Brand template’ from within the design itself.
It’ll now have a ‘BRAND TEMPLATE’ designator regardless if you’re in your Brand Kit or on the Home page, which we love.
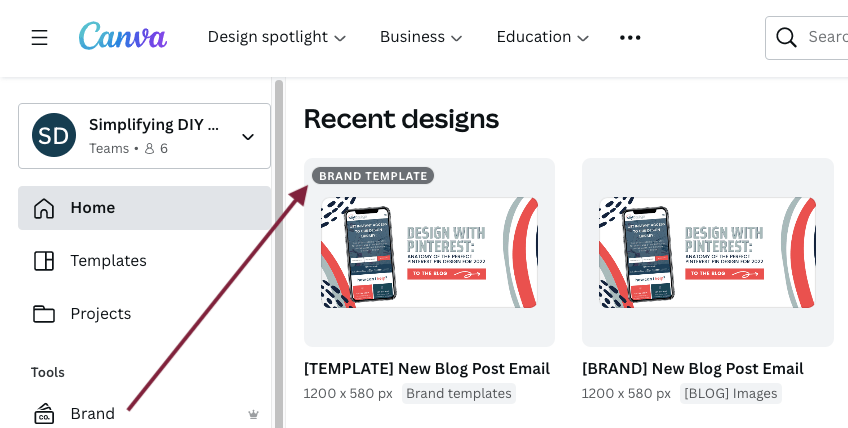
What makes this particular Canva Pro feature even cooler is that when you click on a ‘BRAND TEMPLATE,’ a pop-up appears asking if you’d like to use it as a template or edit the original.
It’s just another added layer of protection, preventing an instant stress headache when you realize you unintentionally edited your template yet again.
BRAND CONTROLS
If you have a team, this Canva Pro feature is for you! Remember when we said segmenting your color palettes would come in handy later on in this post? Here’s what we mean.
With Brand controls, you can limit your team’s access to specific color palettes and fonts, so it’s important you have a dedicated brand color palette.
We forgot to toggle the ‘Color control’ box when we onboarded a new assistant designer. Well, they ended up creating about 30 designs using the wrong color palette. Again, now we know for next time.
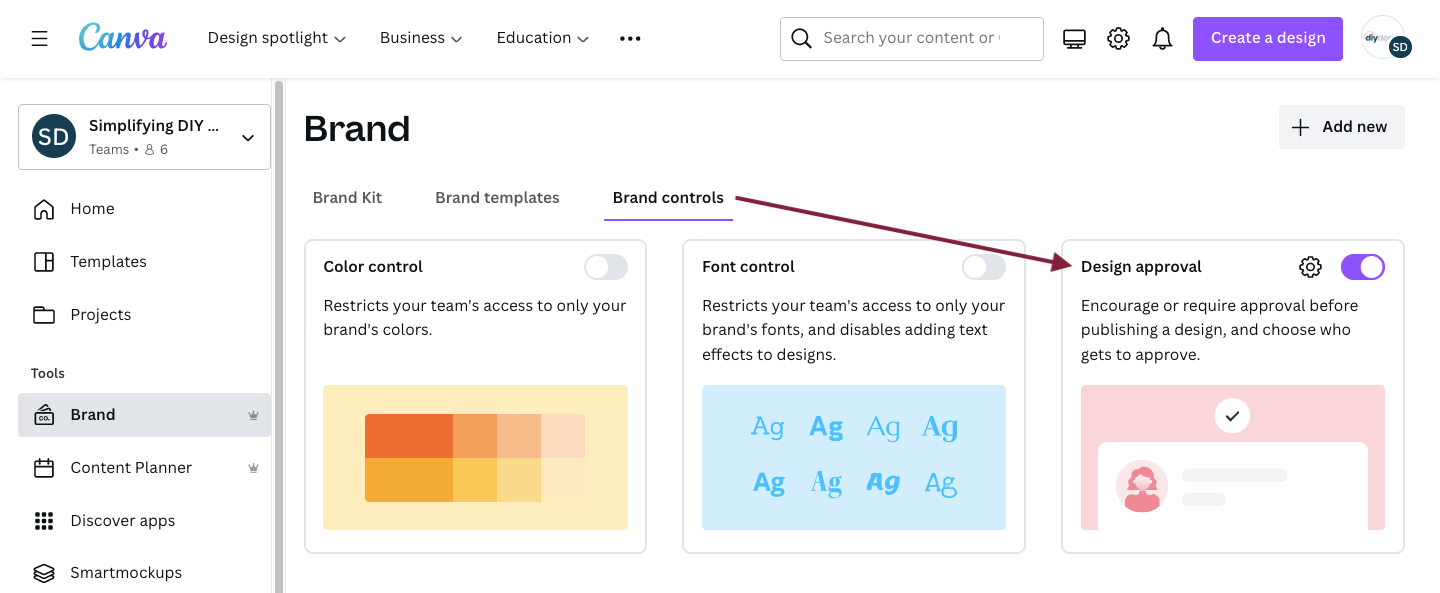
But what’s REALLY cool for anyone with a team is our ability to require ‘Design approval!’
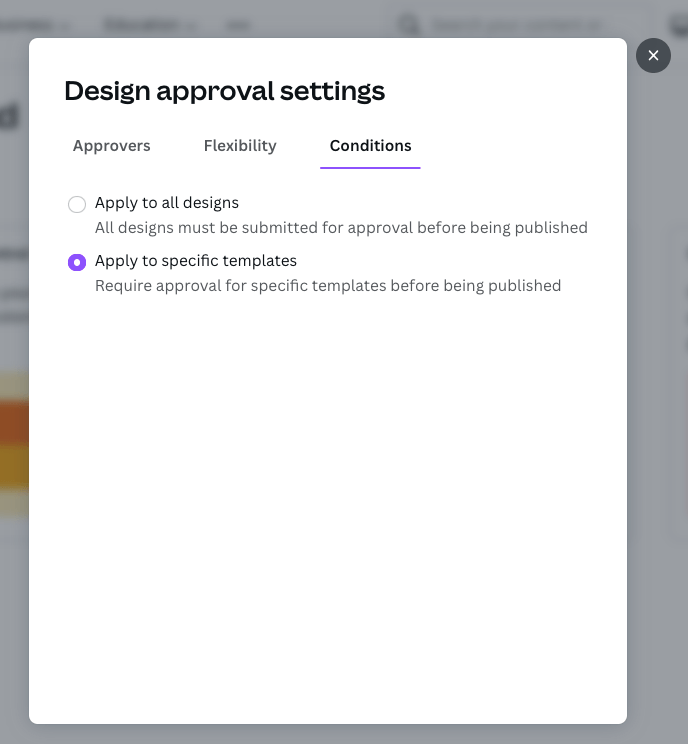
Once you toggle ‘Design Approval,’ select the cogwheel icon to customize:
- Approvers (who is able to approve designs)
- Flexibility (either approval is required or encouraged)
- Conditions (applies to ALL or specific designs)
This is hands down the most exciting Canva Pro feature because we can ensure our designs are on brand before they’re scheduled to social media, uploaded to Pinterest, or added to any of our products.
Before, we were either using email or Asana to communicate approval/changes.
While that’s not a bad thing, it did take extra time flipping from one thing to the next, logging in, going back to our email to say it’s good to go, etc.
FOLDERS
Prior to mid-2022, free Canva users were limited to just two folders. Both free and Canva Pro users can now have unlimited folders (and subfolders), which is a type-A blogger’s dream!
We love to organize our designs based on categories to, you guessed it, save time.
Here’s an example of how we organize our designs with Canva folders.
[PRODUCTS] folder –> individual [Product Name] subfolders –> individual folders for promo graphics, seasonal graphics, testimonials, product templates, etc.
LIBRARY OF PREMIUM ASSETS
While this Canva Pro feature isn’t necessarily something you need to set up like we just did with our Brand Kit, we want to ensure you know how to ‘save’ your favorite premium assets for quick reference.
We guess if you really think about it, you’re still technically setting up your workspace, so we’ll roll with it!
If you find a stock image, design element, or anything else from Canva’s extensive library (except audio), you can either ‘Star’ it or ‘Add to folder.’
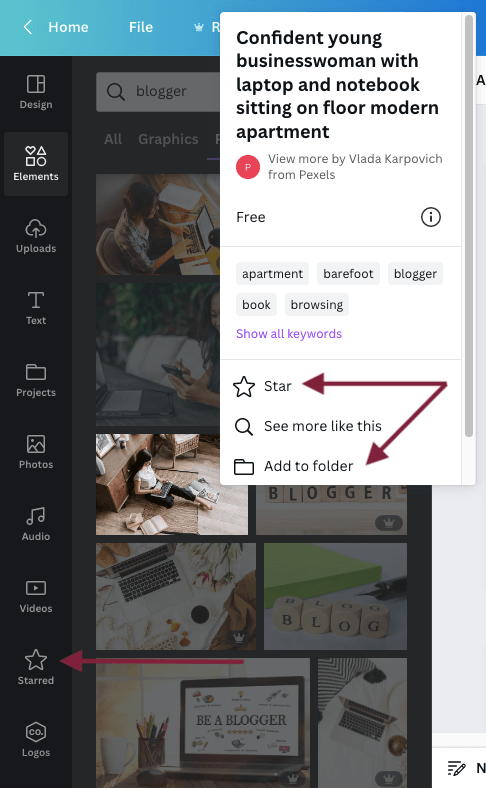
Starring sends that specific asset to your ‘Starred’ folder from your left menu. But if you want to take your organization up a notch, you can click ‘Add to folder’ and add it to, let’s say, a designated Stock Photos folder.
To add your Stock Photos folder to your left menu, click ‘Projects’ –> ‘Folders’ and again on your Stock Photos folder.
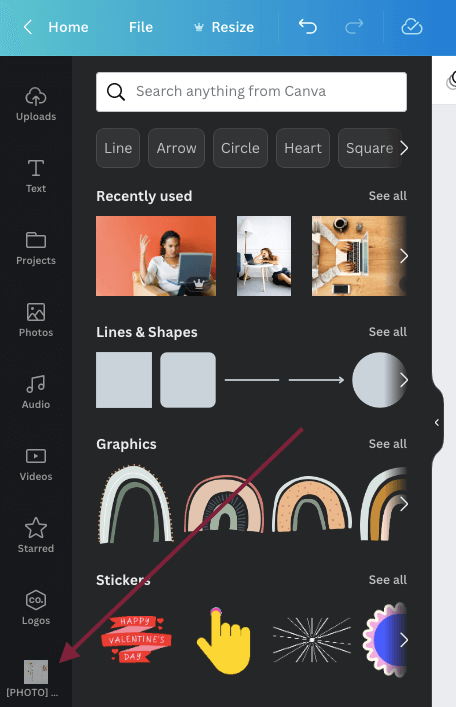
Now when you need to add a stock photo to your Pinterest pin design in Canva, that folder is now saved to your left menu for you to access with just one click!
If we just blew your mind with everything that Canva Pro has to offer, you’re going to LOVE our complete Canva course, Confidently Canva!
It’s EVERYTHING you need to know to feel completely confident in your designs because now you truly understand the tool you’re using and the design concepts involved.
Enroll now and get $20 off Confidently Canva today!
Other non-negotiable Canva Pro benefits for bloggers are:
- Downloading transparent images
- Smartmockup library of +8000 mockups
- FULL access to high-quality stock photos, videos, graphics, and audio
- Thousands of drag-and-drop templates in a variety of styles
- Instant graphic resizing
- Wide selection of page, text, and graphic animations
- Schedule straight to Instagram, Facebook, and more right from Canva
Speaking of other awesome Canva Pro features, make sure you check out these awesome Canva Shortcuts to help you design faster!
It’s the little things when it comes to Canva Pro features
Just like how extra change can add up, the same holds true for little time-saving features you’ll find with Canva Pro.
Your logo, colors, and fonts will only be a click away by setting up your Canva Pro account the right way.
Stop wasting time scrolling through your hundreds (if not thousands of Uploads), searching to no avail, and looking up hex codes to that one seasonal design you created ages ago.
And if saving time isn’t your cup of tea, but saving money is, how about this? We cut ALL of our stock photo memberships once we upgraded to Canva Pro.
We’re not going to drop any names, but we had annual memberships to three different (premium) stock photo memberships that, let’s just say, were NOT cheap.
It was upwards of $700/yr that we slashed from our budget just by upgrading to Canva Pro’s annual plan. Now, will this work for EVERY niche? Probably not.
But there’s a plethora of tech-style photos that are perfect for our brand.
And if we can put those hundreds of dollars into other things like ad spend or monthly site support, that’s a HUGE win for us.
Check out these Canva Pro features yourself with a FREE 30-day trial of Canva Pro. The only you’ve got to lose is time!
RESOURCES MENTIONED IN THIS POST:
- How to Choose Brand Colors For Your Blog
- FREE 30-day trial of Canva Pro
- Confidently Canva
- Canva Shortcuts to Help You Design Faster
- 3 Easy Canva Resize Tricks for 2024
Don’t forget to enroll in our FREE self-paced Canva 2.0 Quick Start course! It’s PERFECT for learning the ins and outs of what makes Canva the best design platform for bloggers!
TRY CANVA PRO FREE FOR 30 DAYS
Start your FREE Canva Pro trial today and unlock ALL of their incredible time-saving features that cut your design time to just minutes.
To be honest? It’s the best $14.99/mo OR $119/yr we spend on our business because that time we save with every design is put back into making MORE money in our business!

Leave a Reply