Let’s talk about how bloggers can (and should!) create multiple pins to drive blog traffic to blog posts, sales pages, opt-in pages, and MORE!
When creating our business plan for Simplifying DIY Design, we knew that once we got a reader to our site, our avatar-driven content and lead magnets would easily get them on our email list.
Until our SEO efforts with Google would kick in (which can feel like forever on a brand-new site), we decided to focus on a traffic source we were VERY familiar with as consumers; Pinterest.
Turns out, Pinterest was the fastest way to get traffic to our blog.
Want to level up your Pinterest content with video pins? Grab our pack of FREE Canva video pin templates NOW and start designing!
Instead of pumping out new blog posts every other day, we centered on quality content our audience wanted to learn more about.
This helped us experiment with different pin titles to provide variety and boost our click-through rates (CTR).
In turn, we created anywhere from 7-10 Pinterest pins PER blog post.
That was much more manageable for us than publishing multiple blog posts a week PLUS designing a pin to go along with it.
WANT TO SAVE THIS POST FOR LATER? BE SURE TO PIN IT!
Not only that, we learned to be really strategic about the entry points to our blog sales funnels.
We designed Pinterest pins for other areas of our blog, including opt-in pages for our freebies and sales pages for our paid products.
One of the ways we were able to create so many pins in such a short amount of time was by using templates.
And yes, we use the exact Canva Pinterest pin templates from our MEGA Pinterest Template Bundle (+PLUS get $20 OFF)!
Before we get into the nitty-gritty, let’s dive into why you should have multiple pins for a single blog post.
Table of Contents
WHY HAVE MULTIPLE PINS?
Having multiple pins per blog post is a great way to continuously add new content to Pinterest without spreading yourself thin by writing new blog posts on a regular basis.
We’re not saying you need to stop new content altogether.
It’s just that there are some seasons of blogging (like during a launch or creating a digital product) that can be overwhelming if you’re trying to do all the things.
That being said, there are some other reasons why you may want to create multiple pins for not only your blog posts but your landing pages as well:
- VARIETY: Switching up the design/title could be the difference between a viral pin and a flop
- REFRESH: Great way to revive old content, especially if recently updated
- VISIBILITY: Increases the number of times your content is on Pinterest
CREATE VARIETY FOR PINTEREST USERS
We can’t tell you how many times we for sure thought a certain Pinterest pin design or title would take off, only to find out that it was our least favorite that is atop our ‘Top Pins.’
Thank goodness we changed the style and title of our Pinterest pins (How to Create a GIF to Promote a Digital Product vs. Canva How To: Create an Animated GIF to Promote Your Freebies), or else we may have missed out on thousands of visitors to our site!
EASY WAY TO FRESHEN UP OLDER CONTENT
We simultaneously created new Pinterest pins as we updated older content to bring traffic back to those posts.
This was especially helpful for our content with outdated Pinterest pins and blog post titles.
Related Post: Anatomy of the Perfect Pinterest Pin Design
No one’s going to click on a Pinterest pin that’s titled “Best Tools to Start a Blog in 2018,” but they’ll definitely want to learn more about “Best Blogging Tools for Beginners 2023.”
MORE PINS MEANS MORE VISIBILITY
What would you rather have, one billboard promoting your business or several?
By adding multiple pins to Pinterest (using different styles and titles), we can easily expand our reach to give our blog posts an extra boost in traffic.
HOW TO UPLOAD MULTIPLE PINS TO PINTEREST
The two most popular ways to upload multiple pins to Pinterest are using Pinterest’s native scheduler and Tailwind.
There are other third-party schedulers, such as Canva, Later, and Planoly, but we prefer Tailwind for its analytics and ease of use.
Keep in mind your first 100 pins on Tailwind are free. You must upgrade to Pinterest Plus ($14.99/mo or $119/yr) for UNLIMITED scheduling.
UPLOAD DIRECTLY TO PINTEREST
If you don’t want to pay for a Pinterest scheduler, you’ll have to do manual labor by uploading directly to Pinterest.
Honestly, the time we save by using Tailwind far outweighs the cost.
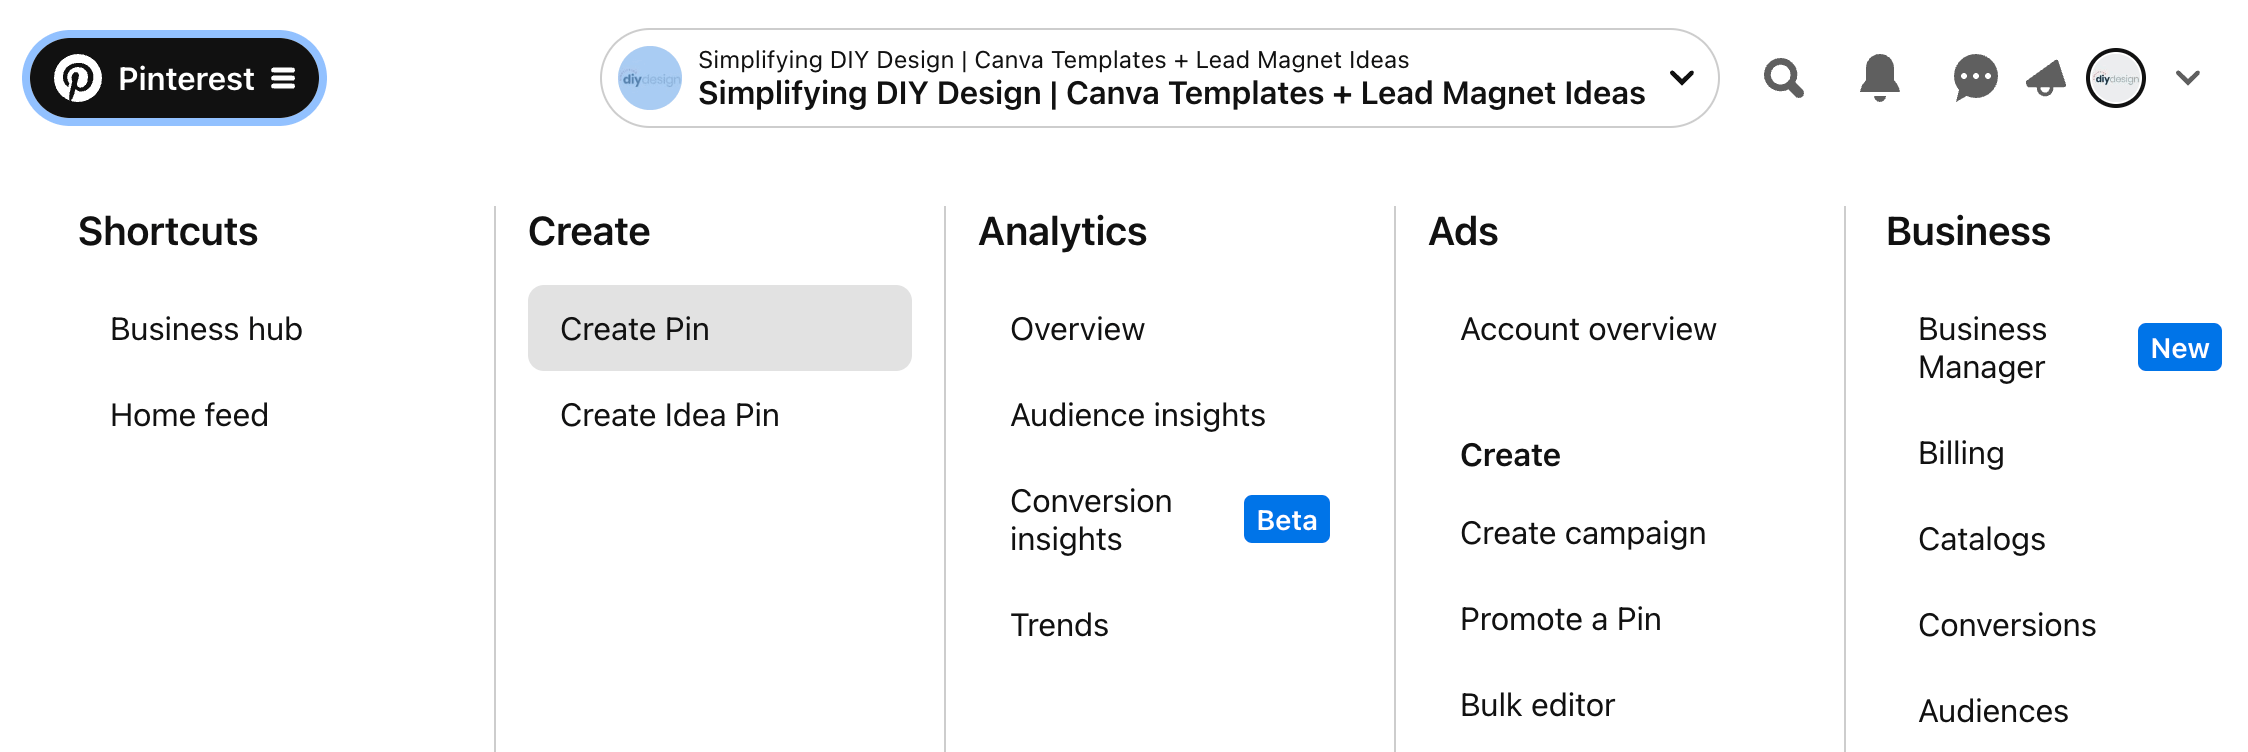
Head to Pinterest and select the dropdown in the top left-hand corner. From there, click ‘Create Pin’ under the ‘Create’ category.
Here, you can upload your Pinterest pin and add your pin title, description, and link.
Add multiple pins by clicking the ‘plus’ icon at the top left.
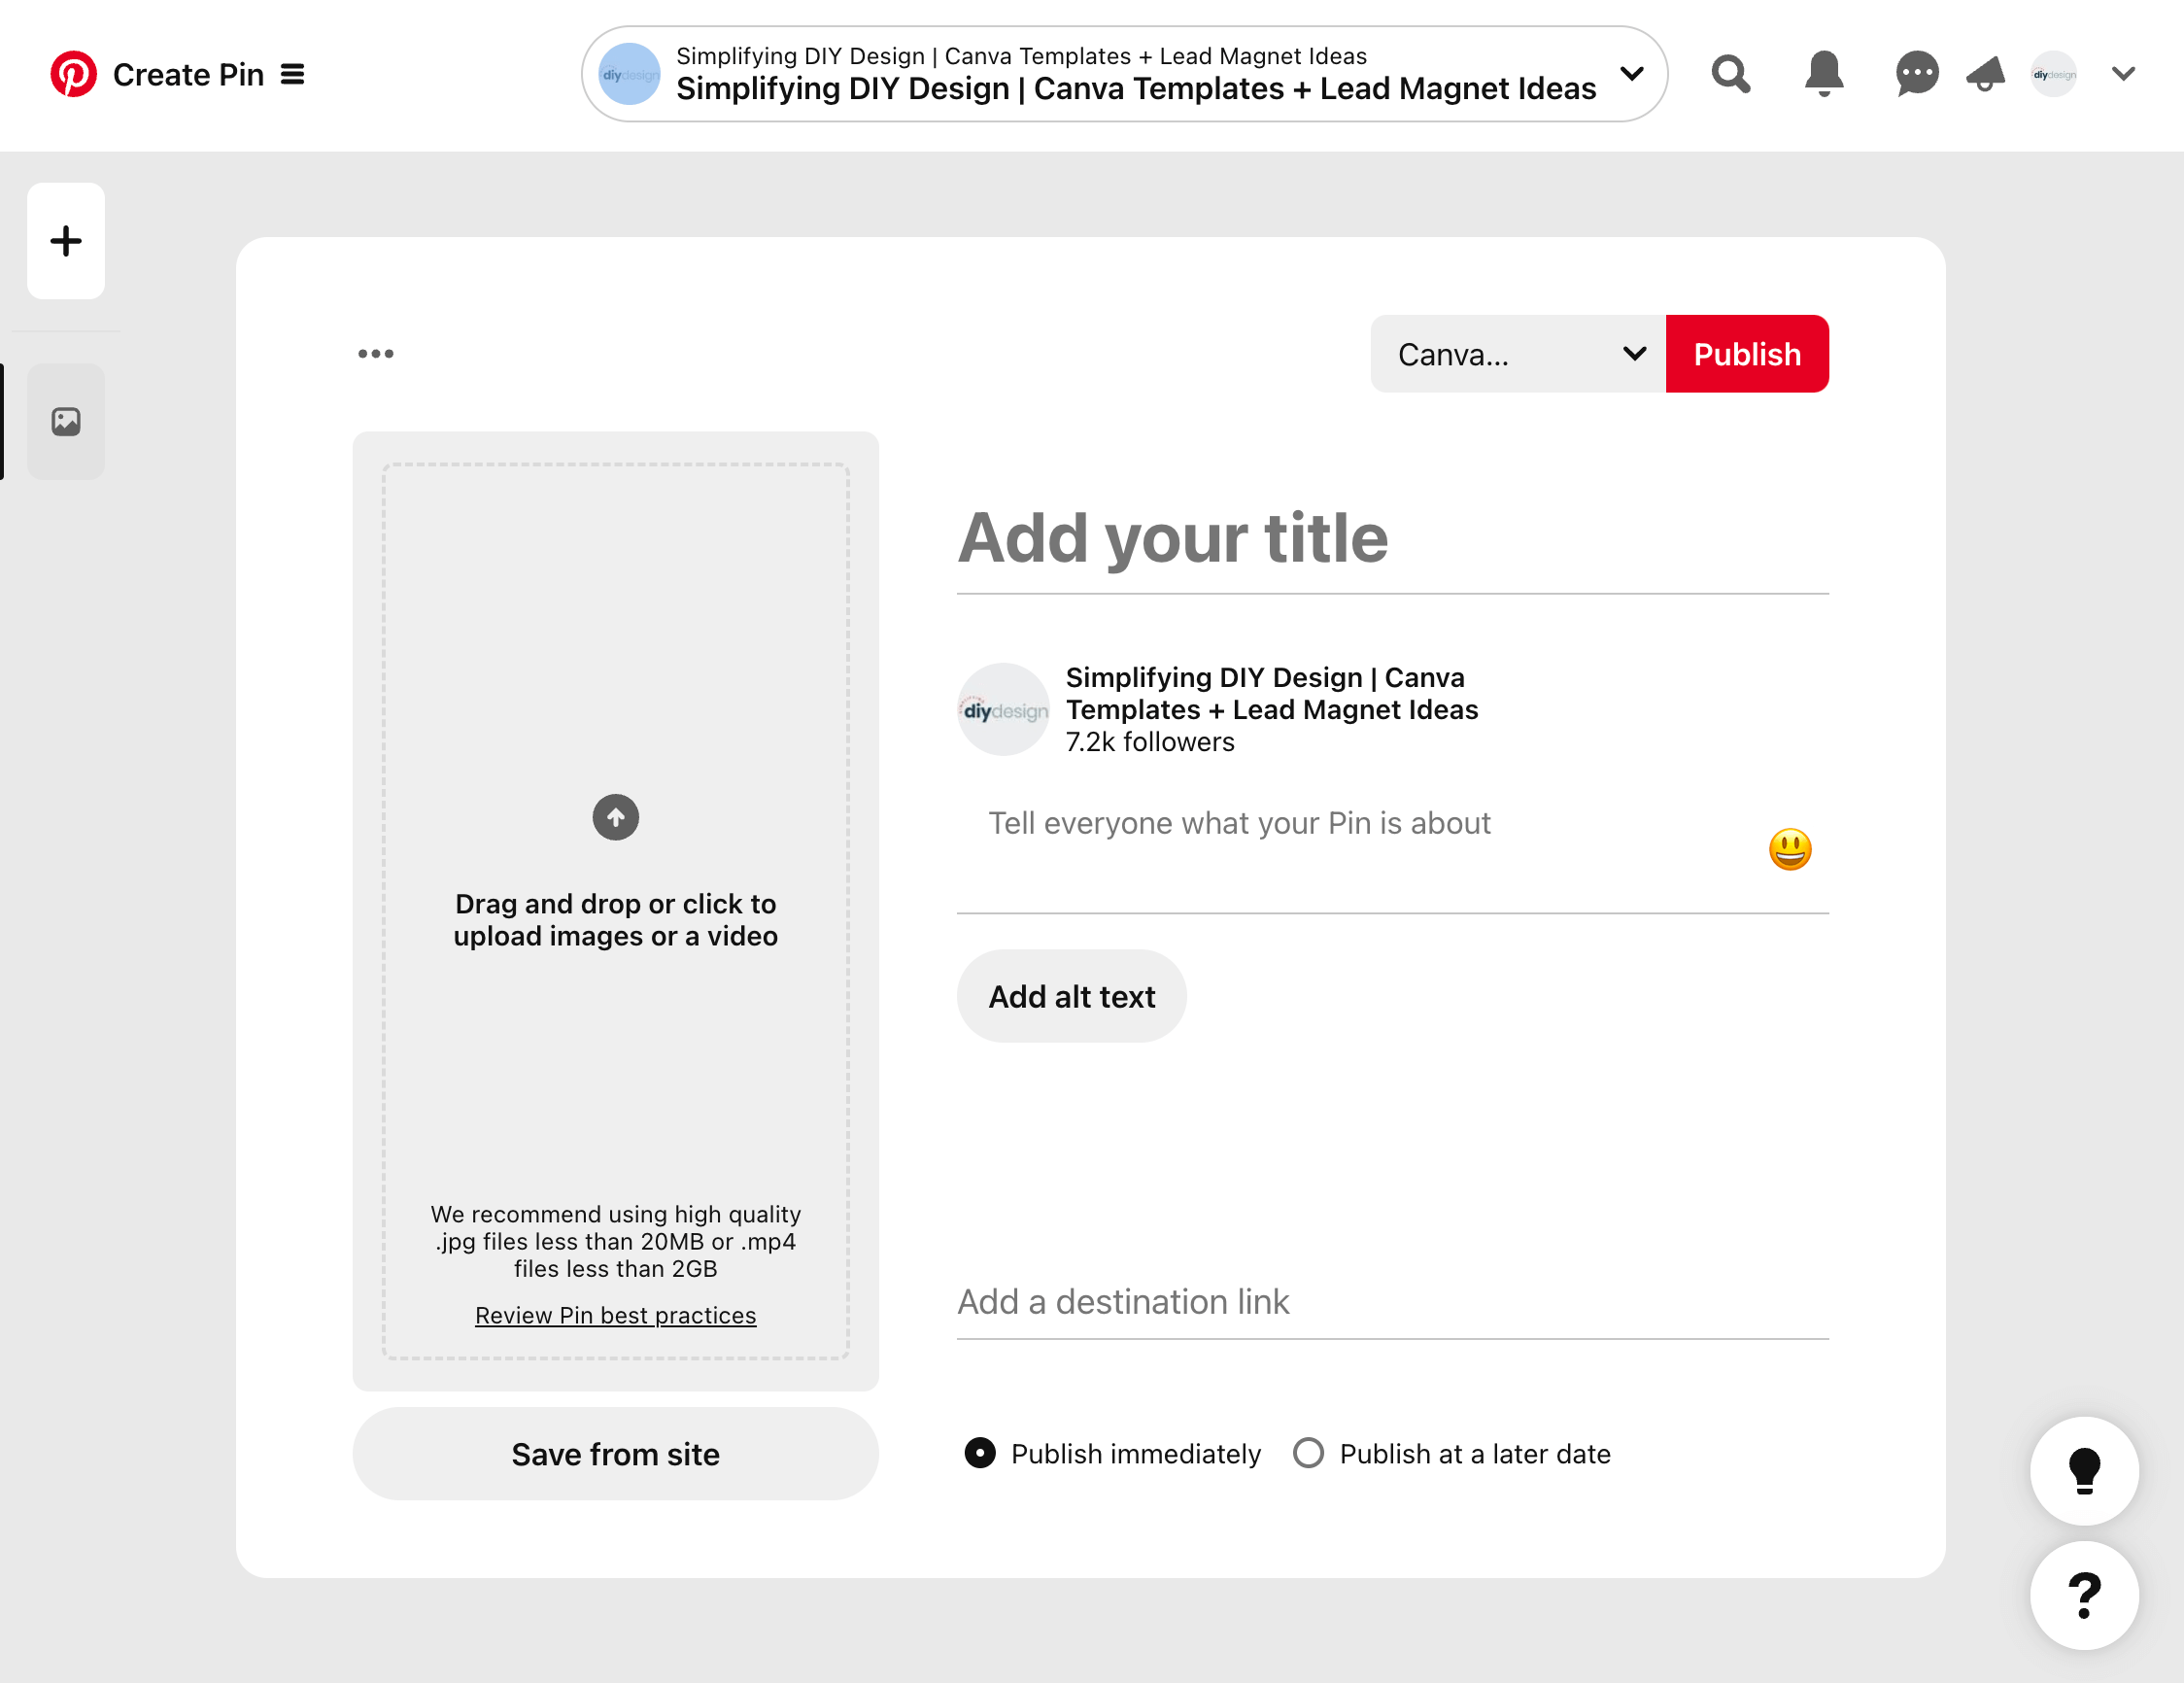
Lastly, choose the board you’d like to pin and either select ‘Publish immediately’ or ‘Publish at a later date.’
UPLOAD PINS TO TAILWIND
As we said earlier, we prefer to use Tailwind over other schedulers because of its analytics and ease of use.
It’s very easy to upload multiple pins and schedule them to post at the most active times.
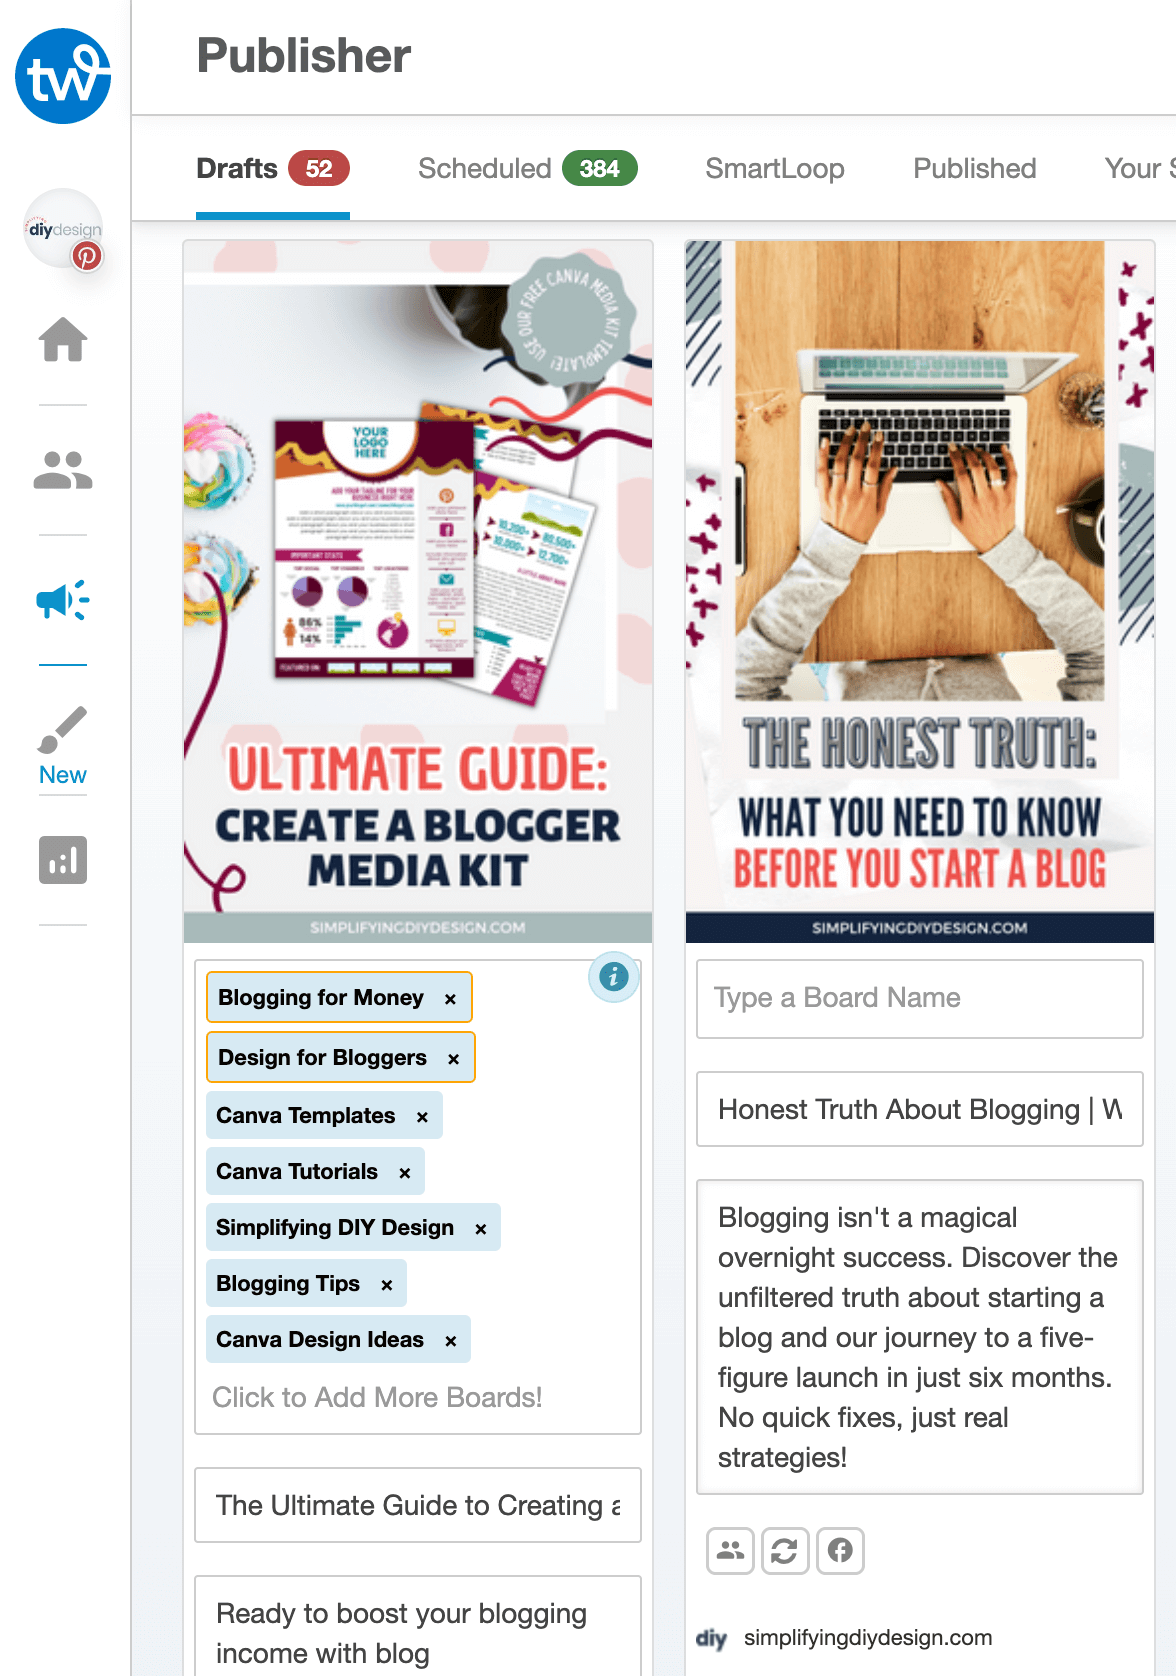
Head to Tailwind and click ‘Publisher’ (speaker icon) from the left menu.

From there, click ‘+ Create new pin’ just above your scheduled content on the right. Select ‘Upload photos/videos’ and add as many pins as you have available.
We batch as much work as we can, so we’re usually uploading dozens of Pinterest pins at a time.
- ALWAYS click ‘Save’ if you can’t schedule right away
- Add in the title, description, and link FIRST
- Do NOT choose your boards unless you’re ready to schedule
If you choose your boards first, Tailwind will essentially duplicate that pin for every board, creating additional work for you.
Let’s say we have 10 Pinterest pins that we want to add to 5 boards.
If we do the title, description, and link FIRST, we’ll only have to add content to the original 10 Pinterest pins.
But if we choose the 5 boards first, we’ll have 50 Pinterest pins that will need the title, description, and link. 10 is much better than 50, isn’t it?
PINTEREST TIP: To provide even more variety to your Pinterest pins, ask ChatGPT to “Write 4 Pinterest pin descriptions using this text” and then paste the contents of your blog post. Don’t forget to tweak the descriptions to fit your brand voice!
Combined with ChatGPT (for our Pinterest pin descriptions), we scheduled 100+ pins using Tailwind in just one afternoon.
UPLOAD DIRECTLY TO A BLOG POST
Don’t forget to add at least one Pinterest pin to your blog post.
We’ve come across so many amazing articles (both personal and professional) that we’d love to pin but don’t have a Pinterest pin.
We’d exit the tab, thinking we’d remember when we needed it later, only to completely forget about it.
There is no right or wrong area to add your Pinterest pin. Do what works best for your brand style and flow of your blog post.
Related Post: Easily Achieve Brand Consistency with Your Blog
We usually add one within the introduction, along with a call-to-action (CTA), and again at the bottom of the post.
Be sure to give your content every fighting chance at being seen!
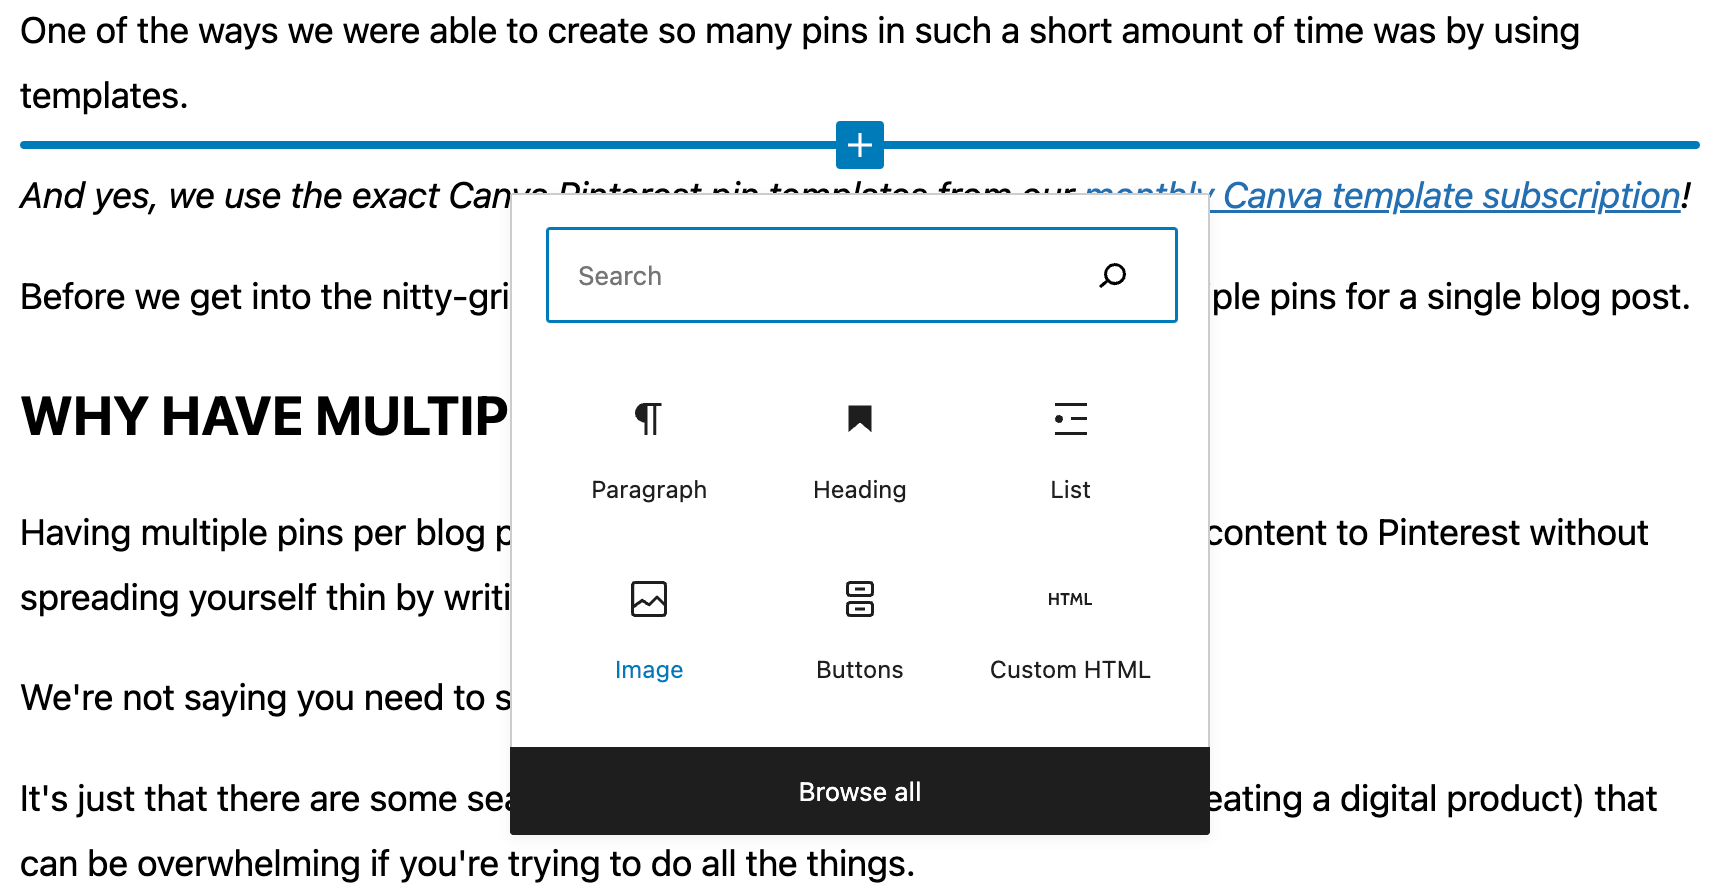
To upload your pin directly to your blog post and you’re using WordPress, click on the ‘Plus’ icon either underneath a ‘block’ or to the right of a blank ‘block’ and select ‘Image.’
From there, you can upload it directly or add it to your Media Library.
SEO TIP: If using Canva, download your Pinterest pin as a JPG with 100% ‘Quality’ AND compress using TinyPNG before you upload to your site!
TYPES OF CONTENT TO PIN AS BLOGGERS
You can create Pinterest pins for SO much more than just blog posts.
People use Pinterest to find a solution to their problems, whether it’s a new knitting pattern, a recipe for picky eaters, learning more about email marketing, or tablescapes for Christmas.
Embrace that knowledge to help spark some ideas using your content!
Here’s a list of popular content you can pin as a blogger:
- Blog posts
- YouTube videos
- Instagram videos
- Podcast episodes
- Opt-in pages (the landing page to sign up for your freebie)
- Sales pages (can be created using Elementor, LeadPages, or ThriveCart)
- Pre-launch content (webinar, challenge, or masterclass sign-up)
- Shop pages (Etsy, Shopify, etc.)
- Individual product pages (sales pages on Etsy or Shopify)
- Affiliate products (follow FTC guidelines and that it’s an affiliate link in the pin description)
- Resource/recommendation pages (page with affiliate resources or related posts)
The pins that lead to our freebie landing pages regularly bring in new visitors turned email subscribers.
Again, our reader is on Pinterest looking for something specific, which is why this strategy works so well versus social media.
Related Post: 5 Reasons Why You’re Not Making Money on Pinterest
People use social media to socialize, take a break from work, or zone out, not to buy or sign up for something.
DESIGN A PIN USING CANVA
It’s SO easy to create Pinterest pins for your blog using a design platform like Canva because it can take just MINUTES.
If you’re not a fan of starting from scratch, we highly recommend our Mega Pinterest Template Bundle, a pack of 65 Canva Pinterest templates for bloggers.
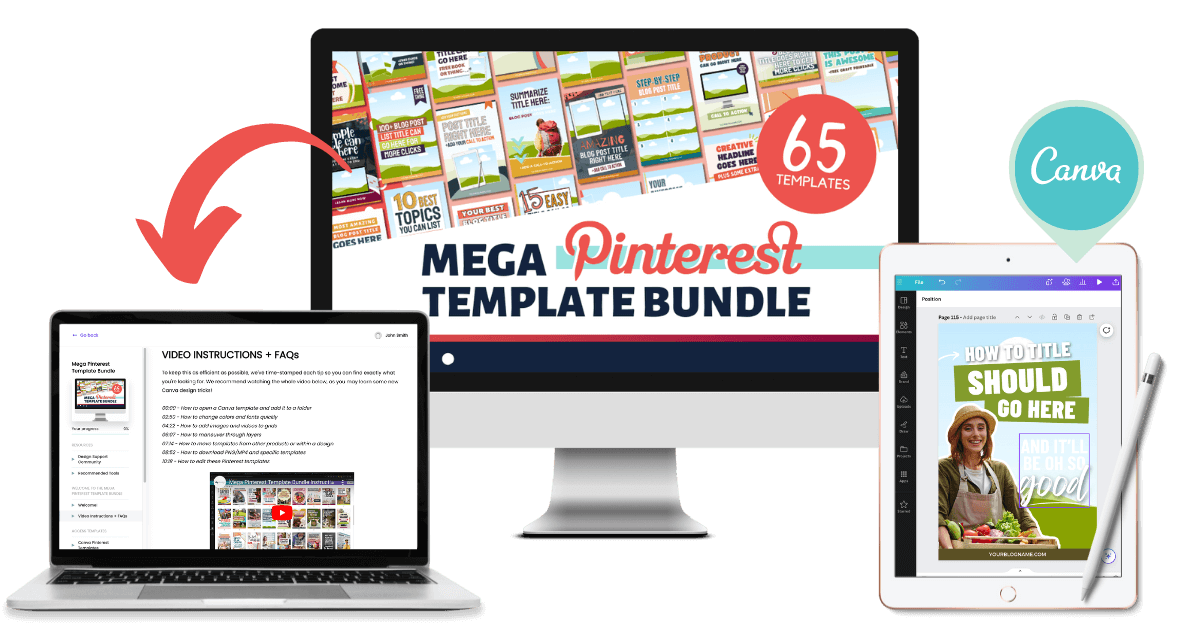
We’ve combined grid, collage, and mockup style pin designs for MEGA variety and MAX conversions! Get it NOW for only $27!
Now, let’s head over to Canva and design a Pinterest pin from scratch.
STEP ONE: Set the dimensions for your pin design
Pinterest prefers a 2:3 ratio (1000 x 1500 px) so that when an image is uploaded to Pinterest, it’s less likely to suffer in quality when compressed. Compression can really blur an image, especially on Facebook.
Select ‘Create a design’ from the top right and type ‘Pinterest’ in the search bar.
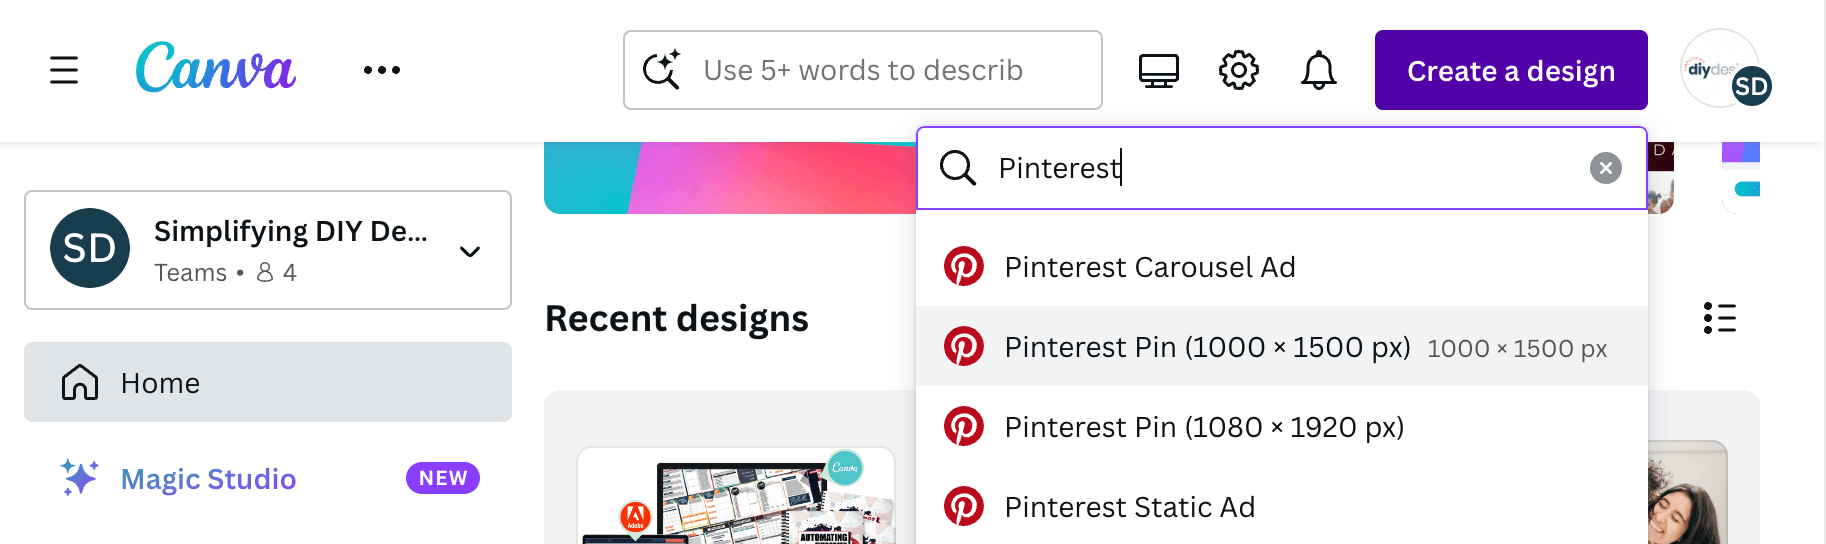
Click ‘Pinterest pin (1000 x 1500px’) from the dropdown to open up a new project.
STEP TWO: Add image related to your post topic
With Canva’s extensive media library, we’re sure you’ll find an image that’s related to your blog post topic.
Select ‘Elements’ from the left menu and use the search bar to find what you’re looking for.
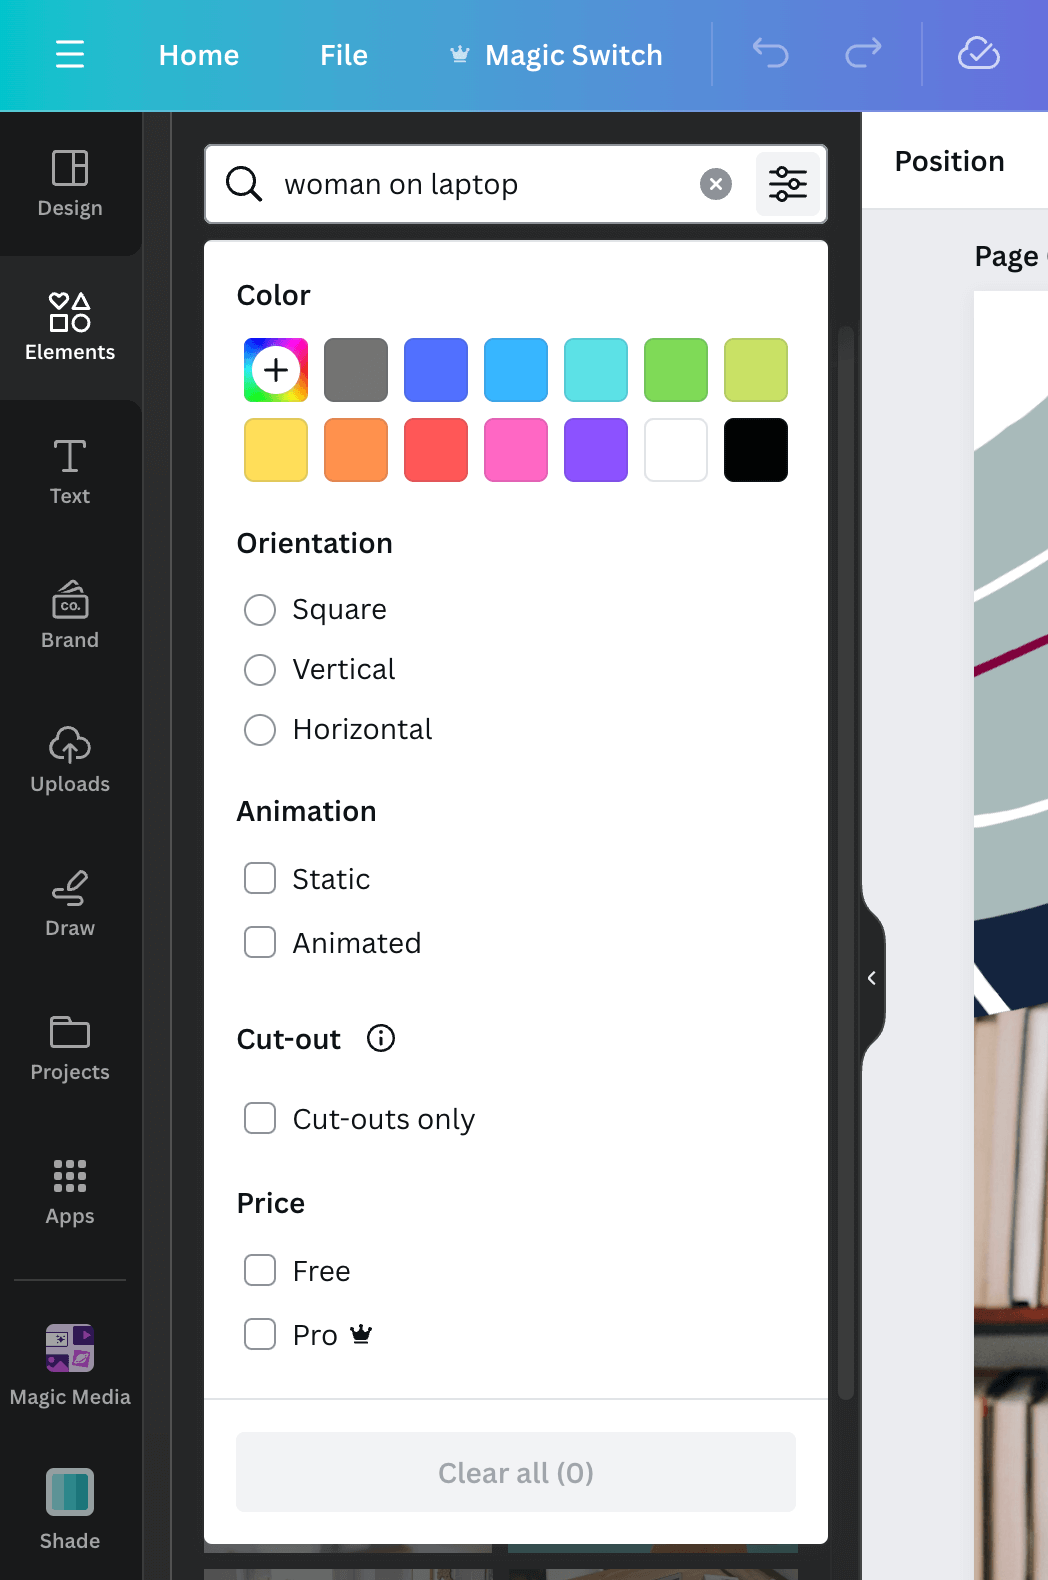
Be sure to click ‘Photos’ directly underneath and again on the ‘filter’ icon to search either free or Pro content, as well as vertical or horizontal photos.
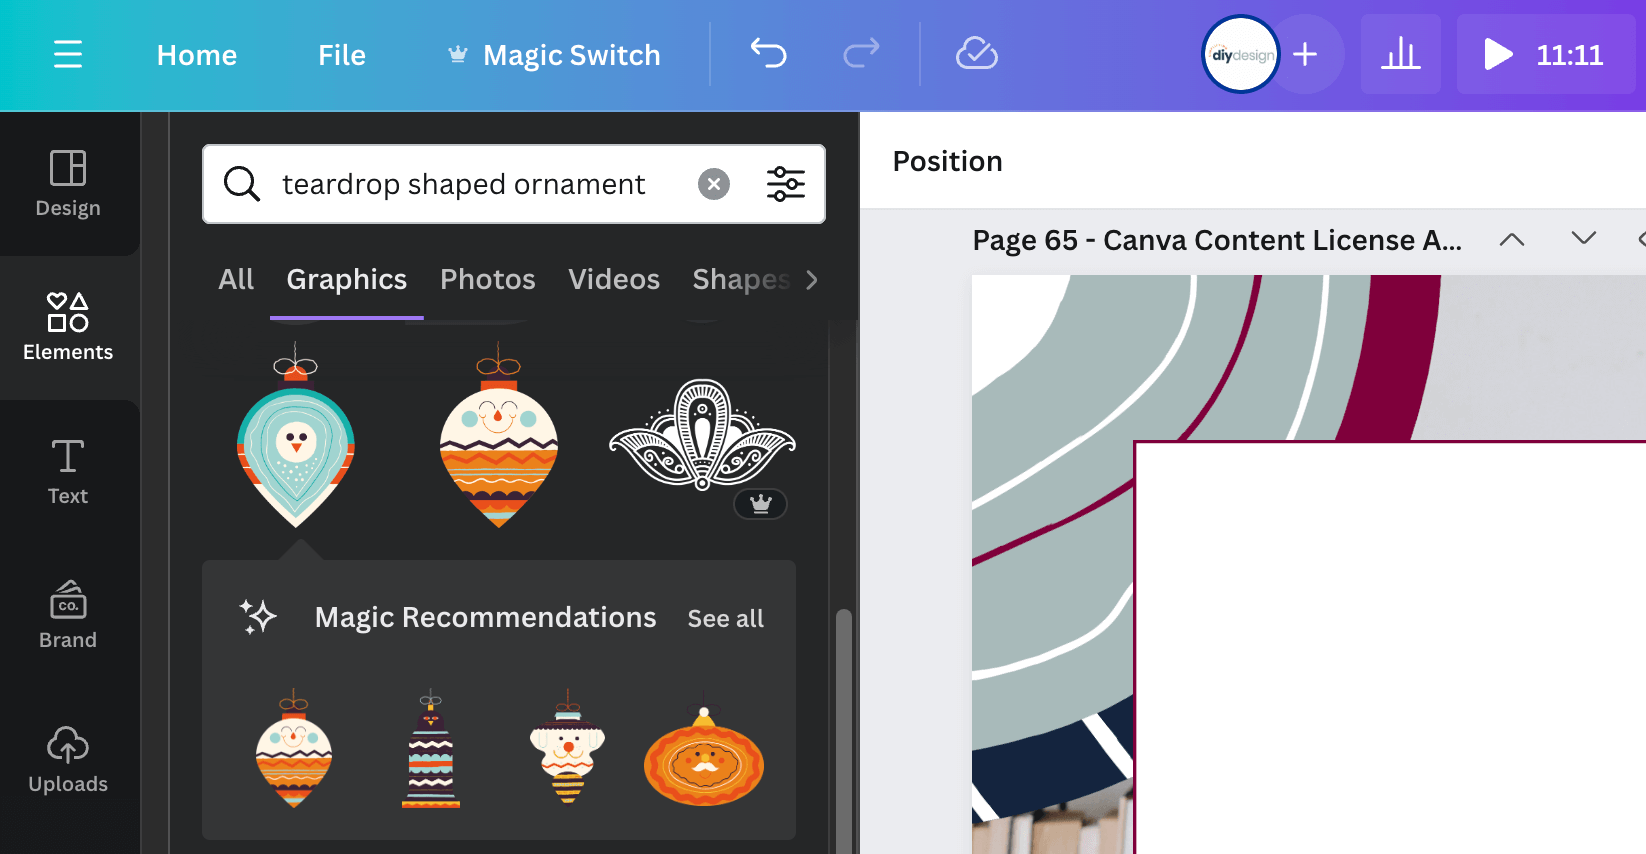
STEP THREE: Include shapes and elements
We love to use fun shapes in our Pinterest pins, but at the very least, be sure to include space for the base of your Pinterest pin title.
Keep in mind that most Pinterest users are on mobile. If your pin title is hard to read because it blends in with your photo, you won’t get any clicks to your website.
The same holds true if your Pinterest pin is too busy or overwhelming.
STEP FOUR: Add headline text for the title
Make sure it inspires YOUR reader to click by piquing curiosity, promoting a transformation, or using power words like ‘easy’ or ‘free.’
Just think of things that YOU click on. What would entice you more?
“30-Minute Cheeseburger Casserole Your Family Will Love” vs “How to Make a Cheeseburger Casserole.”
Related Post: 5 Easy Font Design Tips for Bloggers
Now, having an awesome headline is only half the battle. You need to make sure it stands out and is easy to read.
Pinterest is generally NOT the place for fancy fonts or small text.
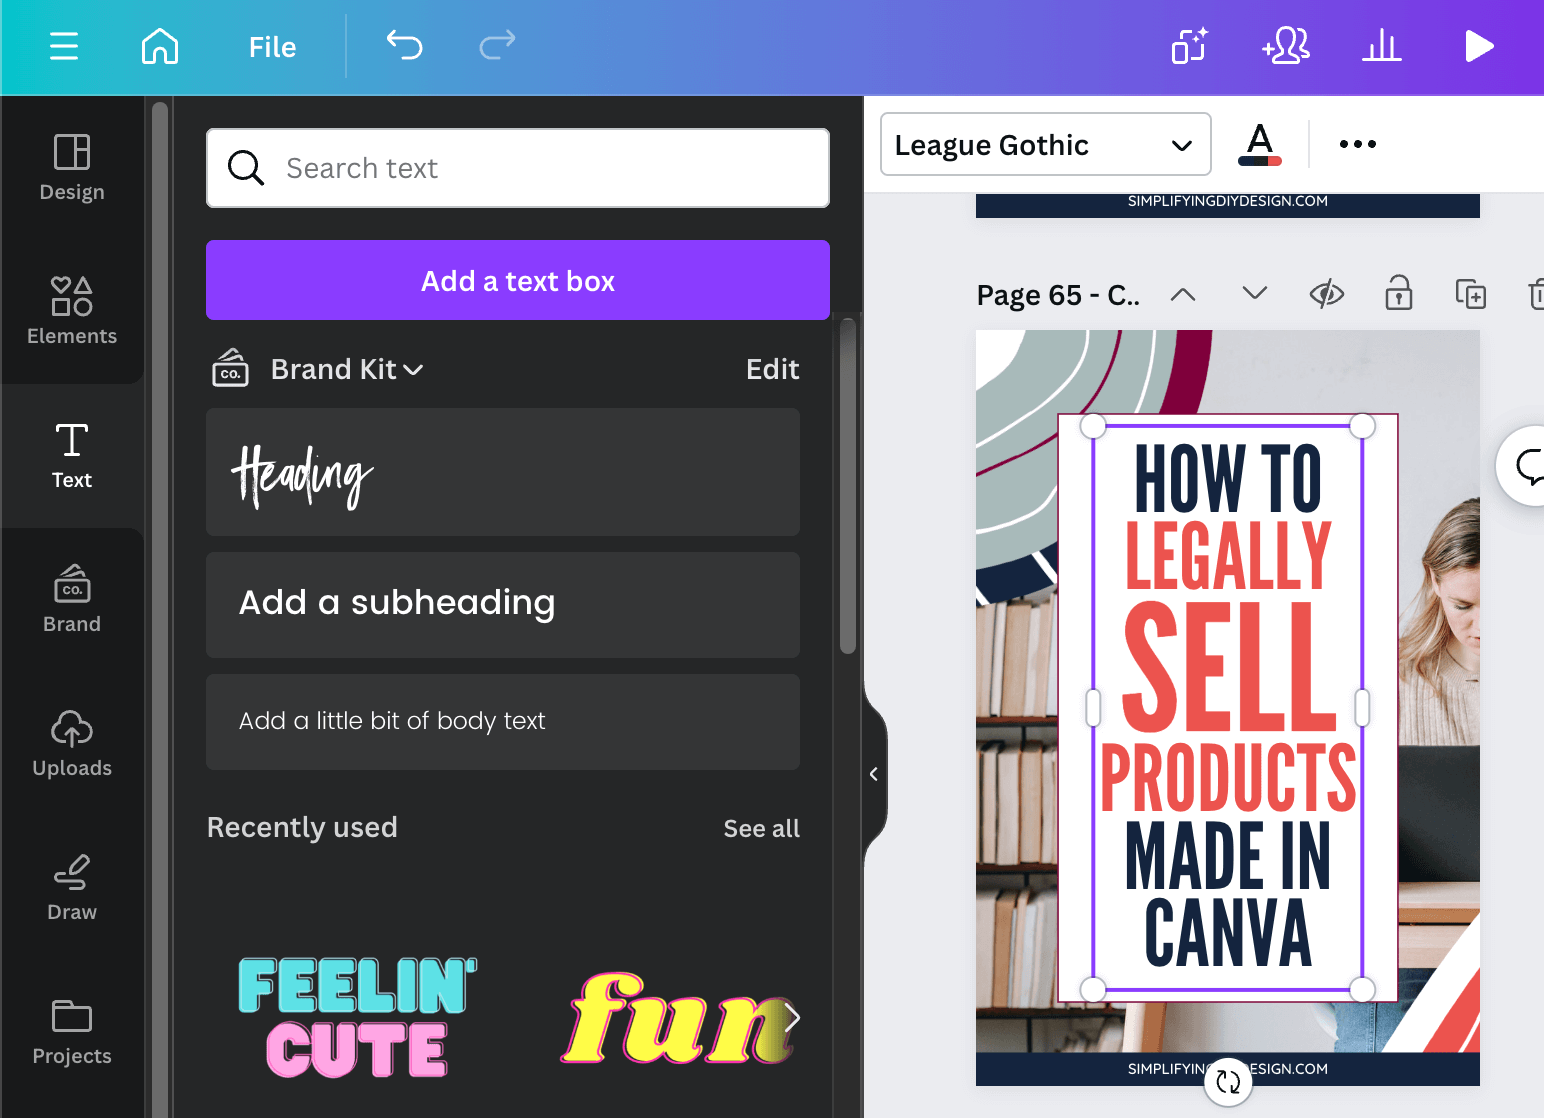
Don’t forget to add your logo or blog URL at the bottom of your pin.
There are many ways to make your pin stand out. Play around in Canva and get creative!
BEST PINTEREST TIPS FOR BLOGGERS
- CREATE MULTIPLE PINS TO BOOST TRAFFIC: Focus on every entry to your sales funnels, including blog posts, sales pages, opt-in pages, and more
- ADD AT LEAST ONE PIN TO A BLOG POST: Encourage visitors to pin your content with a CTA and Pinterest pin graphic
- TRY DIFFERENT TITLES: Play the game of “How many times can I say the same thing?” because you never know what’s going to catch the attention of your intended audience
- KEYWORDS MATTER not just ON your pin graphics but also the descriptions, headlines, boards, and even your Pinterest profile
- BIG, EASY-TO-READ TITLES perform best because the majority of Pinterest users are on mobile devices
- VISUALS MATTER because Pinterest has image recognition and will categorize your pin based on the photo (so be sure to keep it relevant)
- CHOOSE BRIGHT AND CLEAR PHOTOS that avoid faces (bonus points if they’re close up!)
- DON’T BE AFRAID TO EXPERIMENT with different styles and layouts to see what your audience responds with the best
- REVIEW YOUR ANALYTICS to see your top-performing pins and find commonalities to include in more of your Pinterest pin designs
- IT’S OKAY TO GO OFF-BRAND on Pinterest (mainly with fonts), and it’s OK to go off-brand for seasonal content (both colors and fonts)
- DON’T GIVE AWAY THE FARM: When you put all the information in the Pinterest graphic, your readers have no reason to click through to your website
Above all, don’t overcomplicate your Pinterest design strategy. If designing from scratch just isn’t your thing, invest in a great on-brand pack of Pinterest templates.
We use the same templates from our Mega Pinterest Template Bundle to create Pinterest pins for our own blog.
You do NOT need to create a new design for every Pinterest pin you create. Once you change out the visual and text (and maybe even move some colors around), it’ll look like a completely different pin.
Dive into our MEGA Pinterest Template Bundle with 65+ Canva Pinterest templates NOW for only $27.
When we offered client services, we’d charge $10+ for ONE pin design. You’re getting 65+ Canva templates for $.47 EACH!
Leverage the second most powerful search engine with high-quality Pinterest pin designs and watch your blog flourish – NOW!
RESOURCES MENTIONED IN THIS POST:
- FREE Canva video pin templates
- Tailwind (FREE trial)
- Mega Pinterest Template Bundle (for $27!)
- Canva Pro (FREE 30-day trial)
Don’t forget to grab our pack of FREE Canva video pin templates NOW to level up your Pinterest content and boost traffic to your blog!
TRY CANVA PRO FREE FOR 30 DAYS
Start your FREE Canva Pro trial today and unlock ALL of their incredible time-saving features that’ll cut your design time down to just minutes.
To be honest? It’s the best $14.99/mo OR $119/yr we spend on our business because that time we save with every single design is put back into making MORE money in our business!
WANT TO REMEMBER THIS LATER? SAVE IT TO YOUR FAVORITE PINTEREST BOARD! ⬇

Jennifer Lane says
This is so helpful! I’ve been struggling with how to increase my traffic with Pinterest and this post nailed it. It’s easy to get stuck as a new blogger when you spend so much time trying to figure things out. Creating multiple images and testing titles to see what works is my new favorite strategy. Thanks for this!