Want to save even more time editing your Canva templates? Canva templates are already a huge time-saver, but now you can customize them faster than ever using Canva’s amazing design features!
It’s no secret that we absolutely LOVE Canva templates. But now Canva has added even more amazing features that make editing them easier than ever.
Back in the day, we were dedicated to finding a workaround for everything.
Based on our years of using Adobe and learning design, we knew what we wanted our Canva templates to look like. Unfortunately, the functions weren’t quite there… yet.
Ready to grow your email list? Get our FREE Lead Magnet Template Pack! Create high-converting lead magnets AND promotional graphics for lightning-speed list growth!
We’d get questions all the time about how to do certain things, and if Canva itself didn’t have a solution, then we’d find one.
We essentially became the MacGyver of Canva in the blogging world, getting creative and finding solutions.
Luckily, designing your Canva templates is getting easier and quicker every day.
It seems like they’re coming out with new functions and features every week that we seriously cannot get enough of.
REMEMBER THIS POST LATER! PIN IT TO YOUR FAVORITE PINTEREST BOARD! ⬇
While we can’t exactly deep dive into every single amazing feature and function Canva has to offer, we do want to talk about the ones we love specifically for designing with Canva templates.
But if that’s something you’re looking for, definitely check out our course, Confidently Canva!
Now, let’s explore how you can easily edit your Canva templates to save a lot of time!
Table of Contents
INSTANTLY CHANGE COLORS + FONTS
To use this feature, you’ll first need to upgrade to Canva Pro and configure your Canva Brand Kit to match the fonts and colors of your branding.
Once you have a brand you love, you’ll head to your Brand Kit inside Canva to set your hex codes and brand fonts.
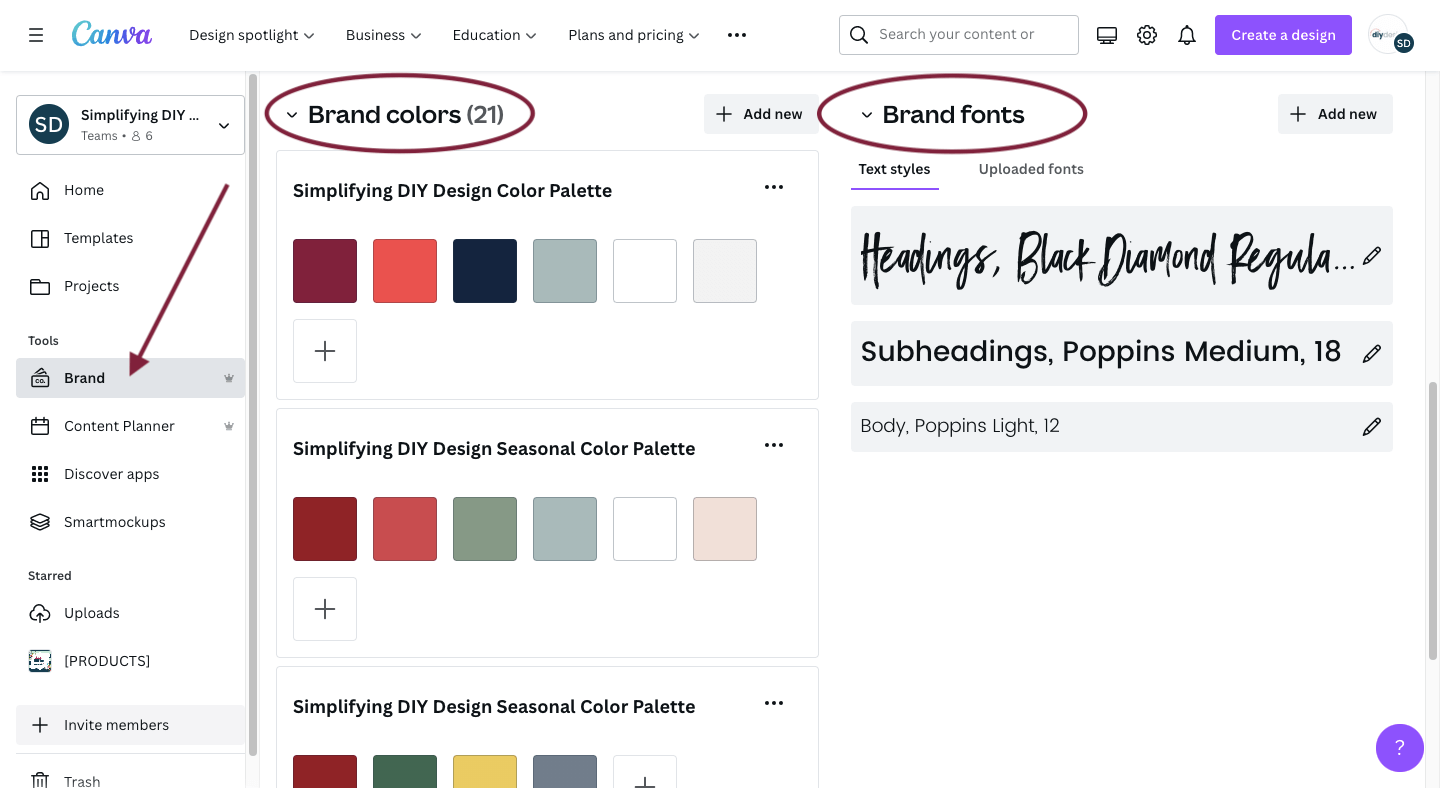
If you’re unsure how to create the perfect brand for your blog, check out our Five-Minute Brand! You’ll get 40 complete Brand Kits in various styles, along with everything you need to brand your blog.
Once your brand is configured, open your template and choose ‘Styles’ from the left menu.
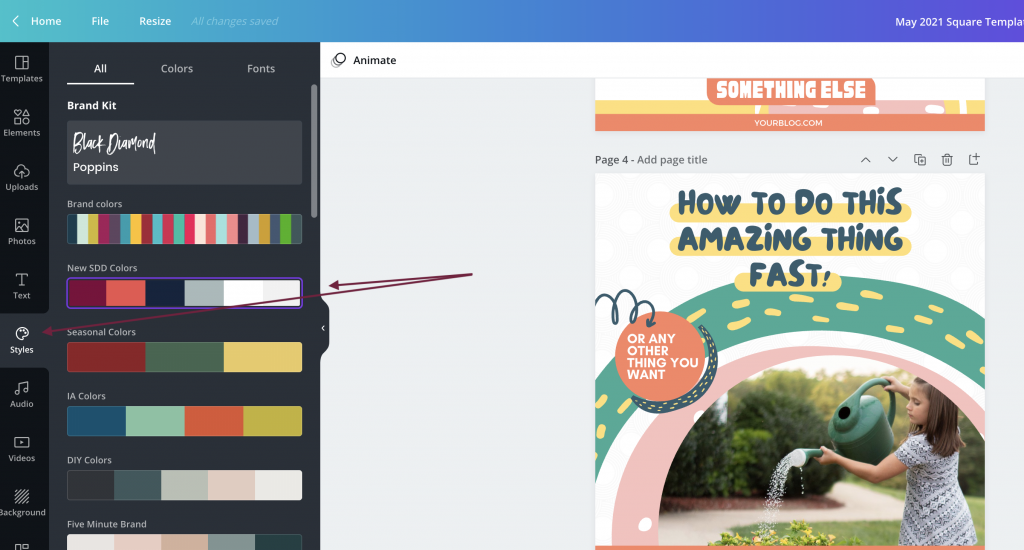
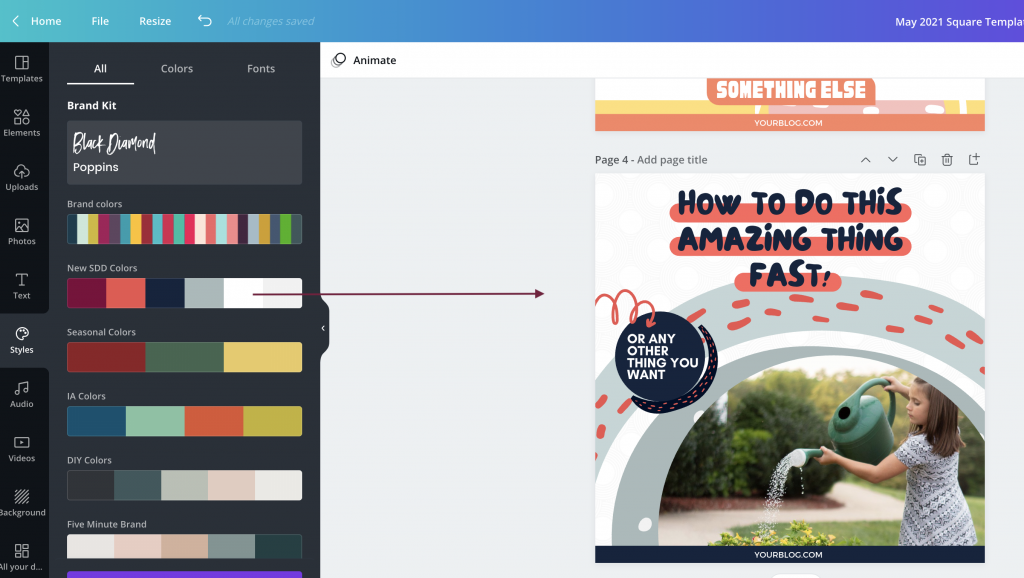
Click on your brand colors and watch the magic unfold!
You can shuffle the colors around as much as you like or manually adjust as needed (like white space). This feature will ONLY use colors within the color palette you chose, making editing your Canva templates a breeze.
DESIGN TIP: Set the color of any element by clicking the ‘Lock’ icon to save even more design time
All that’s left is to add your text and swap with any of your brand images! Super simple, right?
Remember, this is a Canva Pro feature, but you can try it FREE for 30 days here! We highly recommend it if you haven’t tried Canva Pro yet.
We save at least $700 a year by reducing our graphic purchases and eliminating ALL of our stock photo memberships.
Canva’s always adding new fonts, media, and incredible features like SmartMockups, Magic Write, simple web hosting, and MORE.
Did we mention the ‘Background Remover’ tool on both images AND videos? Oh, and curved text, too!
SHADOWS TO PAGE PREVIEWS
This Canva feature was a total game-changer because up until now, we’d manually add shadows, and let us just say, it was NOT fast.
To add a shadow, click on any image –> ‘Effects’ –> ‘Shadows.’
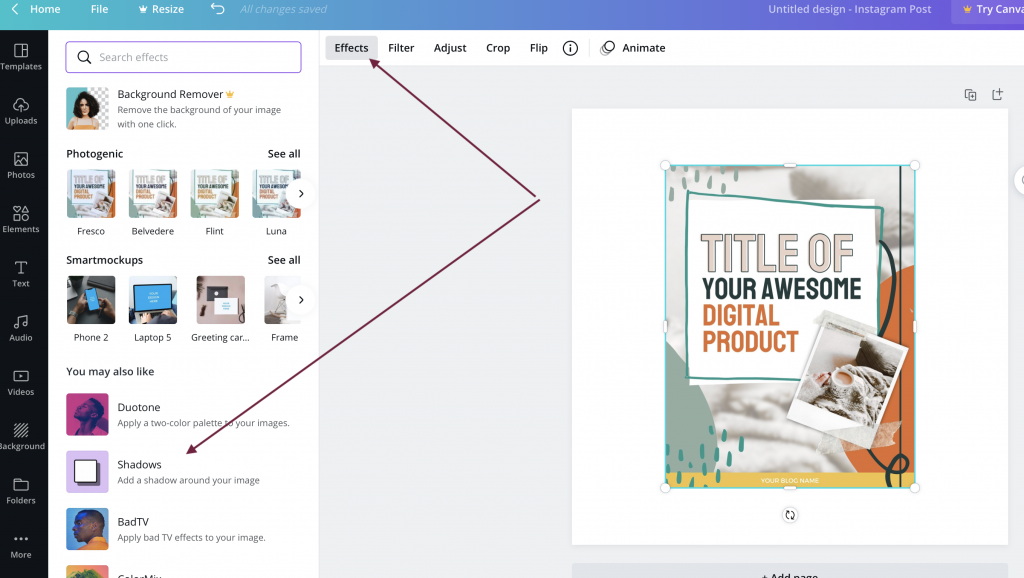
You’ll now see a variety of shadow styles (who knew there were so many shadow types!).
We generally only use ‘Drop’ because it looks the most natural and really makes your printables, workbooks, checklists, etc., pop!
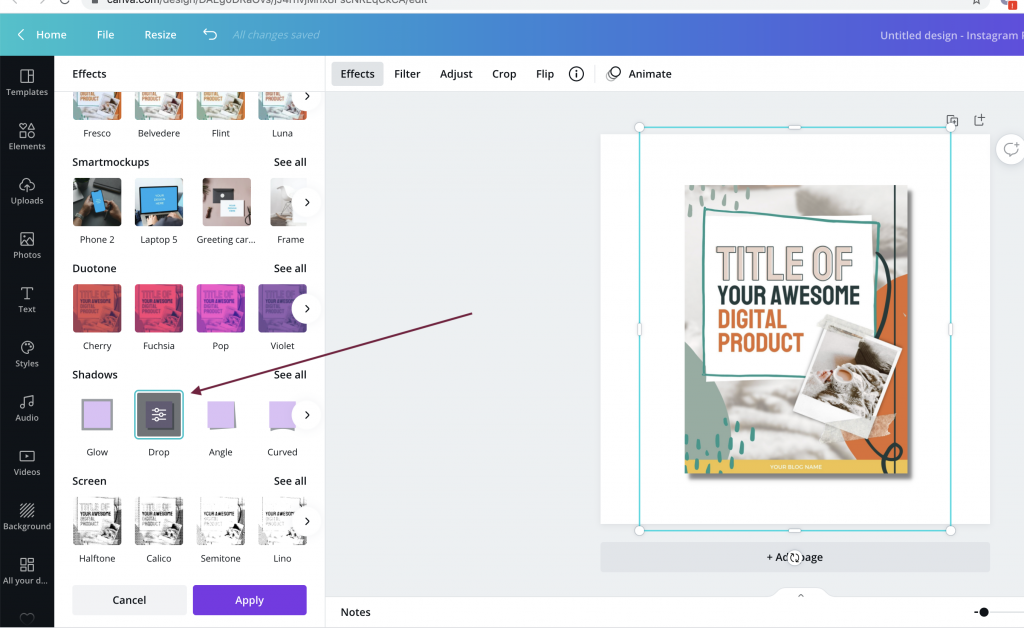
You can also click again on the shadow style of your choice to adjust the offset, angle, transparency, blur, and color.
We like to keep our shadows somewhat minimal, so we generally stick with Canva’s presets on this.
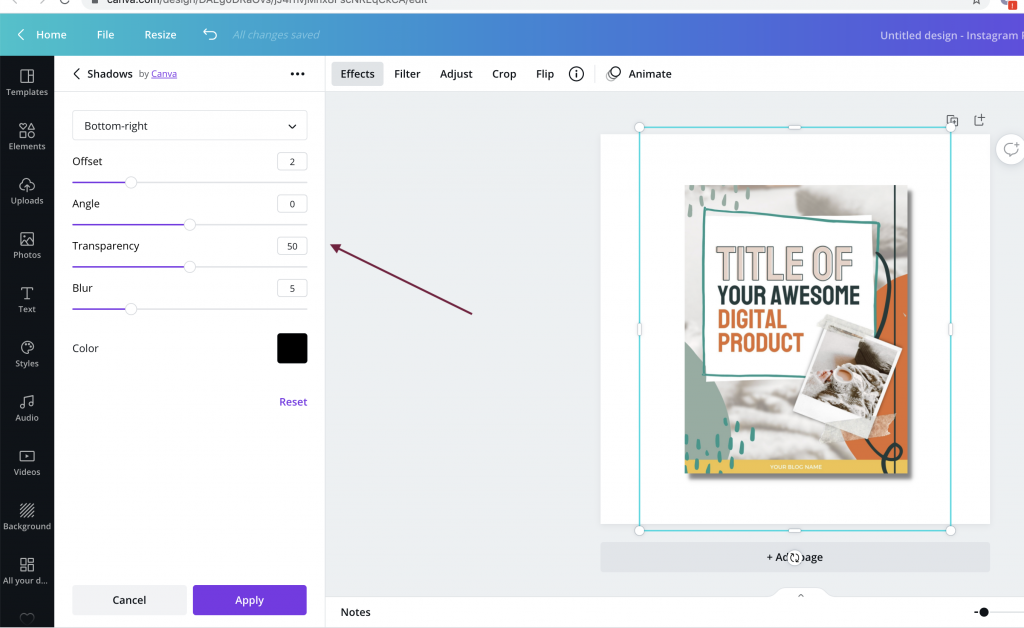
Once you’re done, click ‘Apply’ and you’re all set. Please note your image may look a bit blurry immediately after adding a shadow for just a second or two.
It should be crystal clear upon download, though!
ELEMENT + PAGE ANIMATIONS
Not only can you animate elements, but you can also animate text in your designs. This means any of your Canva templates can be eye-catching animated designs with the click of a button.
Click on the text or object that you want to animate, choose ‘Animate’ from the top menu (or right-click), and select the animation option of choice.
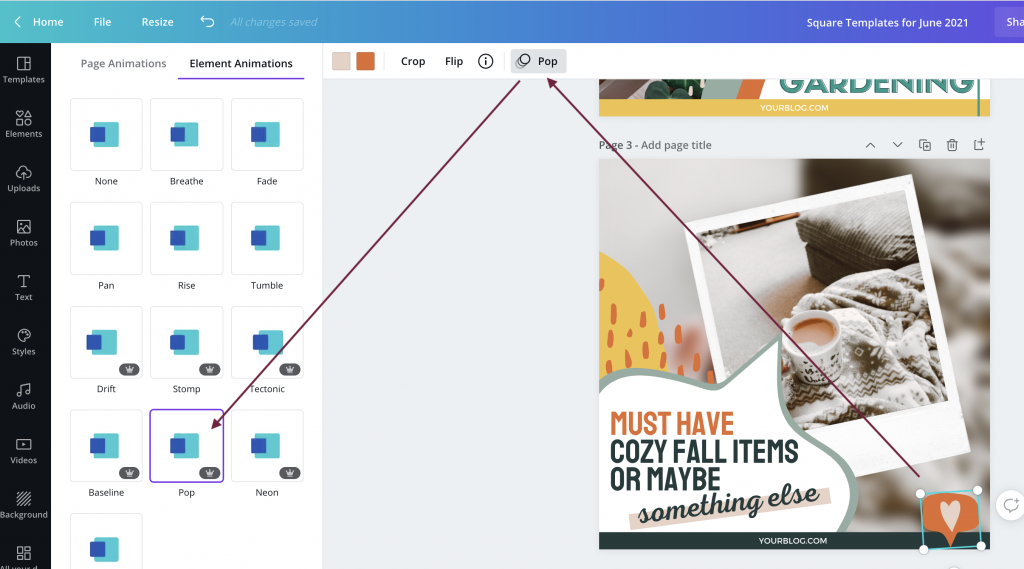
You can even change the time (when the animation starts), speed, and direction. Once you’re done, download your design as a GIF or MP4.
Related Post: How to Make an Animated GIF or Flipbook in Canva
This is a really great option for creating video pins on Pinterest without creating an actual video.
We usually animate one element (or add an animated design like an arrow) and the main text – that’s it!
ACCESS FOLDERS FROM INSIDE THE EDITOR
Another amazing time-saving feature for editing your Canva templates is the ability to access ANY folder from inside your page design.
This feature lets you mix and match Canva templates without having the crazy workaround of opening an additional project, copying the design, and returning to your current design to paste.
We’re all about simplified design over here if you haven’t guessed!
To avoid copying an already existing design, make sure to add a new blank page. From the left menu, select ‘Projects’ and again on ‘Folders.’
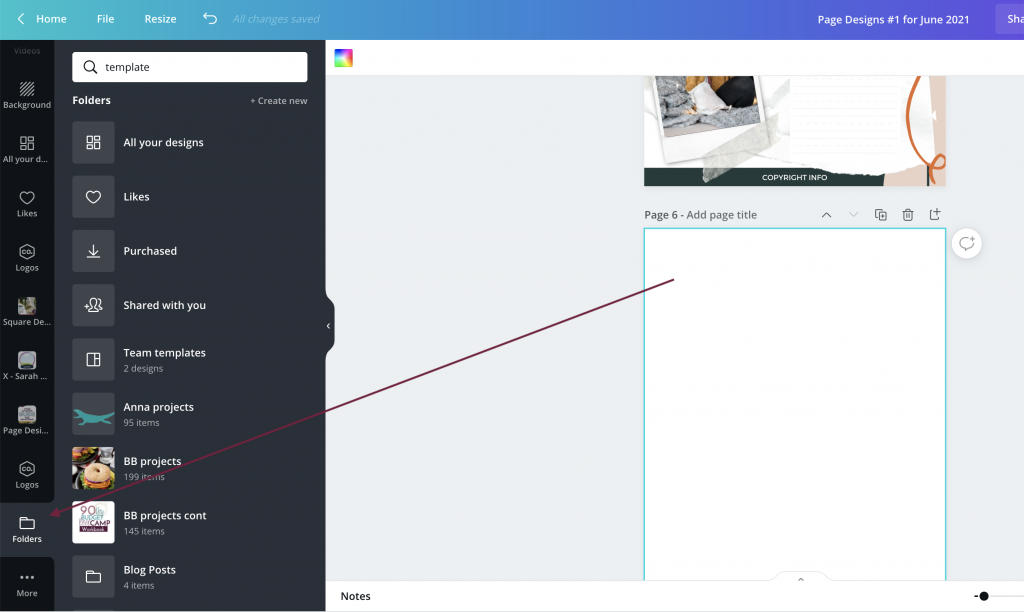
If you don’t already, keeping your Canva templates organized with folders is a game-changer when it comes to organization.
We love categorizing graphics based on products, freebies, brand assets, and more.
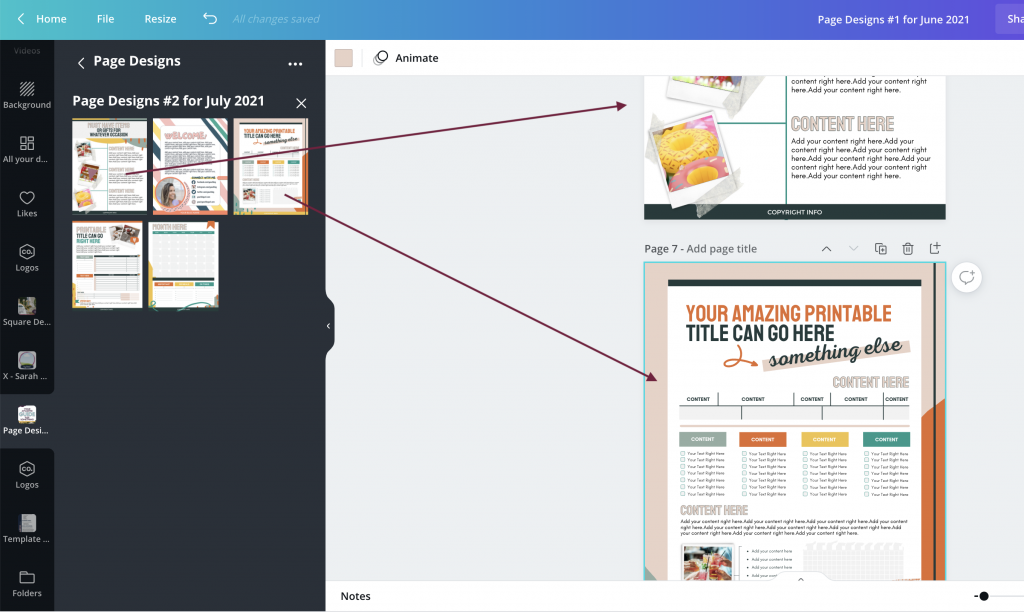
Select the appropriate folder and one last time on the design you want to add to your current project.
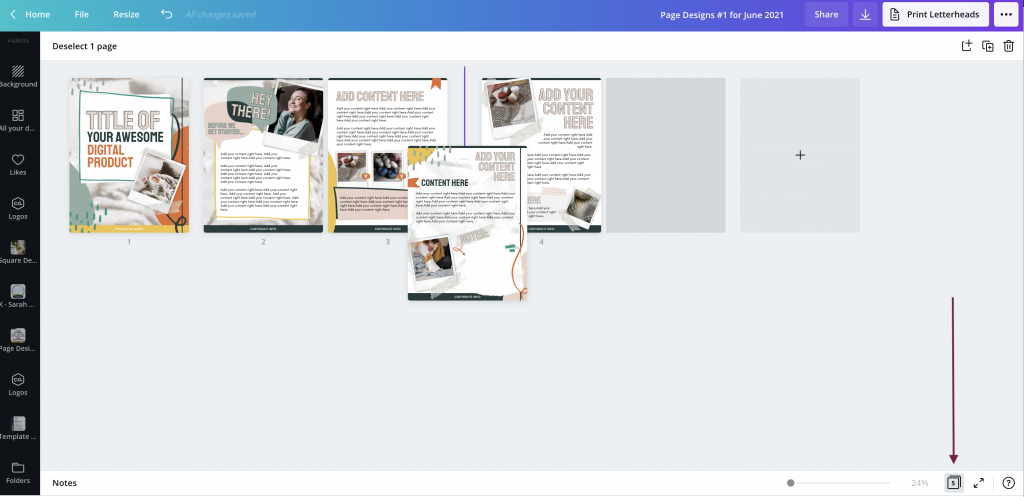
Use the ‘Grid’ view to quickly and easily rearrange, duplicate, and organize the pages within your project.
Click and hold on a page you want to move, drag it wherever you’d like, and unclick.
To duplicate, select the page you’d like to duplicate and again on the page overlap-looking icon in the top right of the image below. The same goes for deleting and adding a new page as well.
Canva has come a LONG way over the past few years, and we can only imagine what’s to come. They’re always looking for feedback and ways to improve the program.
They host weekly digital events on a variety of topics, share a ton of how-tos, and provide the best customer support, no matter if you’re a free or Canva Pro user.
If you want to learn more about what Canva has to offer, you’ll LOVE our complete Canva course, Confidently Canva!
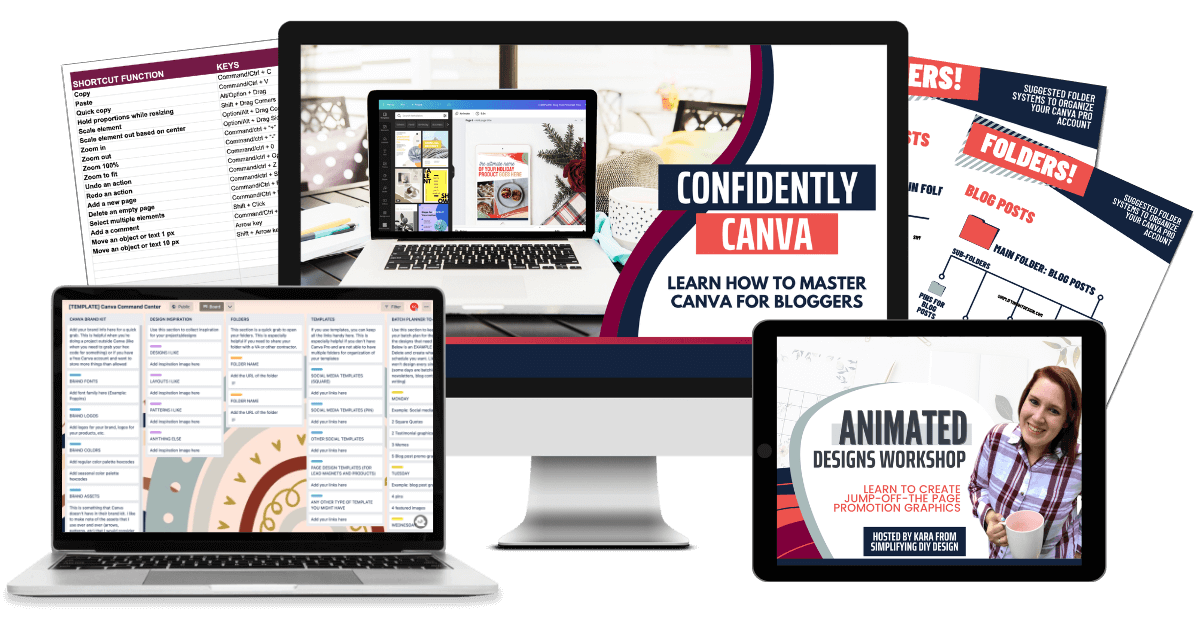
It’s EVERYTHING you need to know to feel completely confident in your designs because now you truly understand the tool you’re using and the design concepts involved.
Enroll now and get $20 off Confidently Canva today!
We know Canva templates have the stigma that no matter how you edit them, they’ll always look like templates. But that’s simply not true!
We use templates in our business and are blown away at how different they look simply by changing the colors, fonts, and images to match our brand.
And using Canva offers so many amazing tips and tricks for designing faster than ever, giving us more time to spend in our business.
RESOURCES MENTIONED IN THIS POST:
- Canva Pro (FREE 30-day trial)
- Confidently Canva (just $37!)
- Canva Tricks Every Blogger Should Know
- Five-Minute Brand (just $27!)
- How to Set Up Your Brand Kit for Maximum Efficiency
Don’t forget to grab our FREE Lead Magnet Template Pack! These fully editable Canva templates will help you create lead magnets that build trust so they’re ready to buy!
TRY CANVA PRO FREE FOR 30 DAYS
Start your FREE Canva Pro trial today and unlock ALL of their incredible time-saving features that cut your design time to just minutes.
To be honest? It’s the best $14.99/mo OR $119/yr we spend on our business because that time we save with every design is put back into making MORE money in our business!

Paula Hickey says
Love these tips! I need to use the animation feature more! And folders are so handy!
karafidd says
Thank you so much! I’m so glad you enjoyed them!