↑

Simplifying DIY Design

Simple Graphic Design To Grow Your Blog

  • Black Friday
  • Blog
    • Holiday Blog Strategy
    • Design Tutorials
    • Growth Strategy
    • List Building
    • Product Creation
    • Social Media
    • Page Design
  • Products
    • Monthly Templates Membership
    • Confidently Canva
    • Product Creators Ultimate Toolbox
    • The Complete Blogger’s Template Toolkit
    • The 5 Minute Brand
    • Holiday Gift Guide Bundle
  • Design Library
    • Sign Up for Access
    • Enter Library (Password required)
  • Contact
  • Login

List Building Tips | 5 Ways to Repurpose Blog Content to Grow Your List

February 8, 2018 by Simplifying DIY Design 2 Comments

Last updated on June 5th, 2023

Save yourself loads of time by growing your list using content you already have. Here’s how you can repurpose blog content to create value-packed lead magnets that your audience will love!

Have you ever fallen in love with something you once hated? For the sake of transparency, that’s how we felt about growing an email list when we first started blogging.

We had no idea what an email list really was, what to write about, or how to get people to actually sign up, let alone make any money with it!

After a little research, we did what most beginner bloggers do; we created a random lead magnet that we *thought* people would like but didn’t really relate to any of our blog’s content.

Ready to nail your product launch? Get our FREE Product Creators QuickStart Kit with a checklist, cheatsheet, and Canva design template so you can create a digital product for your blog!

GET THE FREE QUICKSTART KIT NOW!

Then, we started doing the classic follow-for-follow. You know, I comment on your blog post if you comment on mine type of thing.

We were SO excited about our first few subscribers, even though they were totally random people that were NOT at all our avatar and would eventually unsubscribe. Should’ve seen that coming…

Without a strategy, none of the things we were doing to build our email list was working.

We were fighting for every subscriber and knew there had to be a better way… we just didn’t know what that was.

REMEMBER THIS POST LATER! PIN IT TO YOUR FAVORITE PINTEREST BOARD!⬇
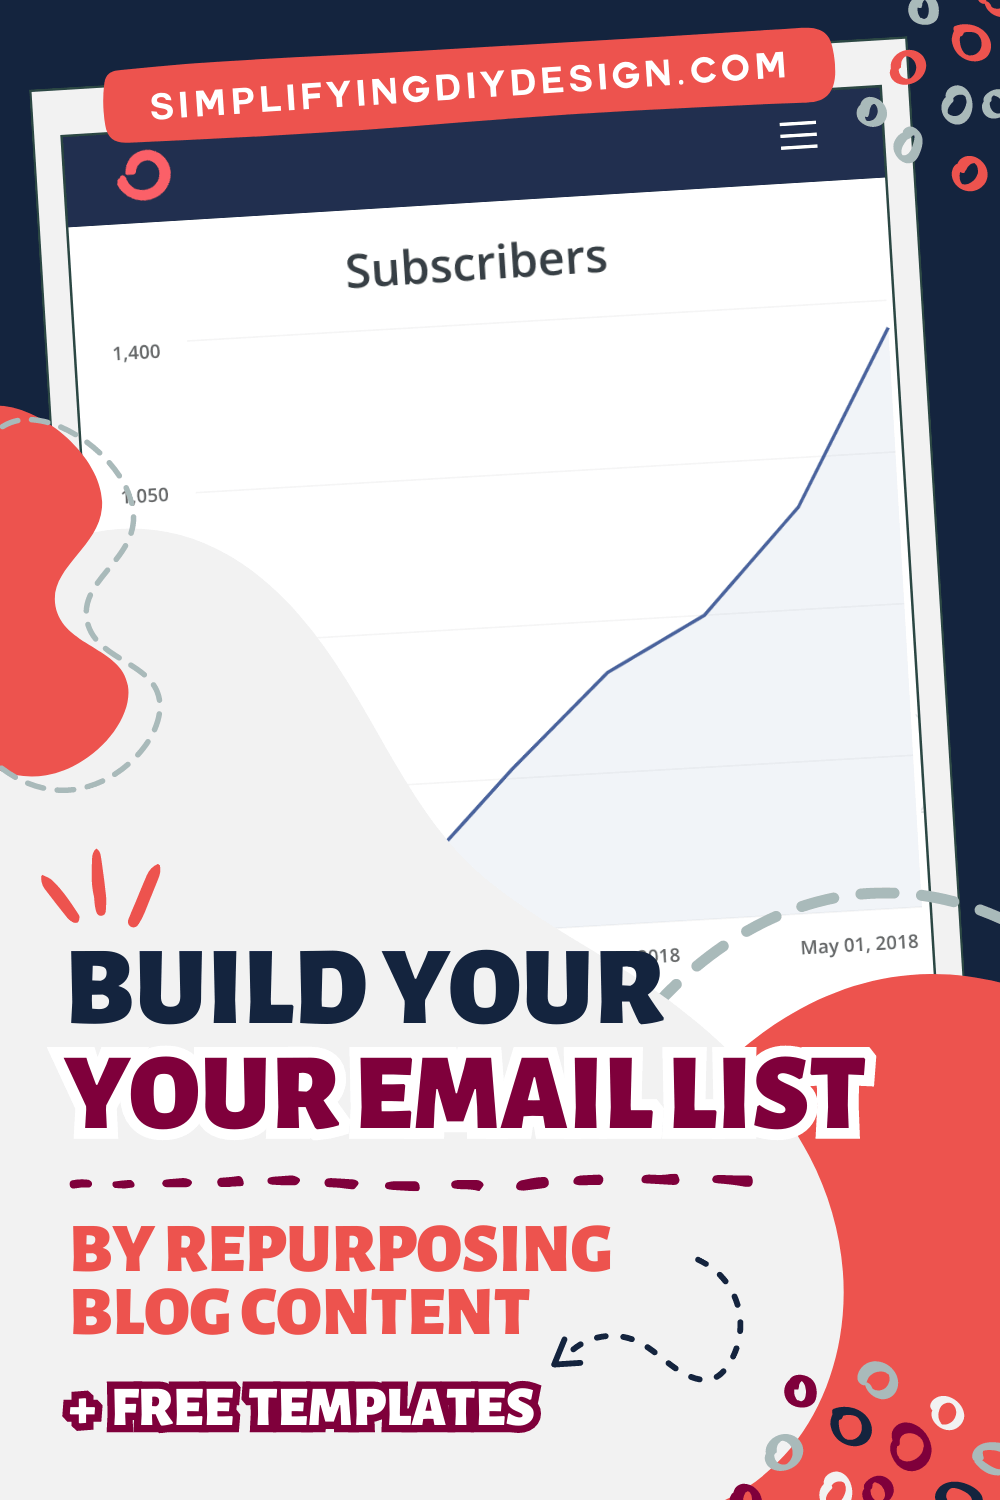
These list building tips will help you skyrocket your email list using content you already have! Learn to repurpose blog content that'll grow your email list fast!

Three blog attempts later, we were determined to get this blogging thing right.

So when we launched Simplifying DIY Design in the fall of 2017, we made a pact to focus on our email list from day one.

We signed up for an email course created by a blogger friend who was getting about 150 sign-ups a day.

We poured over every lesson, learning as much as we could. By the end, we filled an entire notebook with a step-by-step strategy for OUR avatar that we were itching to implement.

And that’s when our luck started to turn!

Three months after launching, we had 456 amazing new subscribers. By month seven, we grew our email list by OVER 1000 subscribers in just ONE MONTH.

The perfect lead magnet doesn’t have to be complicated. In fact, we made it a lot harder than it had to be. The strategy we learned was completely different from what we had ever known.

It was a facepalm moment while we were going through the course, to be honest…

Designing doesn’t have to be hard, either! We’ve got TONS of templates in our free design library to help you out.

Here are some super easy ways you can repurpose blog content to make that perfect opt-in.

  • Know your avatar
  • List out your top 10 blog posts
  • List out all your related content
  • List out your top queries (keywords) using Google Console
  • Get access to the templates in our library

If you don’t have a lot of history to work off of, that’s okay too!

As we said, we focused on growing our email list right from the get-go, so the only data we knew was our avatar and boy, did we KNOW her!

Because our blog posts were written for our avatar, we knew exactly what they struggled with, which made creating lead magnets that much easier.

We were able to repurpose blog content into emails, workbooks, and even a design challenge that brought in 31 new subscribers in 10 days from just one blog post!

CREATE A CHALLENGE

Looking at your related content and/or your top 10 blog posts, consider…

What is your avatar most excited about? What are they trying to learn more about? What can you teach them?

Then, create a challenge (usually 5-7 days) based on that topic. You can deliver the daily challenge via email (most popular) or set it up as an online course through something like Teachable.

You can even start a Facebook group or some sort of connection point dedicated to that challenge.

Another fantastic option is to design a companion workbook that helps your readers through the challenge.

Related Post: Design a Workbook in Canva the Easy Way

This can also be excellent pre-launch content if it’s related to a paid offer that you can promote at the end.

People joining the challenge will already be interested in that topic. And by the end, if they complete all the assignments, they’ll be excited to buy from you!

WHAT WE DID

It’s no secret our avatar wants to learn more about design, whether it’s how to make their own designs to grow their blog or by using design templates.

So, we took that knowledge and created a free 3-day design challenge that we hosted on Teachable.
These list building tips will help you skyrocket your email list using content you already have! Learn to repurpose blog content that'll grow your email list fast!

Then, we decided to repurpose blog content to create a 48-page companion workbook as an upsell (or tripwire product) that we offered immediately after they signed up for our free challenge.

They were also tagged and added to an email sequence using ConvertKit, where we automated:

  • Re-offering the workbook a couple of days later
  • Asking for feedback via Google Forms survey
  • An evergreen flash sale for a related higher-priced product

This was such a simple yet incredibly effective way to boost sales with minimal effort on our part. In fact, we were selling more workbooks on the re-offer than as a tripwire!

Regarding the higher-priced product, we were getting emails almost daily saying it was the exact thing they were looking for.

Once they purchased, they were removed from that email sequence (so they’re not getting promotional emails for a product they just bought) to then enter another sequence that was jam-packed with value (and freebies!) to build even more trust.

DESIGN A WORKSHEET

The easiest place to start with creating a worksheet is figuring out your most popular blog post. From there, brainstorm ways to make that post more actionable.

We recommend making actionable worksheets for at least your top 10 blog posts.

You can always have more than one lead magnet in each post, just like we do in this one!

Related Post: How Worksheets Can Grow Your Email List

Worksheets work so well because the reader most likely found your article by searching for a solution to their problem.

Worksheets provide a great step-by-step solution. If they take action using your worksheet, they’ll find value. And what happens when a reader finds value?

They build trust with you, which helps make selling that much easier. We cannot stress it enough – value, value, value!

Grab our FREE Canva lead magnet template pack to get started!

WHAT WE DID

Without a doubt, our most popular blog posts (according to Google Console) are learning more about Canva – design shortcuts and tricks, how to resize images, set up your Brand Kit, etc.

With worksheets in mind, we could easily repurpose blog content to create a Canva Shortcuts Cheatsheet as our lead magnet.

We took all the Canva shortcuts we mentioned in our blog post (plus a ton more!) and added them to a PDF for easy access. That way, our readers can have the PDF close by instead of forgetting about the blog post, which could save them time!

WRITE AN EBOOK

This is the fastest and easiest way to repurpose blog content because it’s essentially a direct copy and paste.

Looking at your related content, is there a way to piece it together to form a valuable eBook or workbook?

Related Post: How to Create an Editable PDF for Your Readers

You may have to add a little more content to beef it up and make it flow, but you can easily repurpose what you’ve already written into a PDF.
These list building tips will help you skyrocket your email list using content you already have! Learn to repurpose blog content that'll grow your email list fast!

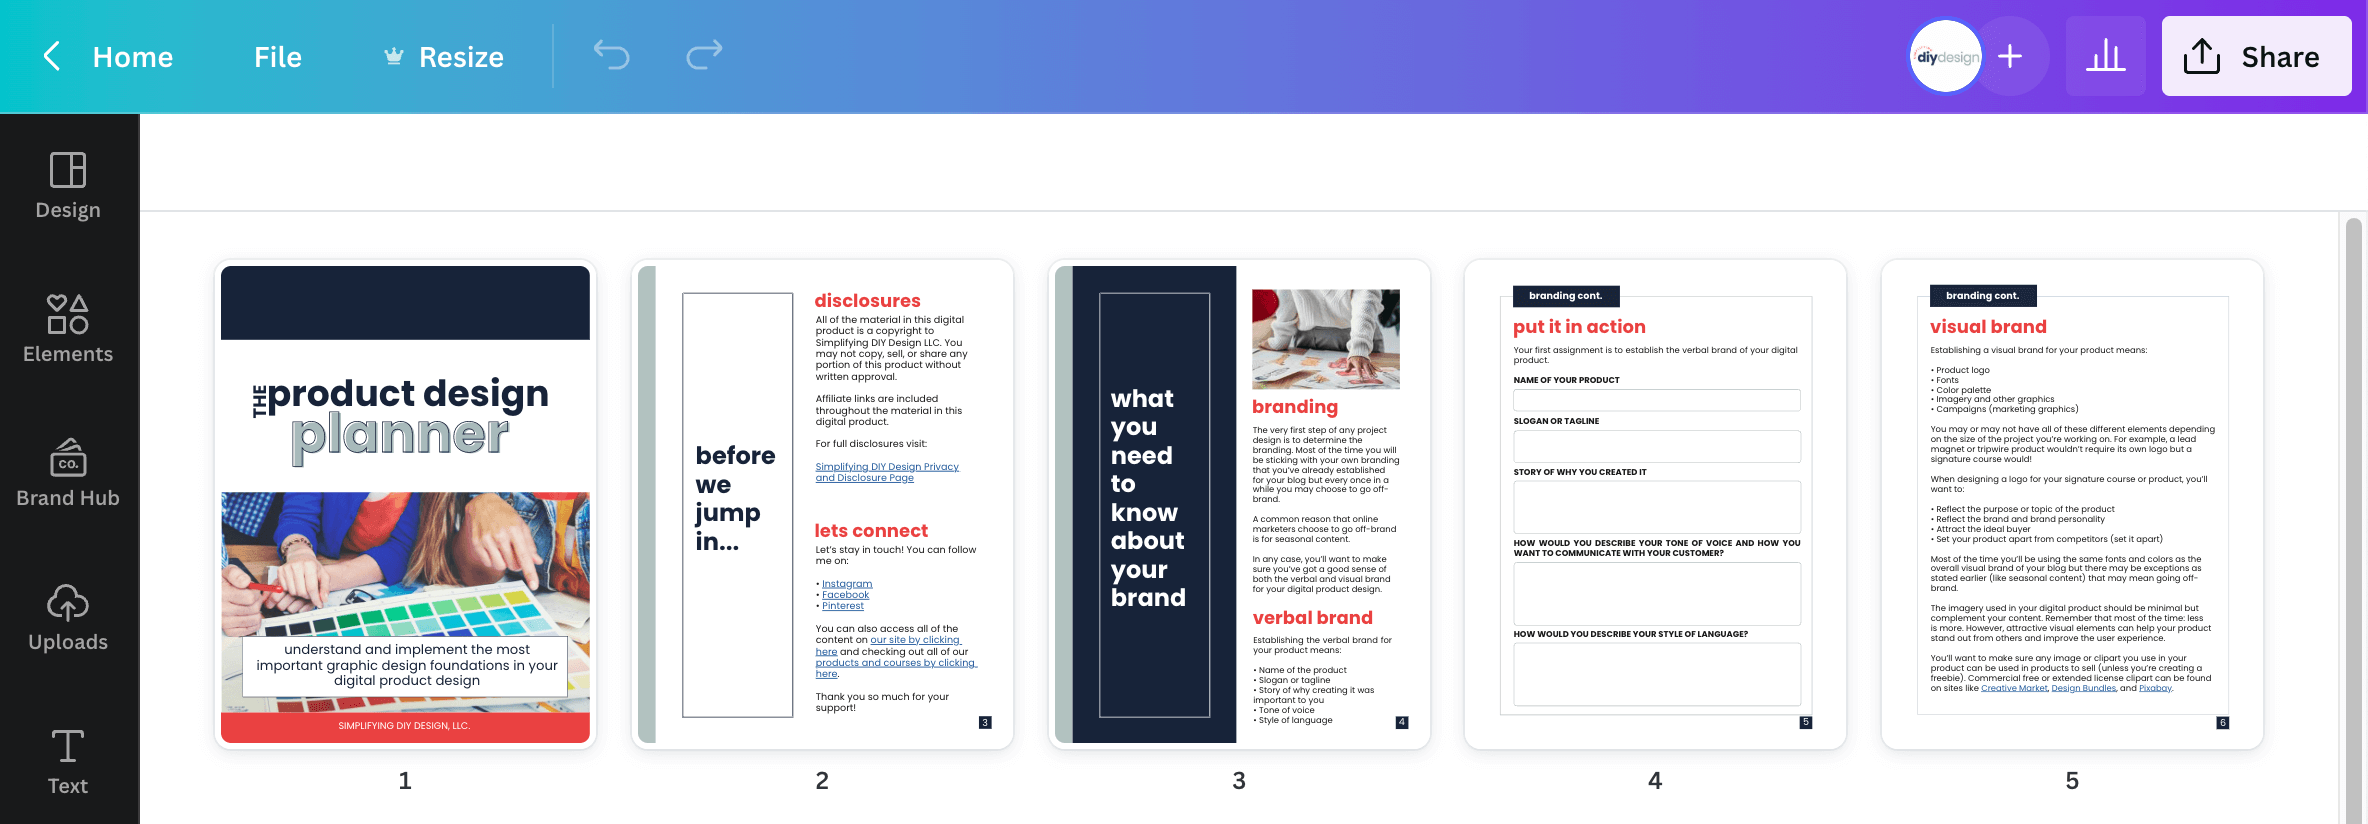
You can create your eBook in Word if you’re short on time. But we recommend using Canva to give it that professionally-designed look that’ll really impress your readers!

Plus, you can use our Canva eBook template to speed up the process even more.

While Canva is 100% free to use, they also have a Pro plan that is the best design investment we’ve made in our business. You can get a free 30-day trial of Canva Pro here!

WHAT WE DID

That’s how we were able to create a 48-page workbook so fast!

We took bits and pieces from our blog posts to create the first draft. From there, we could edit the flow and see what needed more detail or explanation.

Then, we added images, notes, and design elements to really make it pop. And yes, we used Canva to create it all!

PUT TOGETHER AN E-COURSE

Creating an eCourse is very similar to a challenge in how you would repurpose blog content. Instead of delivering the repurposed content via email, you can set it up using a course platform like Teachable.

We went with Teachable for both our challenge and free eCourse because we didn’t want to take a chance on any failed deliveries/accidental spams due to the level of content we were providing.

We were delivering linked video lessons (set to private on YouTube) and Canva templates. Unfortunately, the more links an email has, the more opportunities it gets marked as spam.

Also, we got a few replies saying our emails were too long, and they found it overwhelming. But when put into a course, a mindset shifts to where the level of detail is expected.
These list building tips will help you skyrocket your email list using content you already have! Learn to repurpose blog content that'll grow your email list fast!

If you want to add that extra value to your free course, try making a worksheet or mini-workbook to supplement your content.

You can add it as a resource in Teachable to download or deliver it automatically through your email service provider like ConvertKit.

You can also put together a side deck (just a fancy blogger word for PowerPoint) and record your screen in QuickTime, Loom, or even Canva using their Presentation tool.

Set your emails to be delivered each day using ConvertKit’s automation tool, or again, add your content to a course platform like Teachable.

CREATE A RESOURCE LIBRARY

If you have a few lead magnets, you need to consider a resource library to house them all.

You can add other things, too, like your paid offers and even affiliate products!

There are two ways to repurpose blog content for a resource library that will entirely depend on the goals of your blog.

You can either link to your library but have your subscriber opt-in individually or have it password-protected and offer instant access to each freebie.

If your lead magnets vary in topics, for example, marriage and parenting, we recommend individual opt-ins on your resource library. That way, you can appropriately tag your subscribers and only email them content they’re interested in.

These list building tips will help you skyrocket your email list using content you already have! Learn to repurpose blog content that'll grow your email list fast!

SIDE NOTE: Link to the accompanying blog post so they know exactly how to use your freebie AND boost your blog’s traffic simultaneously!

But if your categories are centered around one main topic, for example, crochet, we recommend the latter – offering instant access to each freebie on a password-protected page.

However, you still could offer individual opt-ins instead if you wanted to tag based on, let’s say, the level of experience.

If you decide down the road you want to create a beginner, intermediate, or advanced crochet course; you already know who to market to.

WHAT WE DID

Once we had a handful of lead magnets, we created our resource library using Elementor.

It’s a free WordPress plugin that’s SO simple to use, and by the end of the day, we were ready to hit publish. We recently updated it to include video tutorials, paid offers, and our favorite affiliate products.

We initially created a password-protected page because, at that point, we already had individual landing pages for each of our lead magnets.

That’s how we knew what our audience was most interested in, which helped us create our very first paid product that generated OVER $10k in seven days!

Related Post: What You Need to Know Before You Start a Blog

If we had to do it all over again, we’d still go the same route. It’s what worked for us, and we never found the process overwhelming.

Plus, we created SO many Pinterest pins to promote specific lead magnets, leading to their own unique landing page versus just one resource library landing page.

While overwhelm is a real thing for bloggers, it’s also a VERY real thing for consumers. Too much of something is definitely overwhelming, just like having too little can be underwhelming. You have to find the sweet spot!

REPURPOSE BLOG CONTENT FOR FASTER LIST GROWTH

A lot of these list growth ideas can be designed in Canva! We have templates for most of them in our free design library here.

Your email list will make all the difference. Build it from day ONE. Nurture it from the very beginning. You do NOT need to wait ’til you have a ton of people on your list to start emailing.

We know it might seem like extra work. Honestly, we would write our emails first and our blog posts second – sometimes repurposing pieces of our newsletter for our blog post!

Even if you have two subscribers, they don’t know they’re the only ones on your list. For all they know, you have thousands of fantastic email subscribers!

Related Post: Profitable Tripwire Product Ideas for Your Blog

And if you promoted a $27 product to those two people, and they both bought it because you put in the time and effort right from the get-go to make them feel heard and cared for? Well, that’s $54 you didn’t have before.

Building your email list should be a top priority, no matter what. But it doesn’t have to be hard! Start with repurposing your content and go from there. Progress is progress, no matter the speed or size!

RESOURCES MENTIONED IN THIS POST:

  • Design a Workbook in Canva the Easy Way
  • FREE Canva lead magnet template pack
  • FREE 30-day trial of ConvertKit
  • FREE Canva eBook template
  • FREE 30-day trial of Canva Pro
  • Teachable

Don’t forget to grab our FREE Product Creators QuickStart Kit! Use the checklist, cheatsheet, and Canva design template to create a digital product for your blog!

GET THE FREE QUICKSTART KIT NOW!

TRY CANVA PRO FREE FOR 30 DAYS

Start your FREE Canva Pro trial today and unlock ALL of their incredible time-saving features that cut your design time to just minutes.

To be honest? It’s the best $12.99/mo OR $119/yr we spend on our business because that time we save with every design is put back into making MORE money in our business!

WANT TO SAVE THIS FOR LATER? PIN IT TO YOUR FAVORITE PINTEREST BOARD!⬇
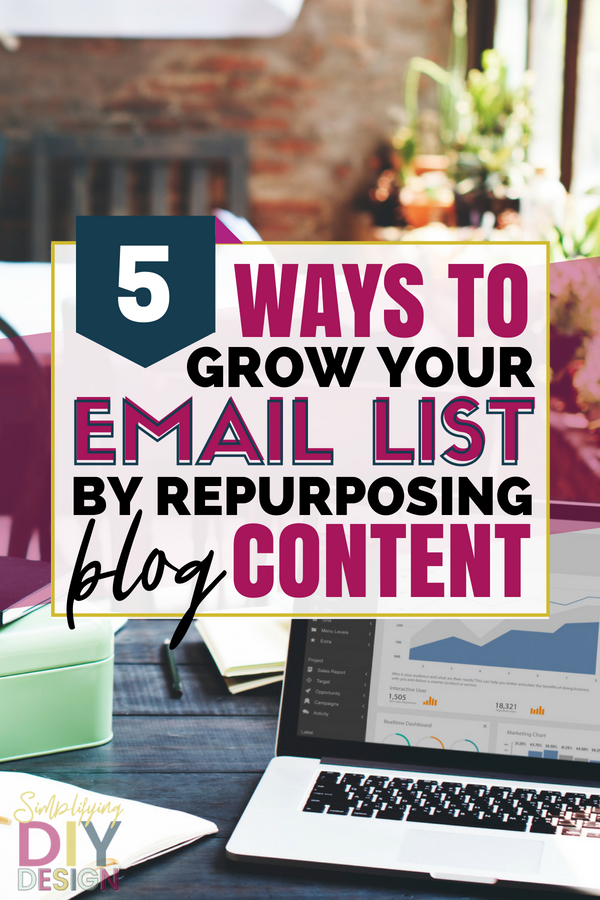
Easily grow your email list with these 5 ways to repurpose blog content. You've already done the work-- reuse what you've already done for list building awesomeness! Grow your list and your income with these 5 email marketing tips for repurposing blog content! #repurposeblogcontent #emailmarketing #emailmarketingtips #listbuilding

Filed Under: List Building, Growth Strategy

Your brand is so much more than just a color or font. Your brand is your entire business personality, it's what set you apart form the rest- it's YOU. And you brand needs to speak to you so much that you will want to print it on a blanket and wrap yourself up in it. It's your attitude, the way you talk, the vision behind your business. Here's how to create a brand AND a free brand board template!

How to Create a Brand Personality That Just Screams YOU: Brand Board Template

January 25, 2018 by Simplifying DIY Design Leave a Comment

Last updated on May 25th, 2018

I think back to my very first attempt at blogging. I did a LOT of things wrong; it almost makes me want to laugh.

One of the biggest mistakes I made? Not having a brand.

But honestly, I’m not the only one. I see it all the time.

Bloggers don’t take the time to brand themselves.

Why would you need to brand your blog? Aren’t “brands” big companies like Nike or Target?

A brand is a style; it’s a theme for your business. It’s your businesses attitude. Most importantly, it’s YOU (if you were converted into colors and fonts).

But what branding can do for you is where most people fall flat. Branding your blog can:

  • Save you a ton of time
  • Help with publicity
  • Increase your traffic and conversions
  • Make you more money

Here’s the thing, if all your pins have a consistent look then people will know exactly where that pin came from before even seeing the logo (think of that big red bullseye… We all know it’s Target without seeing the word Target, right?)

Title image that reads How to create a brand personality that screams you, plus free brand board template

If your pins have a consistent look and you use the same templates each time you make a pin for your blog post, then you will end up saving a ton of time.

Same goes for anything you design. If you already know what colors, fonts, and style to design your project with- then you have already cut out half of the design process!

And no, your readers won’t get bored. In fact, the opposite will happen.

People will start recognizing your designs on social media and start clicking through more. They will become familiar and familiar is good!

You will appear professional and as a result, will see an increase in your numbers and get more opportunities, like sponsored campaigns. 

But here’s what a brand is NOT: a brand is not just a color. A brand is not just a font. It’s not a pattern or a shape or a website. Your brand is YOU. It’s a personality.

You need your brand to be everything you are, it needs to speak to you so much that you will want to get it printed on a blanket and wrap yourself in it.

Branding your blog is a lot more than picking out some colors, it’s setting yourself apart from the rest. What do you have that others don’t? What makes you different? What are you saying that others are not? Identify that thing FIRST.

Then, once you’ve figured out what makes you uniquely you, come up with your brand board. Get it on paper (digitally) and put it into your business plan.

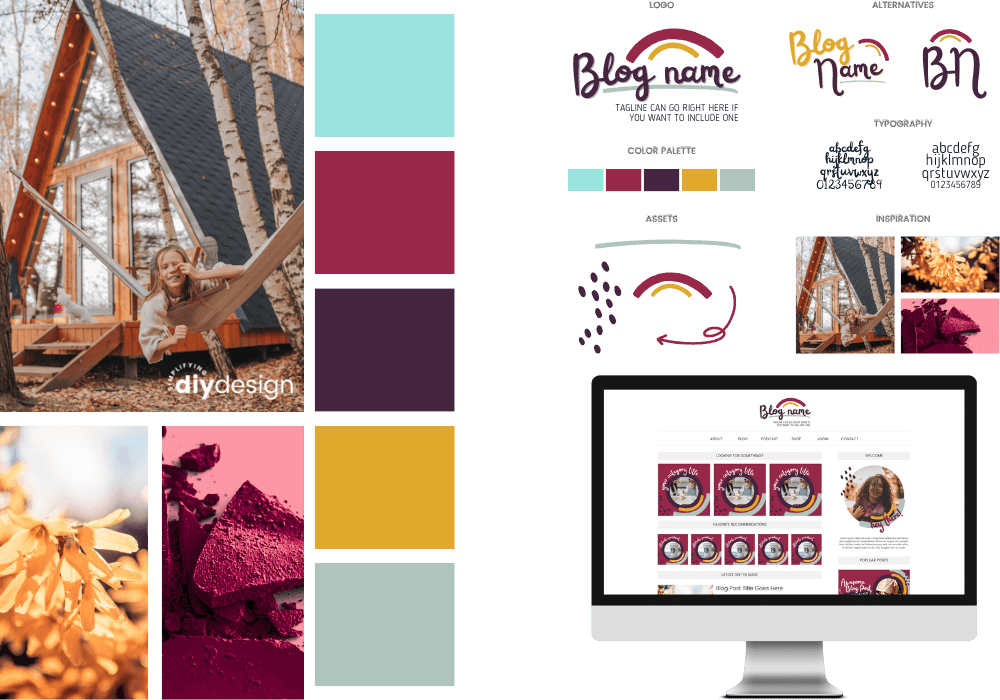
Here’s how to make a brand board:

Before you start

Get access to our free design library and download the editable Brand Board template. This is a free template I made to help you set up your brand board in Canva. You can click right here to get access or fill out the form at the bottom of this post.

Your logo

Start with your logo. If you don’t have the funds to pay someone to make a logo for you, you can try your luck on Fiverr or make it yourself in Canva. Please note that you can not use any of the design elements that Canva has available to make your logo, you can only use fonts.

You can, however, purchase a logo design pack on Creative Market (look with ones that have PNG files if you don’t have Adobe illustrator) and use Canva to compile them into your design. Or simply create a text-only logo.

You can also search Creative Market for fonts to use in your branding. They have some really awesome bundles available which can help you save money.

Once you are happy with your logo, save it with a transparent background and add it to your brand board.

Alternate logo and watermarks

Once you have your logo,  it’s ideal to create alternate ones. When you get your logo professionally designed, the designer will likely give you your logo in 2-3 different ways. You’ll get your full logo and then perhaps a circle or “smaller” version. Think of your logo as your full name and the alternate logo is your initials. 

I also like to create an all-black and an all-white version of my logo so that it’s easier to use as a watermark on my social media images.

Inspiration & Style

This is one of the most important sections of your brand board! This is where you are going to choose about 3 different images (ideally stock photos) that truly describe your brand.

These images need to be your entire essence! Your style, your attitude, everything that makes you, YOU (and your brand) all rolled into an image.

They need to be so YOU that anyone who looks at them can tell exactly what the personality is for your business.

Once you have your three images chosen, upload them into Canva and drag and drop them into the frames provided on the template.

Brand Fonts

I usually suggest having at least one premium font that is specific to your brand. This is essentially so that your brand stands out. Everyone is going to use the free fonts provided on Canva and Google. Your premium font won’t be.

I’m not saying you’ll NEVER see it anywhere unless you hire someone to design a custom font (you definitely don’t need to take it that far) but it will definitely be used a lot less than a free one. Here are 5 tips on how to use your typography in your design! 

If you are looking for a way to save on fonts, check out Creative Market and Font Bundles. Sometimes they even have premium fonts for free (usually each week is a different font).

If you get serious font overload, check out our Font Combination cheatsheet in our design library. These are all fonts that come with Canva. If you have a premium font, you can use the cheatsheet as a guide and compare your font to similar looking fonts (If that makes any sense at all)!

Brand Patterns

This step is optional. Unlike the style images, these patterns would be used in the things that you create. So, you would see these patterns incorporated into your website, social media images, products, etc. The pattern doesn’t have to be overwhelming or take over the entire design, just a little hint of it would do just fine.

This works really well if you want to make sure your brand is really recognizable. Using the patterns over and over would get you that familiarity with your audience and anyone that has seen your website and brand.

Choose no more than two different patterns. You can purchase patterns on Creative Market, Etsy, Stock sites, etc. or you can hire someone (like on upwork) to design a pattern custom to your business.

Add your patterns to your brand board and you’re done!

Your brand is a personality, not a color

I can’t say it enough. A brand is so much more than a color palette or website design. Yes, you want your style to be consistent. Yes, colors and fonts are the exterior of a brand – it’s what people see.

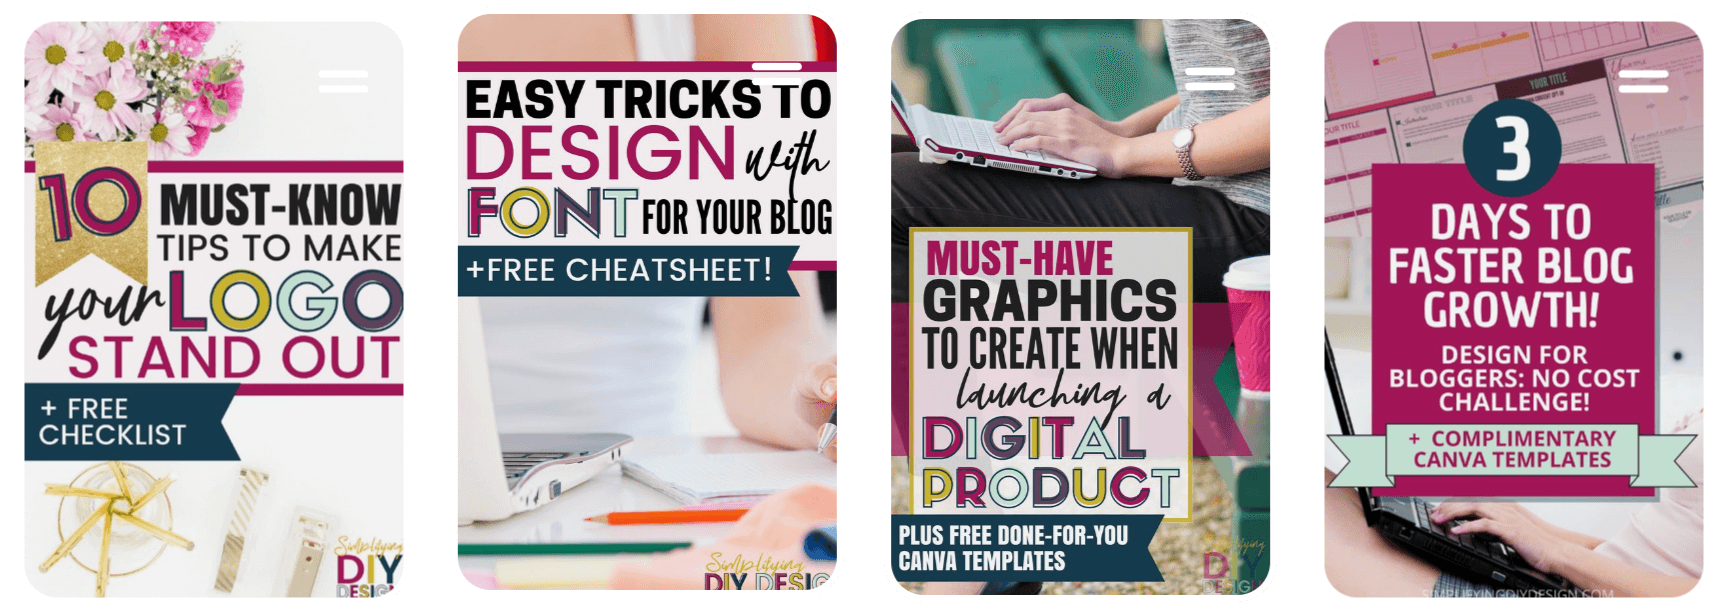
But your brand itself is the personality of your business that you want to convey to others. It’s how you talk to people, it’s how you express yourself, it’s your attitude. Even your audience will recognize your branded graphics and pins, instantly! Check out Simplifying DIY Design’s Pinterest board for inspiration! 

So set up your brand board right now! Make sure everything you do from this point out is branded and consistent and I guarantee you will see business growth.

The difference it has made for me since I have really stuck to a branded style is amazing. 

GET YOUR FREE BRAND BOARD TEMPLATE NOW!

Computer Screen showing preview of our brand board template

Just fill out the form below and get access to our design library. You will not only be able to use our brand board template but you will also have access to our other done-for-you templates, step-by-step design tutorials, and other tools like cheatsheets, planners, trello boards, and more.

This template is available in our FREE Design Library! Fill out the form below to get access!

When you sign up to our email list you'll get instant access to this canva template, PLUS you'll get access to all of our tutorials and tools in our design library as well!

Want to remember this post? Pin to your favorite pinterest board! ⬇

Create a brand for your blog! It's ALL in the brand, having an amazing brand personality that screams you will help you grow and monetize your blog in so many ways. Click to learn more about what having a defined brand can do for your blog! #branding #blogbrand #brandpersonality #branding

Filed Under: Design Tutorials

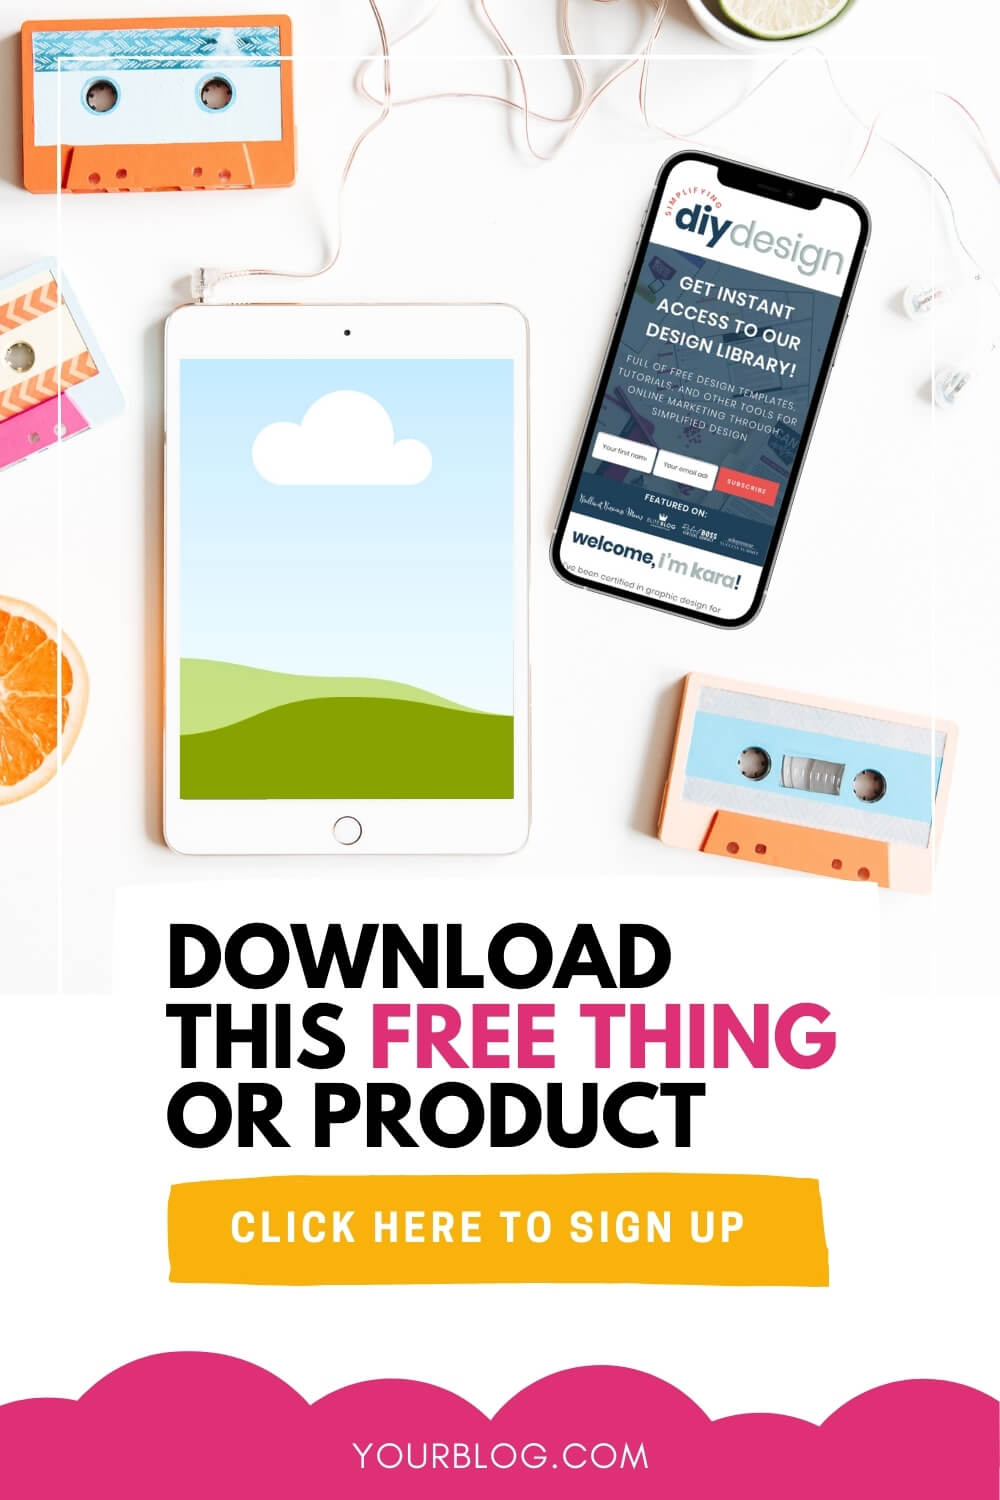
Start saving a ton of time by creating your own template for your mockup product photos. These will give your product photos a level up and make them eye-catching and convert higher. Which means more sales and more money!

How to Create Product Mockup Templates | Canva Mockups

January 22, 2018 by Simplifying DIY Design 4 Comments

Last updated on May 16th, 2023

Product mockup templates are essential for any niche because they’ll boost your email sign-ups and increase product sales. We’re sharing our exact design process to create a beautiful product mockup template that you can use over and over again, cutting your design time in half!

Ready to nail your product launch? Get our FREE Product Creators QuickStart Kit today! This kit has a checklist, cheatsheet, and Canva design template so you can create a digital product for your blog!

GET THE FREE PRODUCT QUICKSTART KIT NOW!

Designing a product mockup doesn’t have to be complicated, yet it’s one of the most requested template designs we get.

Showcasing your product in a mockup-style format helps keep your designs consistent.

But, it also helps your audience see exactly what they’re getting, and that can make people feel a lot more confident when putting in their information, even if it’s just handing over their email address.

We noticed a significant increase in email signups and product sales as soon as we started adding product mockups to our website.

Truth be told, we use product mockups everywhere.

Blog posts, sales pages, social media graphics, landing pages, and even Pinterest pins!

Product mockups are a MUST.

And, it’s super easy to create your own product mockup template that saves you a ton of design time and keeps your designs consistent.

Related Post: How to Brand Your Blog and Easily Achieve Brand Consistency

The thing about consistency that most people don’t realize is that it builds trust. If you’re consistent with your designs, your audience knows it’s you.

You can spot our pins in the smart feed a mile away. That’s consistency!

REMEMBER THIS POST LATER! PIN IT TO YOUR FAVORITE PINTEREST BOARD!⬇

If you're looking for an easy tutorial for designing a mockup inside of Canva this is for you! Mockups are a great way to generate more money and sales from digital products- here's how you can create a mockup in Canva to visually market and promote your digital products!

We make all of our product mockups right inside of Canva, whether it’s for a freebie or paid product (to include bonus offers).

Canva makes it so easy to create mockups for almost (if not) every product type and niche. That’s where your creativity comes into play.

If you’d rather have NEW plug-n-play Canva product mockup templates delivered every month, join our DiyDesign Creators Vault!

Now let’s get to the good stuff. If you have your product image already created and ready to go, let’s jump right in!

STEP 1: SEARCH FOR A PRODUCT STOCK PHOTO

Once you’re inside Canva, choose your design size. We like to use an Instagram Post, preferably 1080px by 1080px. 

We found this to be the most versatile size that looks great wherever you use it. Another popular choice is the Facebook ad size, 1200px by 628px.

Now, the first thing we’re going to do is find a product stock photo.

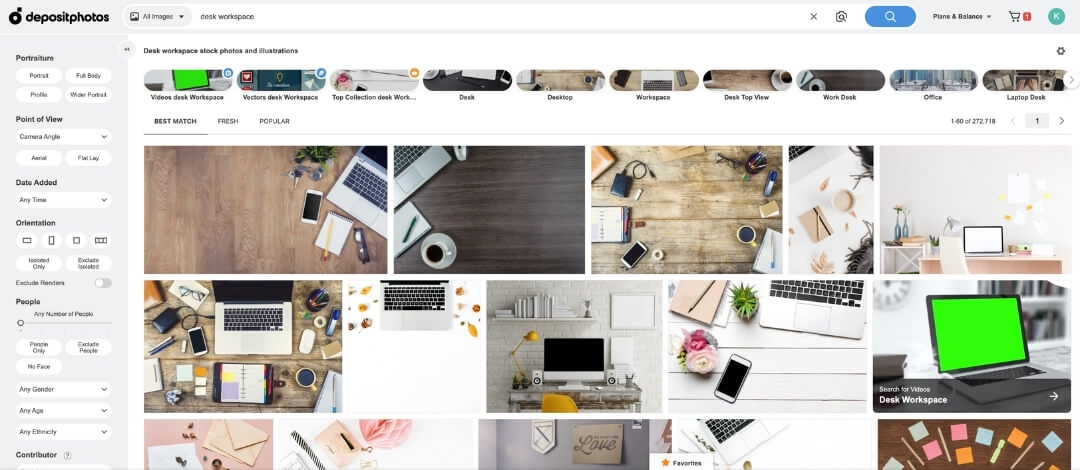
We love Depositphotos because they’re the best bang for your buck. The quality of stock photos is really great for the price, too.

Save time designing graphics for your digital product and lead magnets by creating a list-building product mockup template using Canva!

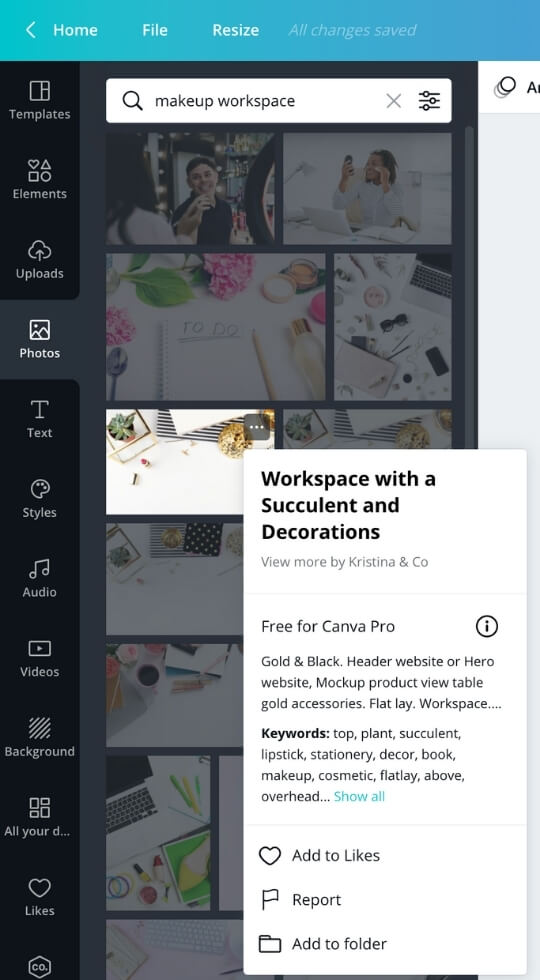
To start, search any kind of workspace – colorful workspace, makeup workspace, tool workspace, whatever your overall blog theme is about.

PHOTO TIP: Choose a photo with a lot of bright, white space. You want the focus on your mockup image and text, not the stock photo itself. Plus, it’s easier to match your brand colors!

When we first started Simplifying DIY Design, we went with flat lay stock photos instead of angled, so we weren’t spending extra money creating 3D cover designs.

If you have a design budget, check out myecovermaker to create a 3D product mockup that really pops!

Save time designing graphics for your digital product and lead magnets by creating a list-building product mockup template using Canva!

You can also search for a product stock photo right inside Canva. But just know you’ll have a much larger selection if you upgrade to Canva Pro.

WANT TO TRY CANVA PRO FREE FOR 30 DAYS?

Start your FREE Canva Pro trial today and unlock ALL of their incredible design features, including hundreds of top-quality stock photos in almost every niche.

Once you find your stock image, head to Canva and start designing your product mockup template.

STEP 2: DESIGN YOUR PRODUCT MOCKUP TEMPLATE IN CANVA

We’re ready to add the cover of our product to our mockup template.

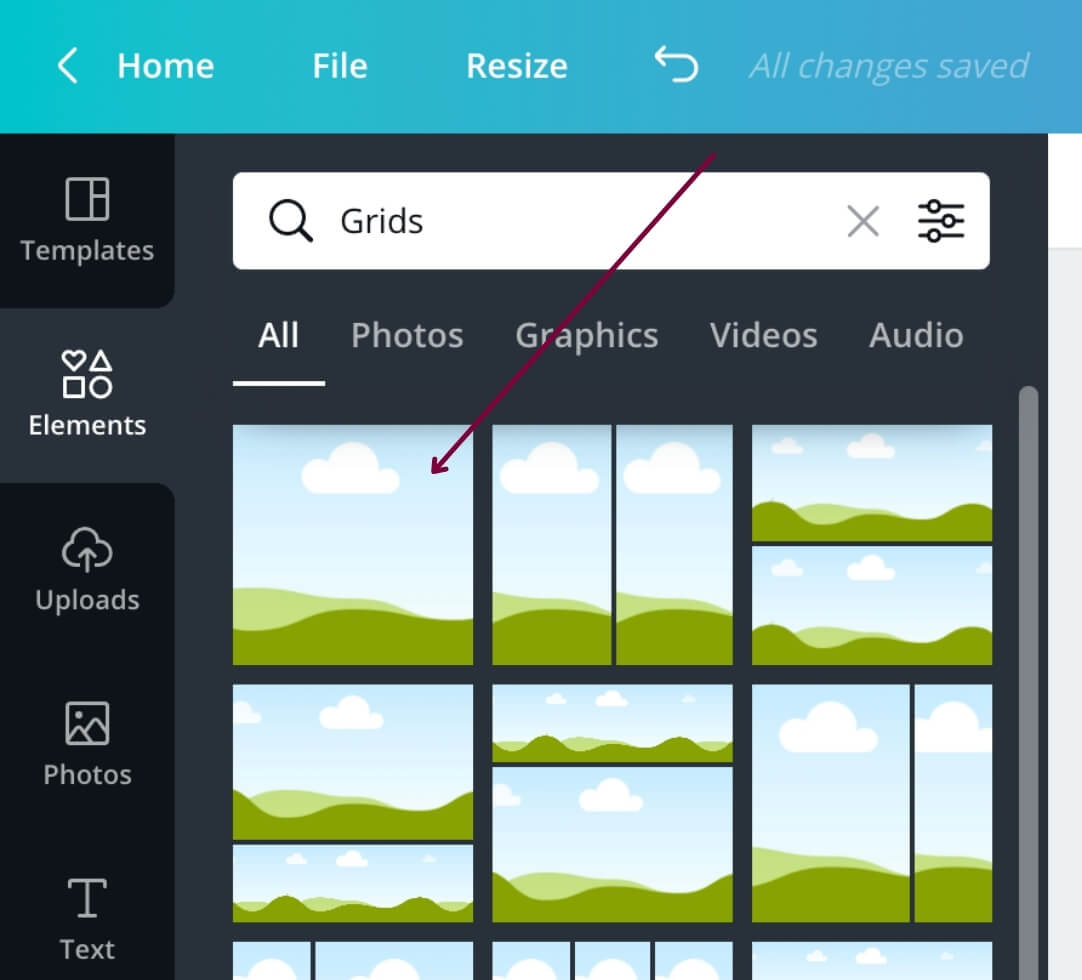
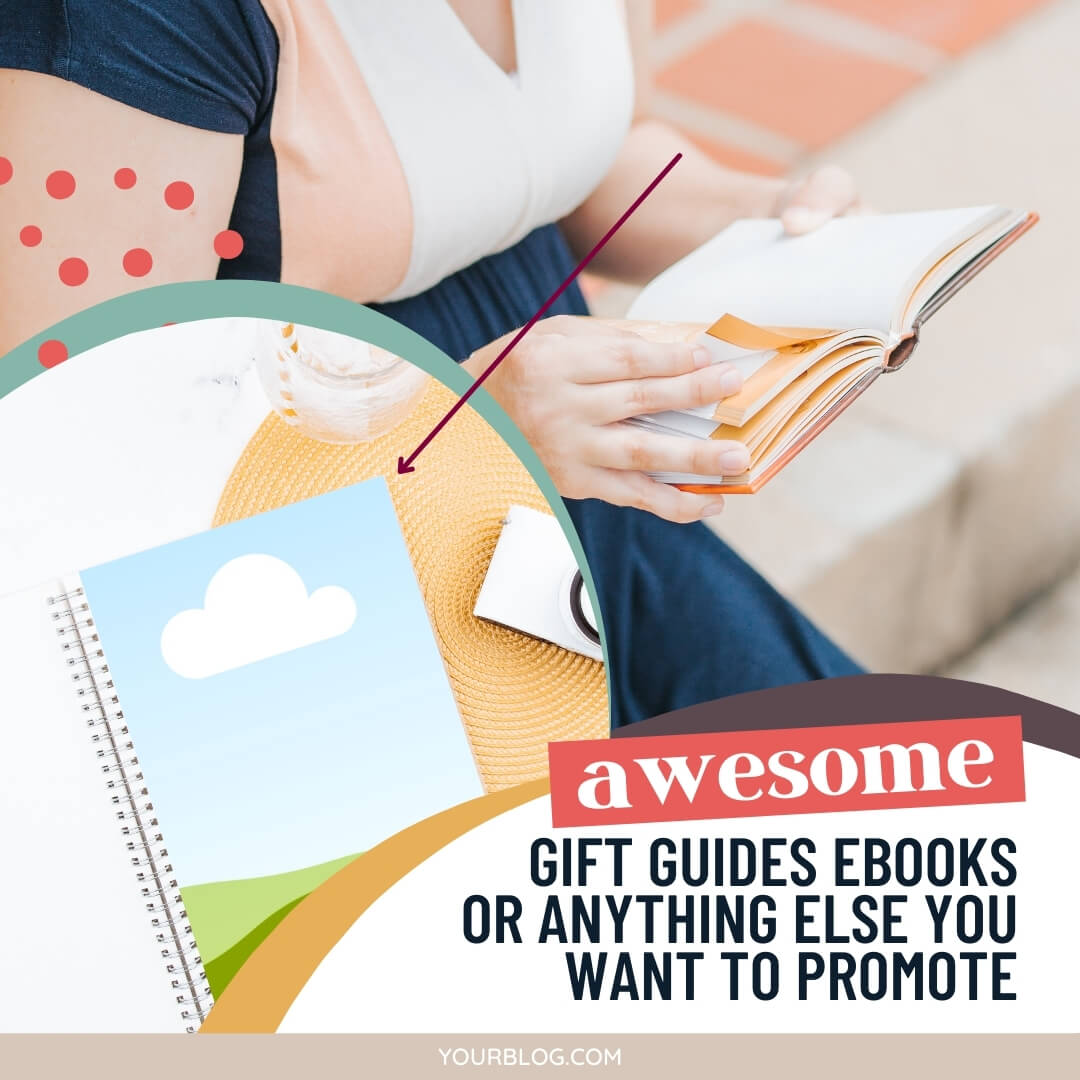
If your photo has a notebook, iPad, or any other kind of device, you can add a grid right on top of it, which will allow you to drag and drop your cover image right into it.

We recommend zooming in as much as possible to make sure you line it up to the notebook edges perfectly.

If your stock photo doesn’t have a device on it already, you can search for design elements like ‘iPad’ to add to the space in your photo (or on top of undesired objects like a notebook).

It all depends on the product and how you want to showcase it.

Save time designing graphics for your digital product and lead magnets by creating a list-building product mockup template using Canva!

Love this design? These Canva design templates shown throughout this post are from our DiyDesignCreators Vault!

Like we said earlier, you can get as creative as you want when designing your own product mockup template.

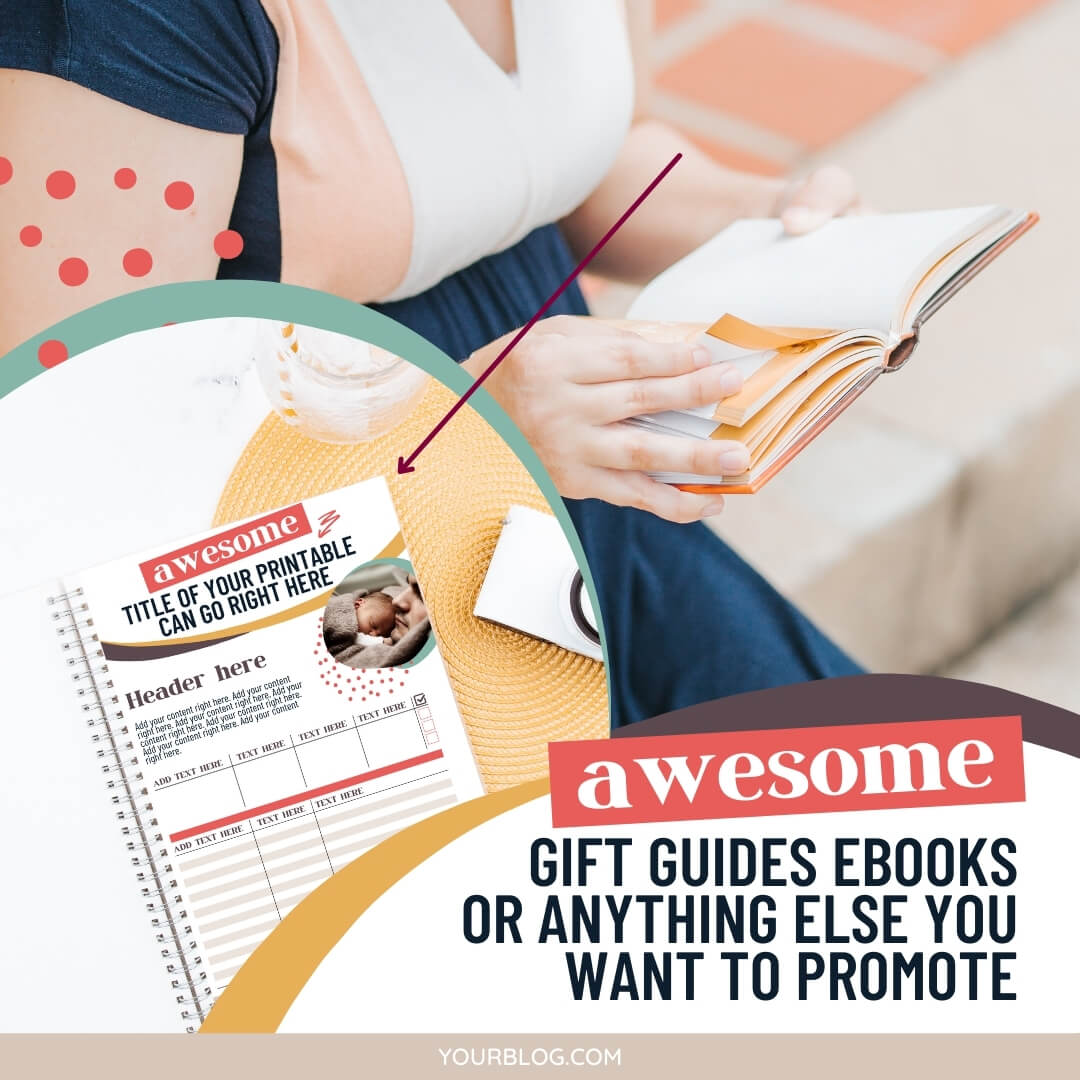
Once the grid is added to your stock image, it’s time for the product. In this case, it’s the cover page of one of our page design templates found in our DiyDesign Creators Vault.

Save time designing graphics for your digital product and lead magnets by creating a list-building product mockup template using Canva!

And that’s it!

You now have a product mockup template that can be used over and over again, saving you a TON of design time and helping to keep your brand consistent.

Product mockup templates are also an essential piece to launching your digital products.

Related Post: Digital Product Launch Graphics You Need to Create

We made five figures on our first big product launch, and we have our product mockups to thank for that!

Instead of just reading about it, our audience could SEE the templates, workbooks, Trello boards, and video lessons they were about to buy. Total game-changer for sure.

Save time designing graphics for your digital product and lead magnets by creating a list-building product mockup template using Canva!

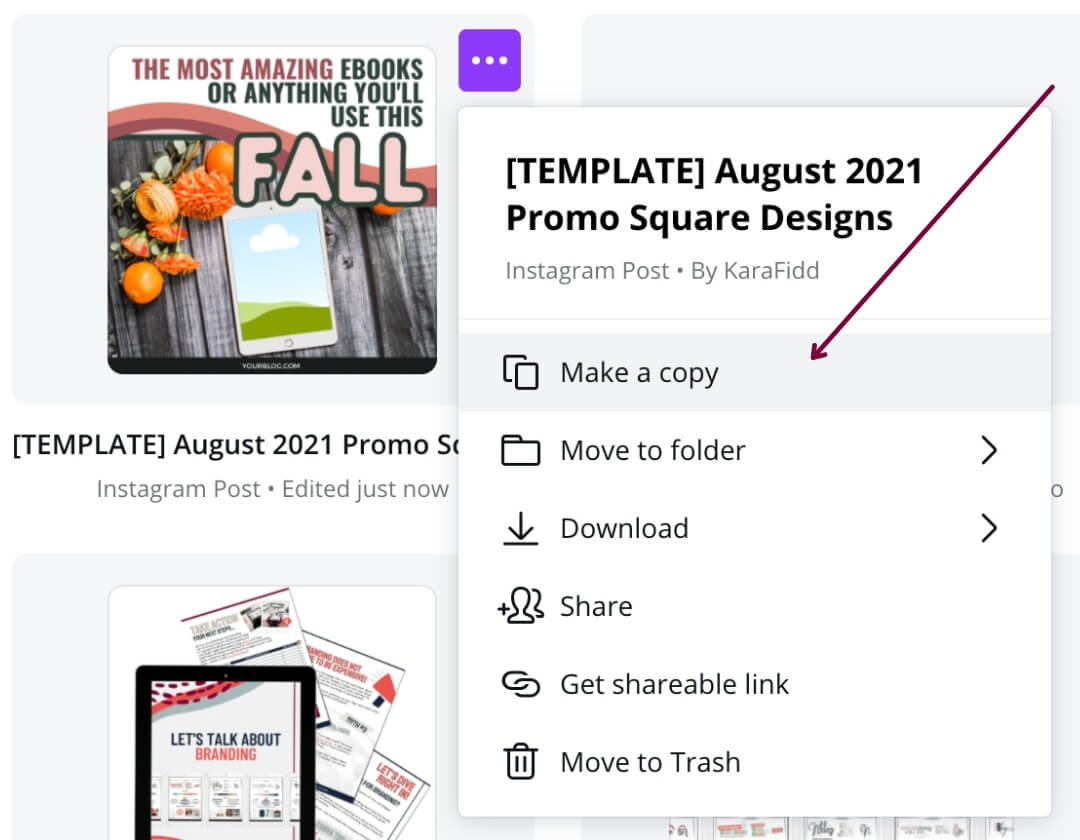
Don’t forget to name this product mockup (to include ‘template’), so all you have to do is click ‘Make a copy’ whenever you want to create a new mockup.

Seriously, it’s that easy! Once you make a new copy, swap out your cover for your new design, and you’re all set.

BRANDING YOUR PRODUCT MOCKUP TEMPLATE

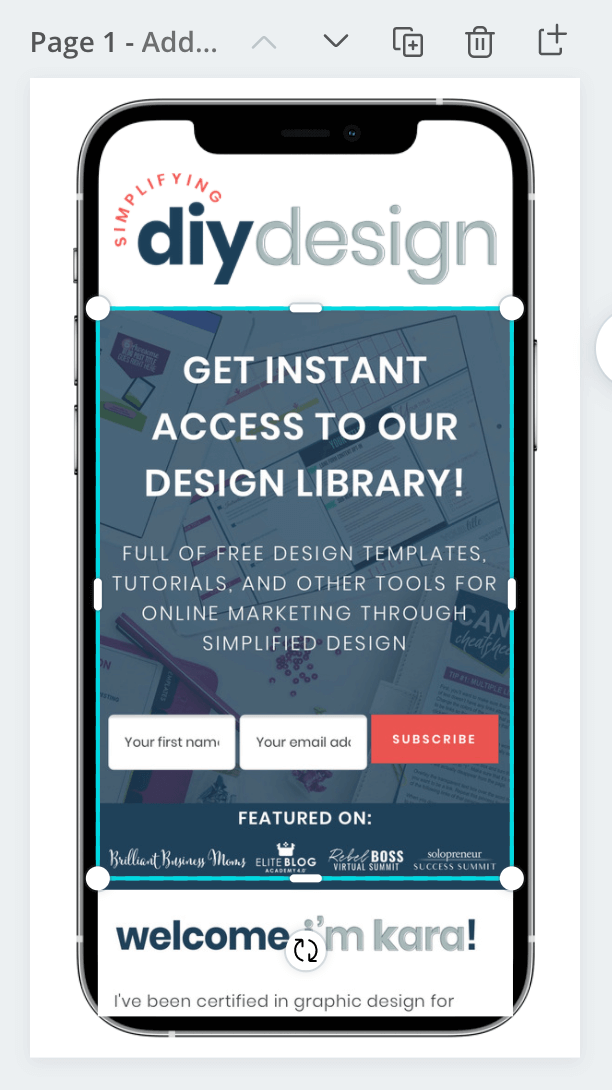
Another thing we like to do for our product mockup templates is to add a phone that has our logo on it.

It’s an easy way to show where this product is coming from without having an awkward logo that never seems to fit.

First, we created a new design using the size 540px by 960px. I found this to be the best size for cell phones.

Then, we added our logo at the top and placed the screenshot of our website in another grid to form one long image.

Save time designing graphics for your digital product and lead magnets by creating a list-building product mockup template using Canva!

This design definitely requires a few modifications to make it right, but it looks good once it’s done!

This feature is only available with Canva Pro, but you’ll checkmark ‘Transparent background’ before you click ‘Download.’

It’s a great time to upgrade to Canva Pro because you can try it FREE for 30 days!

You can use many different programs to remove the background of a graphic if you don’t have Canva Pro. If you have a Mac, you can use Preview.

Another option we recommend is Pixlr.com, a free option that anyone can use regardless of what type of computer they’re operating.

Save time designing graphics for your digital product and lead magnets by creating a list-building product mockup template using Canva!

Once that’s finished, you can head back to the product mockup template, upload the iPhone image, and try a few different placement variations to give your website a little shout-out.

Your Canva-designed product mockup template is now ready to go! Maximize your time by creating even more design templates to grow your blog!

Related Post: 3 Ways You Need to be Using Templates to Grow Your Blog

THINGS TO NOTE

If you’re looking to create your own Canva templates to sell, make sure you have the commercial rights to sell your purchased stock photos in your templates.

For example, we can’t use a stock photo from Depositphotos or Creative Market without purchasing the license to resell.

It can be quite a bit extra to purchase the Commercial license, but it’ll protect you against any legal action taken from the original owner/creator.

The same goes for premium fonts and design elements, too.

Despite all of that, creating and selling Canva templates can be very profitable, easy to maintain, and can cost you almost nothing to get started!

RESOURCES MENTIONED IN THIS POST:

  • FREE Design Vault
  • How to Brand Your Blog and Easily Achieve Brand Consistency
  • FREE Product Creators QuickStart Kit
  • DiyDesign Creators Vault
  • Digital Product Launch Graphics You Need to Create
  • 3 Ways You Need to be Using Templates to Grow Your Blog
  • Must-Have Tools for Creating and Selling Digital Products

Don’t forget to grab our FREE Launch Template Pack now! These fully editable Canva templates will help you create jump-off-the-page product mockups so you can rock your launch!

GET THE PRODUCT LAUNCH TEMPLATE PACK!

TRY CANVA PRO FREE FOR 30 DAYS

Start your FREE Canva Pro trial today and unlock ALL of their incredible time-saving features that cut your design time to just minutes.

To be honest? It’s the best $12.99/mo OR $119/yr we spend on our business because that time we save with every design is put back into making MORE money in your business!

WANT TO SAVE THIS FOR LATER? PIN IT TO YOUR FAVORITE PINTEREST BOARD!⬇

If you're looking for an easy tutorial for designing a mockup inside of Canva this is for you! Mockups are a great way to generate more money and sales from digital products- here's how you can create a mockup in Canva to visually market and promote your digital products!

Filed Under: Design Tutorials

15+ Best Blogging Tools for Beginners 2023 | Start a Blog

January 19, 2018 by Simplifying DIY Design 15 Comments

Last updated on November 16th, 2023

Just three months after starting our blog, we were making money even with a VERY small budget because we had the right tools for the job. Here are the exact blogging tools we used for our new blog to help us replace our full-time income in just six months!

We were listening to a podcast the other day about different approaches to tackling the day.

One guest mentioned how he breaks his main 24-hour day up into three days to help switch his mindset to get more done.

Honestly, it was a revelation for us because while we know that every second of your day counts, you really need to make them worthwhile when you’re a new blogger.

Especially if you’re a working mom with small kids! #askushowweknowhow

And even more so if you want to grow your blog quickly and leave that soul-sucking 9-5 behind.

Ready to grow your email list? Get our FREE Lead Magnet Template Pack! These fully editable Canva templates will be the perfect upgrade to your blog posts!

GET THE FREE TEMPLATES NOW!

Because of that, it seems like everyone has some kind of tool that you absolutely need (and up buying out of sheer desperation).

Or this ONE tool will streamline your entire business. It’s a MUST-have!

Or what about this one – it’ll magically make you go from zero to millions. It’s truly that missing piece your business has been dying for!

Ever heard of those before? We figured you did. And don’t worry, we fell for a lot of it, too.

Every tax season, we cringe knowing the insane amount of money we spent on all the ‘magic’ tools in years past, knowing the only thing we can do is chalk it up as a MAJOR lesson learned.

In the hopes of preventing you from making the same financially-agonizing mistakes we’ve made, we’re sharing the exact blogging tools we used to go from launch date to $2k/mo in just three months.

WANT TO REMEMBER THIS LATER? SAVE IT TO YOUR FAVORITE PINTEREST BOARD! ⬇

Want to start a blog in 2023? Here are the best blogging tools for beginners that we'd recommend (and even used ourselves!) to grow into a six-figure blog!

If you’re NOT a new blogger, you may want to check out our post about the blogging tools we use as a six-figure blog here.

The blogging tools and resources we’re about to chat about are what we used in the first three months to grow our blog.

Unfortunately, some of the blogging tools we used no longer meet our standards of recommendation. In turn, we’re providing what we would use if we had to start our blog over again in 2023.

Keep in mind these are just tools. Will a tool alone help you make money blogging? No. You need a strategy that’s built around your avatar to pair with your tools.

This is the strategy we used to make hundreds our first month to now six figures annually with our design blog.

WEBSITE

WORDPRESS THEME – $0

You can easily use an off-the-shelf WordPress theme for your blog and still have a beautiful website. Unfortunately, most themes are built for design and focus less on site speed and functionality.

This, in turn, reduces your site speed which negatively affects your search engine optimization (SEO) and usability.

Stupid Simple SEO recommends the Kadence WP theme (it’s free, by the way) because it still looks great no matter how you customize it without compromising your load times.

But as a design agency, we really wanted our website to stand out and be as unique as our Canva templates.

Laura from Pixel Me Designs was not only affordable but did an amazing job with our branding and website. It’s fast, easy to navigate, and highlights our brand personality to a T.

WEB HOSTING – $4.99/MO

Because we had about four blogs under our belt before launching Simplifying DIY Design, we knew what to look for in terms of web hosting.

Bluehost’s very affordable pricing attracts a lot of new bloggers on a budget. Heck, that’s who we used because of it! But in this case, you get what you pay for, and we learned the hard way.

Believe it or not, Bluehost shut down one of our blogs after one of our posts went viral, stating, “We were taking up too much space on the server.”

After a quick rant in a Facebook group, this was more common than we thought. And since we wanted to grow Simplifying DIY Design as quickly as possible, we knew we needed a better host.

*SiteGround enters the chat*

Ad - Web Hosting from SiteGround - Crafted for easy site management. Click to learn more.

We weighed pricing, server space, usability, integrations, updates, SSL certificates, other blogger reviews (both high and moderate traffic), and, most importantly, customer support.

So in November of 2017, we launched Simplifying DIY Design using SiteGround and absolutely LOVE them! We had months of consistent +26k page views, and our site never skipped a beat.

Now, are we saying that if you’re currently using Bluehost, you need to jump ship? Definitely not. But it is something to keep in mind if you plan to scale your blog since they seem to really only focus on low-traffic sites.

LANDING PAGES – $0

A LOT has changed with our landing page and lead box (email capture form) tool since launching Simplifying DIY Design.

We originally used Thrive to build all of our landing pages and lead boxes we used throughout our blog posts because it was a one-time cost instead of a monthly fee. It was easy to use (at the time) and looked very professional.

But again, a lot has changed, and we no longer recommend using Thrive. If we were to start our blog over again in 2023, we would use Elementor for our landing pages and ConvertKit for our lead boxes which we’ll chat about later.

Related Post: Simple Landing Page Tool to Increase Conversions

First, Elementor is a free drag-and-drop page builder for WordPress users. It’s very easy to use, and the customization options for bloggers are almost limitless.

Use it as a basic opt-in page for your freebie or multi-level resource library, a tripwire page, an offer expired page, or a full-length sales page for your digital products!

Elementor integrates with most email service providers (ESP), making it a top pick for WordPress users. Brizy is also another incredibly popular WordPress option that’s dominating the tech charts this year!

SEO PLUGIN – $0

If you’re brand new to blogging, you may not know how important SEO is for getting traffic to your blog.

By using a free WordPress plugin called Yoast SEO, we were able to optimize our content to help us rank higher in the search.

A great SEO plugin measures keyword density, readability, the strength of title and meta description, external linking, and so much more.

Even though we used Yoast SEO at the start of our blog, we actually switched over to Rank Math for numerous technical reasons, but the biggest takeaways were its size and efficiency.

A fast-loading site plays a vital role in your customer’s experience, so if there’s anything we can do to reduce load times, we’re all about it.

BRAND TEMPLATES – $27

Every successful blog has a brand that starts with a logo and color palette. And even that can sometimes be where blogs fail because they can’t seem to get past this step.

We designed our own logo, color palette, and blog graphics for a consistent and recognizable brand across all avenues, including our emails and social media accounts.

Having a beautifully branded and professional-looking website built trust with our readers because they knew they were in the right place.

They knew that what we were teaching was authentic. They knew they could trust handing over their email address in exchange for a free good (and ONLY a free good – no spam around these parts!).

If you struggle with branding your blog or just want it all done for you, you NEED to check out our Five-Minute Brand (and get $20 off by clicking this link)!

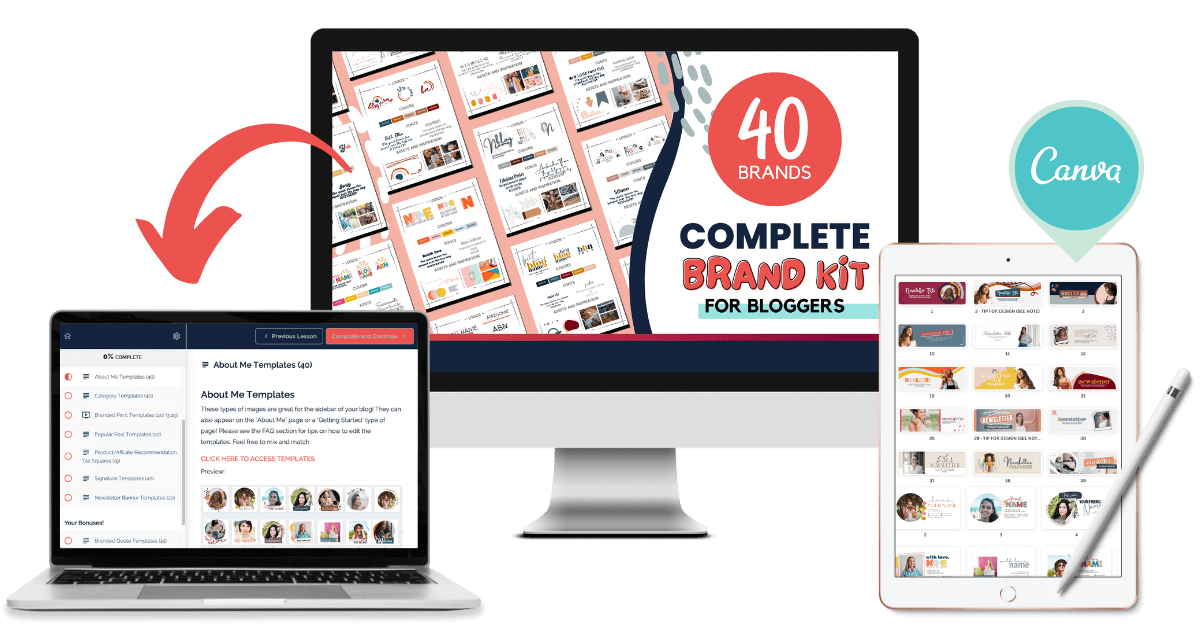
Struggling to brand your blog? Create a brand for your blog that's perfectly you in just minutes with our 40 complete Canva brand templates for your blog!

We’ve designed 40 completely unique done-for-you brands to where all you have to do is add in your blog’s name. It’s truly lived up to the Five-Minute Brand name!

WRITING

While the blogging tools we’re about to chat about aren’t necessarily classified as ‘essential’ like a website or landing page are, we firmly believe they were vital to our blog’s success.

Plus, it’s not like we’re promoting $500 courses over here. Every writing tool we used was and still is 100% free to use, so there’s really no reason to not use it in your blog!

GRAMMARLY – $0

It’s no secret that our brain moves faster than our fingers. No matter how hard we try, we completely skip a word (or two). We sometimes use incorrect punctuation and misspell even the most basic words.

Especially ones you’ve been staring at for hours! The word would; yeah, we’re talking to you.

We also blame our keyboard for having sticky keys… just sayin’.

Anyway, the thing we love most about Grammarly is that it works on any browser screen by simply adding its web extension (we use Chrome).

So whether you’re writing an email, Facebook post, Google Doc, blog post, etc., it’ll either correct your misspelled words or underline your misspellings (if it can’t figure out your hot mess letter cluster), grammatical errors, and punctuation.

All you have to do is hover over the underlined word and click to implement its suggestion or dismiss if it’s correct, like the word Canva (it tries to change it to Canvas).


Seriously, it doesn’t get much easier than that.

We have since upgraded to their Premium Plan ($12/mo) mainly for their full-sentence rewrites and conciseness to remove unnecessary words. It’s been a game-changer for sure!

COPY TEMPLATES – $0

If you struggle with captivating copy, we can’t recommend Write or Die enough.

We downloaded their free Facebook ad copy template, followed it, and literally got this message a few hours later from one of our subscribers who saw the ad:

Fabulous ad! So well written. It’s hitting all my pain points! It makes me want to sign up again! Really nice work.

Now, we know what you may be thinking. And yes, we did run Facebook ads to promote our freebie almost right after we launched our site.

Our budget was VERY small ($1-$2 a day), and we already had a $7 tripwire product in place to help recoup the cost of our, again, small ad spend.

Related Post: Profitable Tripwire Product Ideas for Your Blog

But you know what?

In just the second month after launching our site, we were already generating hundreds in income from our tripwire product alone which more than paid for our ad spend.

And by month ten, we made $23,522 in digital product sales. That seems pretty darn essential now, doesn’t it?

BLOG POST COPY – $0

As bloggers, we love to write. But that doesn’t mean we know how to keep our readers stuck on our site, obsessively pouring over every piece of content we put out.

We wanted to give Simplifying DIY Design every ounce of effort we could afford. At the end of the day, we wanted to be able to say we did everything we could to make this thing a success.

We knew our designs were great. We knew we understood our audience inside and out. But the thing we were a little unsure of was writing content that grabbed their attention and never let go.

That’s when we found Sticky Blogging.

Kelly’s free 5-day course opened our eyes to a totally different take on blogging by focusing on quality over quantity.

Using her 1,000 true fans approach, we were able to launch our very first product to a list of less than 2k subscribers.

Our list was small, but boy, was it mighty. We made over $10,000 in just seven days because we had truly attracted our super fans!

LIST BUILDING

EMAIL SERVICE PROVIDER – $9/MO

Your email list is your blog’s most powerful tool because you OWN it.

If Facebook goes down or Instagram arbitrarily closes your account, your audience is left in the dark.

You have no way of connecting with your readers to let them know about a new blog post, let alone a sale so you can pay this month’s bills.

That’s why we made our email list top priority from day one.

We wanted an ESP that would let us segment our subscribers based on interests, tag buyers, and build funnels to automate sequences and SALES. Yep, we said automated sales!

ConvertKit is not only affordable but grows with your business as you scale. They have fantastic customer support, too.

You can even create simple yet effective product pages to sell (and deliver!) your digital products. Try ConvertKit risk-free with a FREE 30-day trial here!

EMAIL STRATEGY – $64

One of the reasons we were able to make money with our blog so fast is because we understood our avatar down to their core.

We knew what they were good at, what they struggled with, and what they desperately wanted a solution for. But getting people to sign up for your email list was only half the battle.

Keeping them on our list and actively engaging with your emails was a totally different ball game which was made possible using the Busy Budgeter’s Date Your List workbook.

Our subscribers were the ONLY reason we were able to not only create our very first digital product but launch it to a list of less than 2k subscribers and still make over $10k in just a week.

Not to mention our weekly Canva design tip newsletter has an average open rate of 48%. If we didn’t say it already, we’ll say it now – Date Your List is worth its weight in gold.

DIGITAL PRODUCTS

PRODUCT DELIVERY – $0

There are a ton of different ways you can make money with your blog, but the most popular are digital products, ad revenue, affiliate sales (especially during the holiday season), and providing client services.

The bulk of our income (roughly 80-90%!) comes from selling digital products. The other 10-20% is from affiliate sales (people purchasing products we recommend using our special-coded links).

As we said earlier, we had a freebie and companion tripwire product at the start of our launch.

We originally sold our products using SendOwl before we switched over to Teachable (once we offered a couple of free courses). It just made sense to have everything on one platform.

SendOwl handled the monetary transaction and delivery of our products via email. Basic, but effective. Unfortunately, they’ve failed to keep up with the ever-changing tech, and it’s no longer a reliable tool that we can confidently recommend.

Instead, we’d use Payhip if we started selling digital products in 2023.

payhip

Payhip is the freaking bee’s knees. You can literally sell ANY product – coaching, digital downloads, memberships, courses, and even physical products!

You can embed checkouts right on your blog or create an entirely separate storefront. And get this – IT’S FREE.

You can upgrade to a paid plan for a reduced transaction fee, but ALL of the features are available for both free and paid users!

PINTEREST + SOCIAL MEDIA

CANVA TEMPLATES – $37

Some might find it hard to believe, but we actually did and still use the same templates we sell in our shop for our Pinterest pins.

This saves us a TON of time because all we have to do is add in our images, change the titles, and swap out the colors to match our brand. Done and done!

And right now, you can get our own pack of Canva + PicMonkey Pinterest templates for 20% off! That’s 60 fully editable Pinterest pins for only $37 (or $.62 a pin)!

As a new blogger who is most certainly juggling #allthethings, templates will become your best friend. Aside from saving time, templates also help keep your designs consistent and on-brand, key to building trust with your readers.

PINTEREST SCHEDULER – $0

We used a third-party social media scheduler at first but switched to Facebook’s native scheduler a few months later due to the algorithm changes.

Rumor has it that posting directly to Facebook using their own scheduler helps give your posts a little boost versus a third-party scheduler like RecurPost or SmarterQueue.

However, Pinterest is a completely different story (also because it’s a search engine and not a social media platform).

At the time, Pinterest favored pins from other contributors as well as your own, which meant manual pinning was completely out of the question.

There was an amazing tool called BoardBooster that, to this day, is still one of our favorite blogging tools because it did SO much more than Tailwind. However, long story (very) short, it’s no longer available.

The only solution with Pinterest’s personal seal of approval was Tailwind, which became our new Pinterest pin scheduler.


Tailwind lets you schedule posts to your account boards as well as group boards which make publishing your pins a breeze.

You can also add your content to Tribes, which is essentially a group board but with a bit more accountability (i.e., keeping track of how many pins you’ve pinned to your account versus added to the Tribe).

Pinterest and Tailwind were major contributing factors to our blog’s quick success because we were able to reach much larger audiences right away (by having other bloggers share our pins) while waiting for Google to rank our content.

CREATIVE NEEDS

DESIGN PLATFORM – $0

Every blog needs some sort of design platform. How else can you make your Pinterest pins, lead magnets, blog graphics, and social media posts?

With that said, we’ve tried them ALL – Photoshop, InDesign, Illustrator, PicMonkey, Easil… The list goes on. Now, we’re definitely not the type to push anything on anyone, especially a design tool. We’re all different in how we learn and process things.

There are bloggers who’ve tried Canva and still prefer PicMonkey every day of the week and twice on Sunday. They found the layout and functionality fit their needs better, and that’s great!


We want every blogger to succeed using the tools that work for THEM!

But for us, Canva was the design platform that clicked for us. It’s so incredibly easy to navigate, design, edit, and download anything you need.

Honestly, there are a TON more reasons why we think you’ll fall in love with Canva as much as we did, but we don’t want to turn this already lengthy post into a Stephen King novel.

Related Post: Must-Know Canva Tricks to Design in Less Time

While Canva is free to use, they offer a Pro plan that we absolutely swear by.

We’ve cut all of our stock photo memberships (saving us hundreds a year!) and no longer spend (way too much) money on content licenses.

See for yourself why we’re obsessed with a FREE 30-day trial of Canva Pro!

STOCK PHOTO MEMBERSHIP – VARIES

We make it a point to stay as far away from sites like Pexels and Pixabay as possible, and you should too.

If you haven’t heard the juicy news, people were putting their images on these sites to then take them off and sue people that used them for copyright infringement. True definition of money grab right there!

Because of that, we knew we wanted to purchase our stock photos from a reputable company with a clear-cut license agreement we could understand without needing to hire a lawyer.

After trying a handful of stock photo memberships, we found one that fit the bill on both quality and our unique brand style, which was DepositPhotos.

Don’t get us wrong. Memberships like PixiStock, HauteStock, and IvoryMix provide some of the most beautifully detailed stock photos. Unfortunately, they’re just a tad too feminine for our brand.

Now, if you read our little Canva love story just above, you’ll know that we have since canceled all of our stock photo memberships, including DepositPhotos.

We made this decision after Canva drastically expanded its media library to include thousands of photos and videos in a variety of styles and industries.

We’d much rather pay $12.99/mo for a design platform AND unlimited stock photos versus the hefty price tag of just a stock photo membership.

CREATIVE ASSETS – $0

If you’re not familiar with Creative Market’s free goods, you’re in for a real treat.

Creative Market offers four to six FREE assets per week from artists of all different styles.

You may find fonts, slide decks, shadows, hand-drawn clipart, stock photos, Apple product mockups… The sky’s the limit on what you’ll find.

Want to start a blog in 2023? Here are the best blogging tools for beginners that we'd recommend (and even used ourselves!) to grow into a six-figure blog!

We recommend checking in every week because you never know what you’ll find. Who knows, it may be the exact thing you’ve been looking for!

We’ve also purchased a few deeply discounted bundle packs to use throughout our designs.

Again, this was before Canva extended its media and font library, so be sure to check Canva first before purchasing additional creative assets.

MOCKUP GENERATOR – VARIES

Last but surely not least is myecovermaker.

We used this to make 3D images of our digital products to use in product mockups throughout our blog, emails, social media posts, and sales pages.

Although our products are digital, it provides the right visual element to show that there is some tangible aspect to them. We added a screenshot of a course in Teachable to an iPad and a workbook cover to a binder.

We then uploaded our transparent 3D mockup images into Canva so we could create graphics like this.

We feel like a broken record at this point, but Canva now provides an incredible product mockup tool called Smartmockups.

You can add your product image to things like apparel, tech, prints, home goods, and even packaging!

If you have a Canva Pro account, you’ll get access to the full 8000+ Smartmockups image library. You can try Canva Pro FREE for 30 days here.

Full disclosure: Blogging is hard.

What a lot of those gimmicky-type bloggers won’t tell you is that they probably have quite a bit of blogging experience or a decent budget to outsource right away.

We didn’t start Simplifying DIY Design as a brand-new blogger. We had already been blogging for a couple of years, learning and experimenting.

However, we started with ZERO subscribers and ZERO income.

Less than three months after launching Simplifying DIY Design, we reached 500 subscribers and earned +$1500 in one month.

Again, we had a strategy specific to our audience. We used our experience from our other blogs and built a foundation using the tools mentioned above before officially launching.

We also knew when to say, “It’s good enough! Let’s click that button and publish!”

We were willing to invest, despite our tight budget. We had to be careful and make (very) smart investments. We had to quickly measure whether or not a tool was working to determine if we could still afford it.

There are SO many tools out there that it’s easy to think you need to buy yet another thing. You start to feel overwhelmed. You start getting FOMO.

Our biggest advice is to start small. Start with a foundation of blogging tools and work from there.

We are NOT recommending you sign up for everything on this list in your first week of blogging. This isn’t an all-inclusive list, either. It’s simply the tools we used as a brand-new blog.

Start your blog, write as much as you can, and set up your email list. Then you can start weighing your investments.

Do you really need ANOTHER course, or would your money be better spent on a template pack that’ll help you create a product that you can sell over and over again?

Do you need ANOTHER tool, or could you hire a VA to take care of some tasks for you, giving you more time to spend on areas that bring in money, like lead magnets, paid products, networking, emailing your list, etc.?

Everyone’s business is different. You’ll start learning what you can really afford as you go. Most of the blogging tools on this are free, so why not give them a go?

REALLY try it for at least a month and see if it’s made an impact. To put it into perspective, here are the blogging tools we’d use right now (because we swear by them that much) if we were to start a new blog in 2023:

  • Theme: $0
  • Hosting: $4.99/mo
  • Landing pages: $0
  • SEO plugin: $0
  • Brand templates: $27 (with our $20 off coupon)
  • Blog post copy: $0
  • ESP: $9/mo (also for freebie landing pages and lead boxes)
  • Email strategy: $67
  • Product delivery: $0 (for product sales pages and checkout)
  • Pinterest templates: $37 (with our 20% off coupon)
  • Pinterest scheduler: $0
  • Design tool: $12.99/mo (to replace all the other design tools we’ve used)

If we were to purchase everything this month, that would come out to $157.98 with a recurring monthly bill of $26.98. That’s less than $.90 a day.

If we were to sell just ONE $7 tripwire product a week or just ONE $27 product once a month, we’d cover our monthly expenses.

Pretty reasonable, wouldn’t you say? As you grow your blog into an income-generating business, everything else will come with time.

You wouldn’t give up on your four-year degree after just one year, so why not give this blogging thing your best shot? You’ve got this!

Don’t forget to grab our FREE lead magnet template pack! These fully editable Canva templates will help you create amazing freebies that build trust, so they’re ready to buy!

GET THE FREE TEMPLATES NOW!

TRY CANVA PRO FREE FOR 30 DAYS

Start your FREE Canva Pro trial today and unlock ALL of their incredible time-saving features that’ll cut your design time down to just minutes.

To be honest? It’s the best $12.99/mo OR $119/yr we spend on our business because that time we save with every single design is put back into making MORE money in our business!

WANT TO SAVE THIS FOR LATER? PIN IT TO YOUR FAVORITE PINTEREST BOARD!⬇

Want to start a blog in 2023? Here are the best blogging tools for beginners that we'd recommend (and even used ourselves!) to grow into a six-figure blog!

Filed Under: List Building, Growth Strategy, Product Creation

The Ultimate Guide to Creating a Blogger Media Kit That Makes Money

January 10, 2018 by Simplifying DIY Design 3 Comments

Last updated on June 29th, 2023

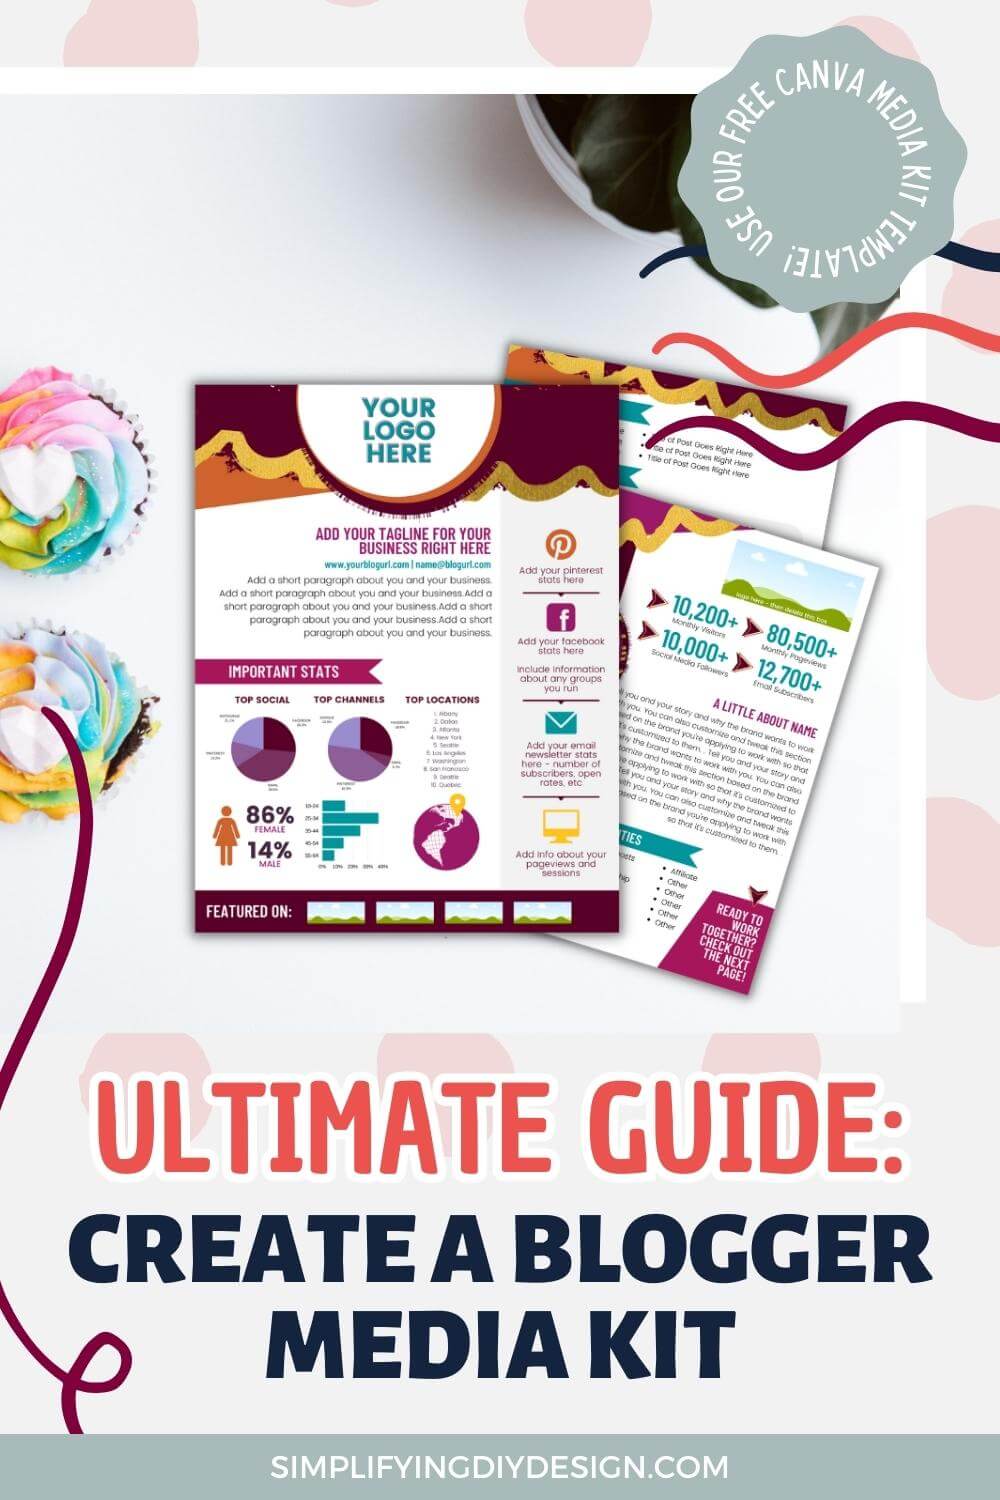
Media kits are the linchpin to nailing blog sponsorships! In this article, you’ll learn not only what needs to go in your blogger media kit but how to design a media kit with our FREE blogger media kit template!

When we look back at our almost decade-long blogging journey, we’re instantly filled with so many emotions.

We cringe, thinking about the horrendous design choices we’ve made with our blog thinking it actually looked good at the time. We can now laugh, a lot, knowing all of the mistakes we’ve made only helped us become better bloggers.

And we can smile from ear to ear thinking about our accomplishments, including our very first paycheck, thanks to our blogger media kit.

Ready to monetize your blog with sponsorships? Get our FREE blogger media kit template so you can have your own professionally designed media kit in just minutes!

GET OUR FREE MEDIA KIT TEMPLATE!

When we finally got serious about blogging as a business by investing in the right tools and education, we were able to grow our pageviews to +10k our first month AND book our very first sponsored post for a whole $22!

One month later, we increased our pageviews to about 26k per month and landed our second sponsored post for $180.

Were we swimming in the money? Definitely not.

But it helped cover our blog’s monthly expenses, which meant we were heading in the right direction. Finally!

REMEMBER THIS POST LATER! PIN IT TO YOUR FAVORITE PINTEREST BOARD!⬇

If you're ready to monetize your blog with sponsored opportunities, you need a blogger media kit. Use our FREE blogger media kit template to get started!

Now, we just want to mention that there are plenty of ways you can make money with your blog aside from sponsorship opportunities.

In fact, we highly recommend diversifying your income streams to cover all of your bases. You can design and sell Canva templates, printables on something like Etsy, courses, workshops, and SO much more.

Other popular forms of blogging income are ad revenue, affiliate sales (especially during the holiday season), and providing client services.

WHAT IS A BLOGGER MEDIA KIT?

A Media Kit, or Press Kit as it’s sometimes referred to, is a quick overview of who you are, what your business is, who your audience is, and your blog’s stats.

The purpose of a blogger media kit is to give a brand a sense of your business so they can decide if working with you for sponsorships (and other opportunities) would be a good fit for them.

Brands look for commonalities amongst both audiences, including demographics.

What we mean is YOU may love a product and want to work with a specific brand. But if your audience is vastly different from theirs, they may politely decline.

That’s just one of the many things your blogger media kit would help determine when choosing brand ambassadors.

WHEN TO START ON YOUR MEDIA KIT

Chances are you’re probably thinking, “But my numbers are low! I’m nowhere near ready for a media kit. Am I?”

Media kits, in our humble opinion, are one of the first things you should set up after you’ve nailed down your avatar.

For Simplifying DIY Design, we knew exactly who our avatar was before we even launched our blog.

We researched, stalked Facebook groups, and surveyed for weeks, so we not only knew WHO we were writing to but WHAT to write; i.e., what they struggled with the most.

You can always update your numbers as your blog grows, which takes less than a minute if you’re using our FREE blogger media kit template. Just sayin’.

If you're ready to monetize your blog with sponsored opportunities, you need a blogger media kit! Use our FREE blogger media kit template to get started!

Here’s the thing. You don’t need big numbers.

What you DO need is a professional and clean-looking blogger media kit.

You also need to have confidence as you approach brands and be strategic about the brands you decide to pitch. But most importantly, you need to know your worth.

Our first sponsored post was well undervalued.

While our numbers may have been low, that post ended up being one of our top five posts for about two years! The amount of traffic that that $22 post brought in was unbelievably impressive.

Media kits are also needed for other opportunities, such as:

  • Giveaways
  • Product reviews
  • Influencing a conference or event
  • Brand ambassadorship
  • Landing guest posts or podcast interviews

See why we recommend getting started on your media kit right away? We don’t want you to miss out on an incredible opportunity because you didn’t have your media kit complete in time.

And yes, it can happen!

HOW TO CREATE A FREE MEDIA KIT

Honestly, a one-page media kit is all that’s needed when you first start out, especially if you’re going after both compensated and non-compensated opportunities.

As you grow, you may want to expand to a more advanced multi-page media kit with a monetization package which we’ll cover in just a moment.

Here’s what to include in your blogger media kit:

  • Logo
  • Stats
  • Elevator pitch
  • “About me” blurb
  • General idea of what services you’d like to offer (or use the examples in our media kit template)

Then, pick your color palette and gather your design elements. You’ll likely need icons for your blog stats and social media stats.

You can also include charts or graphics if you have a more advanced media kit (generally two or three pages).

SIDE NOTE: Use our FREE blogger media kit template to have all of the work done for you!

Other things to include in your media kit:

  • Introduction (what your business is)
  • About you (who you are, and why do you do what you do)
  • Stats: audience (age and gender), pageviews, email list, and social media
  • Services offered
  • Contact information
  • Professional headshot (optional but encouraged)
  • Testimonials and social proof (optional but encouraged)
  • Sponsorship/monetization package and information (optional but encouraged, especially if blogging as a business)
  • Top traffic channels (optional)
  • Top locations of an audience (optional)

Once our media kit was complete, we searched Instagram for newish businesses in our niche and made a list. Then, we picked two to start with and sent them emails with our media kit and post ideas.

As soon as we’d hear back from a brand, we’d send over our sponsorship package.

MONETIZATION OPTIONS

Creating a sponsorship package is a great way to start monetizing your blog. Start by deciding on what services you’d like to offer. Be sure to price them individually for extra clarification.

Then, create a number of different packages that include different combinations of your services at separate prices (think pricing tiers).

For example, if you offer sponsored blog posts, social media campaigns, newsletter campaigns, and ad space, you may consider creating three options:

  • LITE OPTION: 1 blog post, 1 social share, and 1 newsletter mention
  • MEDIUM OPTION: 1 blog post, 10 social shares over 2 weeks, 2 newsletter mentions
  • ADVANCED OPTION: 2 blog posts, 20 social shares over 1 month, 2 newsletter mentions, and ad space for 30 days

We found that discounting packages versus purchasing at the individual service rate helped to sell more because even bigger brands love to save money.

…

If you can commit, we recommend offering longer-term sponsorship opportunities, like 3-6 month contracts. This would bring in recurring income for you and also provide more exposure for the brand you’re working with!

Don’t forget to check out the social media platform you’ll be using for guidelines on #ad content!

Whether you’re ready to make your very first paycheck or want to level up your monetization strategy, now’s the time to do it.

Save loads of design time using our FREE blogger media kit template. Just swap out the colors, add your brand info, and download as a PDF. That’s it! You’ll be landing blog sponsorships in no time!

RESOURCES MENTIONED IN THIS POST:

  • How to Sell Canva Templates
  • How to Make Printables to Sell
  • Top-Selling Digital Products You Need to Make
  • Leverage the Holiday Traffic Using Gift Guides

Don’t forget to grab our FREE blogger media kit template made in Canva! You’ll have a professionally designed media kit in just minutes that’ll be ready to share with top brands!

GET OUR FREE MEDIA KIT TEMPLATE!

TRY CANVA PRO FREE FOR 30 DAYS

Start your FREE Canva Pro trial today and unlock ALL of their incredible time-saving features that cut your design time to just minutes.

To be honest? It’s the best $12.99/mo OR $119/yr we spend on our business because that time we save with every design is put back into making MORE money in our business!

WANT TO SAVE THIS FOR LATER? PIN IT TO YOUR FAVORITE PINTEREST BOARD!⬇

If you're ready to monetize your blog with sponsored opportunities, you need a blogger media kit! Use our FREE blogger media kit template to get started!

Filed Under: Product Creation, Growth Strategy

Typography isn't always easy, whether you are designing logos, the layout of your worksheets, or social media designs. These simple tips will help you rock your next design-- make sure to get the cheatsheet!

5 Easy Font Design Tips for Bloggers | Design With Fonts

November 16, 2017 by Simplifying DIY Design Leave a Comment

Last updated on August 22nd, 2023

Fonts play a critical role in the overall design of your blog. Learn how to design with fonts and create jump-off-the-page graphics to help increase traffic to your blog and grow your email list!

Throughout our years of helping bloggers learn to love design, we’ve noticed fonts and colors seem to be a major hangup for most bloggers.

And even after they establish a brand for their blog, they’re not sure how to design with fonts effectively.

The platforms we use to increase our reach are becoming increasingly over-saturated, making it harder to grab our reader’s attention.

If you design with Canva, grab our FREE font combination cheatsheet in our Design Library! Use these font pairings to brand your blog for a fun and unique look!

GET THE CHEATSHEET NOW!

We need an eye-catching (but not overwhelming) font design for each image.

But if the average blogger has little to no graphic design knowledge or experience, that would, understandably, prove to be quite the challenge.

What makes our brand unique is that we could attribute part of our rapid growth to the first stage of our sales funnel; our Pinterest pin designs.

We learned to use fonts in very unique ways to help our designs stand out and get the click. Then our lead magnets converted most visitors to subscribers.

From there, we were able to nurture our list with even more lead magnets that helped them see results with their own blog design.

That’s when we were able to survey our audience to see what product we needed to make, which led to a five-figure product launch.

REMEMBER THIS POST LATER! PIN IT TO YOUR FAVORITE PINTEREST BOARD!⬇

Typography isn't always easy, whether you are designing logos, the layout of your worksheets, or social media designs. These simple tips will help you rock your next design-- make sure to get the cheatsheet!

We’re not saying all of this to boast.

If we didn’t know how to design with fonts, we wouldn’t have been able to draw our readers in and get them over to our website, let alone launch an incredibly popular product.

Fonts play a critical role in design.

If the fonts in your logo don’t pair well together or match your brand personality, it’ll send a mixed message to your audience.

Related Post: 10 Must-Know Tips to Create the Perfect Logo For Your Brand

If the fonts on your website make your content difficult to read, you’ll lose visitors… fast.

If the fonts used in your social media, Pinterest, and YouTube designs don’t grab your reader’s attention, you’ll never get them into your funnel.

While your blog’s success stems from a few key factors, your reader will never get to that point if your fonts and designs don’t reel them in to start.

And that’s why we’re sharing our top five font design secrets to help you learn how to design with fonts and go from blog to business!

1. PAIR SCRIPT FONTS WITH SANS SERIF FONTS

Of course, there are exceptions to this rule, but the gist of it is that Script fonts pair best with Sans Serif fonts.

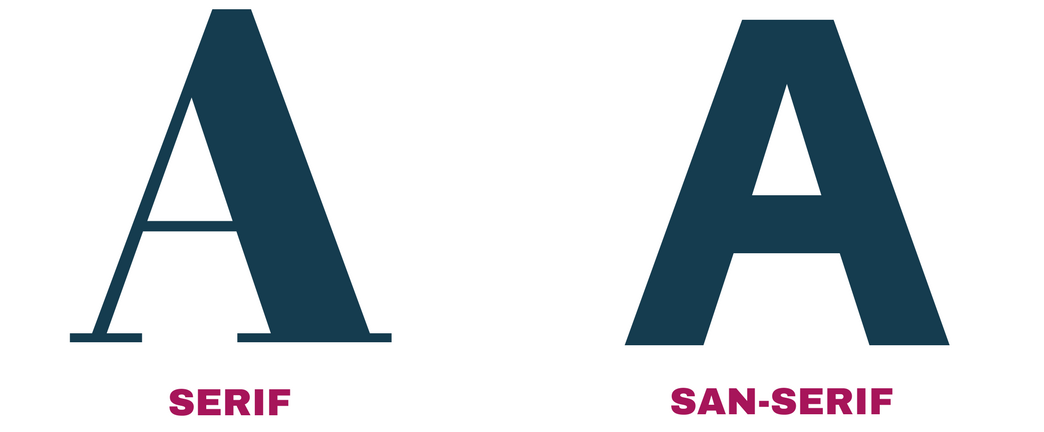
If you’re unfamiliar with a Sans Serif font, here’s an example of a Script font and a Sans Serif font to see the difference:

Learn how to design with fonts with these simple font design tips and create eye-catching graphics to help increase blog traffic and grow your email list!

While they’re both the same size, the Script font is just a little fancier and a bit more ‘complicated’ to the eye.

On the other hand, the Sans Serif is much simpler, so they complement each other well. That font style works especially well on smaller-sized graphics and screens like Pinterest pins.

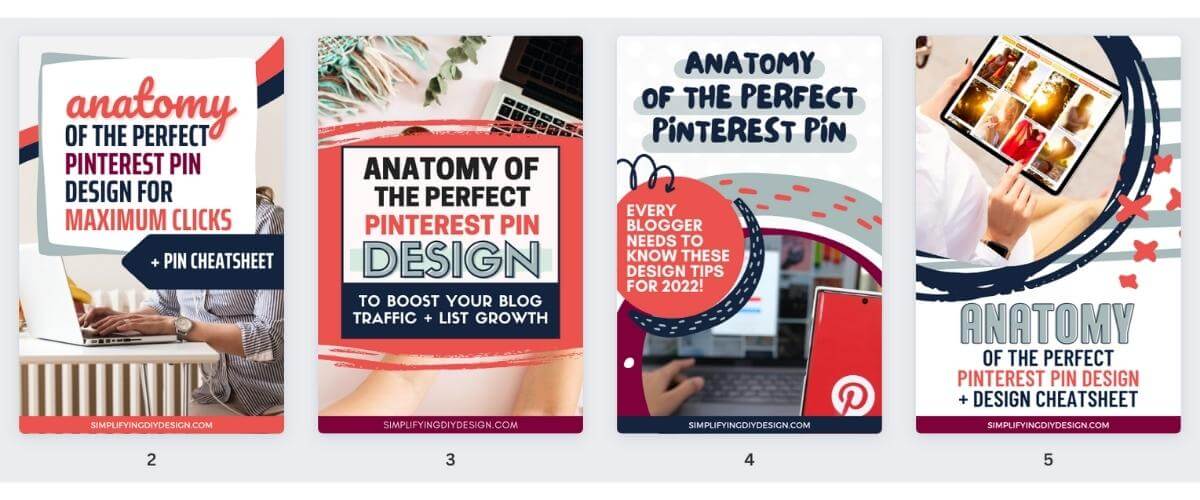
Related Post: Anatomy of the Perfect Pinterest Pin Design

Consumers spend more time on their phones than computers and laptops, so we must ensure we design for both mobile and desktop.

If your website, pin design, or even an opt-in landing page uses hard-to-read fonts, you WILL miss out on that subscriber!

2. NEVER USE MORE THAN ONE SCRIPT FONT

Two different Script fonts should never be used in the same design. It’s very overwhelming and can be difficult for the eye to read.

If you can’t captivate your readers in just a few seconds because they’re not sure what your pin says, they’re moving on.

The only time we EVER use a second script is when we use a “&” symbol (also known as an ampersand) and want it to look different than the one that comes with the Script font we’ve used in the text.


DESIGN TIP: Great Vibes font in Canva has an awesome ampersand!

Personally, we like the sweepy, elegant-looking “&” symbols. But as our brand evolves, we’re using simpler, bold fonts for both clarity and style.

Now, we get it. Script fonts are stunning; we’d use them everywhere if we could, but they’re just not practical for everyday use.

3. KEEP TO 2-3 DIFFERENT FONTS PER DESIGN

We actually learned this one in design school, and we’d say it still holds true.

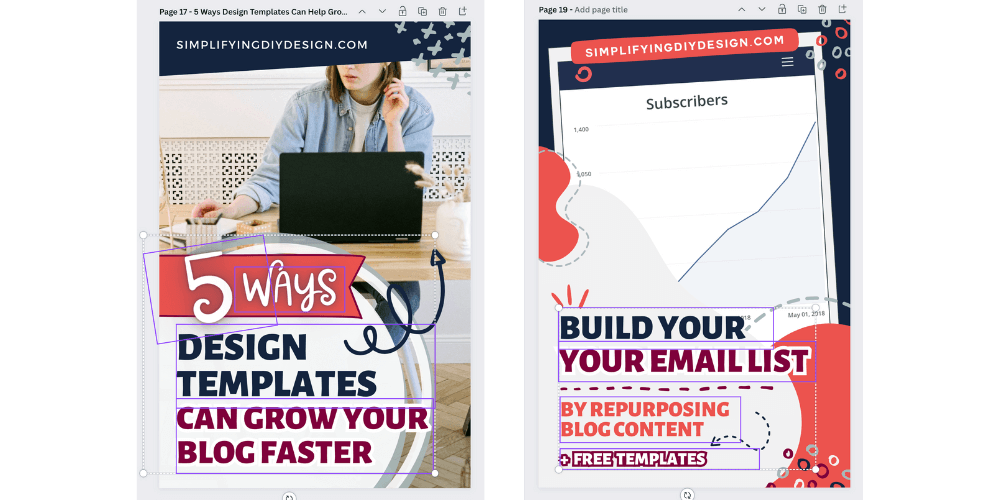
In an average design, we use up to three fonts. Two different fonts in the header and (maybe) a separate font for the body text.

Our Pinterest pins vary from two to three fonts, as well as email graphics and lead magnet designs.

Generally, we use a Sans Serif font and a bold, large font. Depending on the design style, we’ll add a Script font to emphasize a word or two.

Can you have a killer pin design using only two fonts? Absolutely! Some of our most popular pins use only two fonts.

If you’re up in the air about your font combinations, choose simple over complex until you’re comfortable with your designs.

4. USE PRE-PAIRED FONT COMBINATIONS

We’ve literally talked to people who’ve spent hours trying to pair the right fonts.

That can be a deterrent for many beginner bloggers because if they struggle with the branding stage, they’ll think the rest of their journey will be just as difficult, if not worse.

We’ve been there, we know how that feels.

That’s actually why we created The Five-Minute Brand, so you’ll never have to stress over pairing the perfect fonts for your blog ever again!

You’ll get instant access to 40 complete (and editable!) brand kits PLUS matching Canva templates to brand your blog. It’s truly lived up to its name if we do say so ourselves!

But if you’re working on font combinations for a product or project, you’ll love what we found!

When we stumbled upon these FREE design generators, we were grinning from ear to ear.

Related Post: FREE Design Generators to Choose Colors, Fonts, and Logos

All the hair-pulling, finger-tapping, and eye-rubbing work of finding font combinations that actually work together is done.

Just pick a starting font and click to your heart’s content… or until you find your perfect brand font combination!

5. GET A PREMIUM ‘BRAND’ FONT

Investing in a brand-specific font can be a big game-changer. We’re not ones to get obsessively ‘brand-y’ in our designs, but we think that it provides consistency in your products.

Not to mention it also saves time from having to come up with something totally different each time.

We also think it benefits you to have a brand-specific font in your Pinterest pins and YouTube thumbnails.

Not only will people start to recognize your blog when they see your graphics, but it’ll also help your designs stand out among very overly-saturated platforms.

And if Pinterest or YouTube design isn’t your strong suit, the DiyDesign Creators Vault is just what you need!

You’ll get exclusive design templates for Pinterest, YouTube, social media, and even lead magnets every month to help you stay ahead of content trends and leverage your blog posts, email list, and products for faster growth.

Our favorite places to get premium fonts are Font Bundles and Creative Market. We purchased our brand’s premium font, Black Diamond, on Creative Market.

While we do love their free fonts, most are limited to personal use only. You’ll have to purchase the font if you want to use it for commercial use (meaning, for your blog).

If you’re not set on a premium font, no sweat.

Canva’s font library has come a LONG way over the years. You can easily use a font from Canva Pro’s full font library as your premium font and still have a professional-looking brand.

We recommend a Canva Pro font versus a font available for free Canva users because it’s less likely to be used, resulting in a more unique brand for your blog.

BONUS: USE TEXT BOXES FOR UNIQUE PLACEMENTS

We think most people would be amazed at how many text boxes we use in our designs!

For the most part, we have a different text for every line and font, except for long bodies of text, like in a workbook.

Learn how to design with fonts with these simple font design tips and create eye-catching graphics to help increase blog traffic and grow your email list!

The benefit is that we can put our text close together, line or angle them in unique ways, or have an ‘accent’ word in a different font.

Personally, we think it brings your overall design to the next level and helps it stand out from the crowd!

Learning to design with fonts takes practice.

This isn’t something you’ll learn overnight. It simply takes practice. And as bloggers, we get plenty of that!

Don’t be afraid to experiment and try new things. Test certain styles and combinations to see what performs best.

And if you’re just not sure what looks good, definitely check out our Five-Minute Brand.

Whenever we need a break throughout the workday but still want to stay focused, we’ll open up a project that holds all of our favorite pin designs.

We’ll pull pieces from each pin to create a new design.

This is the perfect opportunity for us to start brainstorming new font combinations based on design elements and the overall style of the pin.

Having a starting point, like design templates, provide the perfect canvas to experiment with.

Use our FREE font combinations cheatsheet to see what style of fonts work best with your brand, and start practicing!

RESOURCES MENTIONED IN THIS POST:

  • 10 Must-Know Tips to Create the Perfect Logo For Your Brand
  • Anatomy of the Perfect Pinterest Pin Design
  • The Five-Minute Brand
  • FREE Design Generators to Choose Colors, Fonts, and Logos
  • DiyDesign Creators Vault

Don’t forget to grab our FREE Font Pairings Cheatsheet in our Design Library! Use these font pairings to brand your blog for a fun and unique look!

GET THE FONT CHEATSHEET NOW!

TRY CANVA PRO FREE FOR 30 DAYS

Start your FREE Canva Pro trial today and unlock ALL of their incredible time-saving features that cut your design time to just minutes.

To be honest? It’s the best $12.99/mo OR $119/yr we spend on our business because that time we save with every design is put back into making MORE money in our business!

WANT TO SAVE THIS FOR LATER? PIN IT TO YOUR FAVORITE PINTEREST BOARD!⬇
Font design tips for bloggers! Find out exactly what you need to know about designing with font for your blog graphics and easy design techniques to use to make your font stand out! #designforbloggers #blogdesign #bloggraphics #socialmediagraphics #designforblog


Filed Under: Design Tutorials

  • « Previous Page
  • 1
  • …
  • 8
  • 9
  • 10
  • 11
  • Next Page »

DESIGN RESOURCES

Get instant access to our design library!

Full of free design templates, tutorials, and other tools for online marketing through simplified design

    CANVA MUST-READS

    categories

    some of our
    favorite recommendations

    Photo Editing & More
    Emails That Convert
    Fonts, Images & More
    Stock Photos & Vectors
    Fonts At a Discount

    Navigate

    • Shop Products + Courses
    • Affiliate Sign-Up
    • Contact

    Search

    simplifying diy design canva templates
    Copyright ©2023, Simplifying DIY Design. All Rights Reserved.
    Privacy | Disclosure | Terms

    Get access to all of our free editable templates, step by step tutorials, and design tools! Start saving time and your sanity!

    FILL OUT THE FORM BELOW TO BE ADDED TO OUR EMAIL LIST AND GET INSTANT ACCESS TO OUR DESIGN LIBRARY!

    Your Privacy is protected. I hate SPAM and promise not to send it!

    x